Extract Class Refactoring in Swift

In “Refactoring, Improving the Design of Existing Code” by Martin Fowler, he presents the Extract Class refactoring.

Here’s a video walkthrough of the Extract Class refactoring in Swift and when you might want to use it:

Video Transcript

No video transcript this time. If you find a video transcript useful, please let me know in the comments.

Move Field Refactoring in Swift

In “Refactoring, Improving the Design of Existing Code” by Martin Fowler, he presents the Move Method refactoring.

Here’s a video walkthrough of the Move Method refactoring in Swift and when you might want to use it:

Video Transcript:

Hey, what’s up everybody, it’s Andy the Clean Swifter and I’m back here to show you another refactoring from Martin Fowler’s book, “Refactoring, Improving the Design of Existing Code.” Each week we’re taking a look at a different refactoring from that book and how to implement it in Swift 3. This week we’re going to talk about the Move Field refactoring. Now the Move Field refactoring you’re going to see, and I bet you’re going to write it off as something so trivial that you’ll be wondering why I’m even making a video about it. Before you do that, I want you to realize that the essence of refactoring is identifying an inefficiency with regard to the structure of your code, and improving it. It’s the building blocks of being able to look for these, knowing what to do, and building up that body of experience about refactoring and being able to apply that in much larger puzzles after you’re put together these smaller pieces and fundamentals along the way. Move Field is just that. It’s a fundamental refactoring where you’re going to see that in one class, or struct, that one field exists and it might not be the best place for it. You’re going to take that field and find a better place for it, and you’re going to move it there. All references will then point to that new field in the new location. Remember, the point is you’re taking a field from an inappropriate place to a better place. You’re not always going to be able to identify that up front. Don’t try to over optimize your code, whether it’s from a performance standpoint, or a refactoring standpoint. Go with your first natural design, and then once you get there, reevaluate it, and look for that better place of what the code could be. In this case we’re going to look at it from the perspective of the Move Field refactoring.

Just this week I’m going back to revisit some code in an app I worked on over a year ago. We went to long extents to refactor a NSFetchedResultsController from a UIViewController from it’s tableView datasource and delegate. They are all separate classes in separate files in Objective-C. Going back to that code, it’s hard to digest and understand. At the time, we thought we were being so clever with this refactoring, and thought the code was going to be so flexible for further design. Little did we know, it would be the last update we’d make to that code for a year and a half. We’re actually going back to it now, and rather than being flexible for design, it’s kind of hard to improve. My moral here with these basic refactorings, remember, yes they are basic, but they’re the fundamental for doing something bigger, and being able to put the puzzle pieces together to ultimately improve your code. Let’s look at the Move Field refactoring.

We’re going to reuse the sample code that we used in our refactoring last week, Move Method, and continue with that. I’ve added a new method here, displayFirstName() that will help explain this example for Move Field. In general, there’s a struct that represents a person’s name. It has a first and last String. There’s a view controller with a label, a name, and nickname String. There’s a viewDidLoad() implementation, and another method to displayFirstName() and lower on is a separate class for NameLabel. For the Move Field refactoring, what we’re going to do is identify a field in a class and find a new place for that field that makes more sense. Let’s take a look at this view controller to identify that field that’s going to move. viewDidLoad() sets a name label based on the first name. There’s this other method which isn’t being called at the moment, which is displayFirstName(). displayFirstName() looks like it is doing something a little different than setNameLabel. displayFirstName() is actually going to use nickname, the String on this view controller, and then based on whether there is a nickname or not, format the string and set it on the label. The first thing that jumps out to me is that nickname is being used here as a variable separate from the Name object. That to me smells a little bit. I think the nickname would be more appropriate as an attribute on the Name struct. This is where we are going to start honing in on our Move Field refactoring. Move Field refactoring now that I’ve picked nickname as something that doesn’t make sense in this view controller, and would make better sense in the Name struct, I’m simply going to pull this out of the view controller, and insert it into the Name struct. And now that the nickname is there I’m going to get a compiler error here back in the view controller because nickname is no longer a property on the view controller, and instead it’s being provided by the Name. Then I can access it through name and if name has a nickname then set it to be this interesting label where it’s the firstName plus the nickname, or just set the label to be the first name. That’s it! That’s Move Field in a nutshell. Depending on which logic might be used for computing nickname on setting or getting, you may want to consider different types of encapsulation for the logic which might happen at that point. None of that is happening here. In essence, Move Field is removing a property from one class, and adding it to another, in this case a struct. In my opinion, this is a much cleaner implementation. nickname goes with a Name. It’s no longer a property hanging off the view controller. It’s well enapsulated within Name.

There you have it, it’s the Move Field refactoring from Martin Fowler’s book, “Refactoring, Improving the Design of Existing Code.” It is a very simple refactoring, and you saw a very simple implementation of it where you move one field from a class to another class, all in the sake of finding a better home for that field which can make more logical sense for your code, and support a better encapsulation of your code. I hope you enjoyed this video. You can buy Martin Fowler’s book. “Refactoring, Improving the Design of Existing Code” in the Amazon Affiliate link in the description for this video. I hope you tune in next week for another refactoring. In the meantime, happy cleaning.

Move Method Refactoring in Swift

In “Refactoring, Improving the Design of Existing Code” by Martin Fowler, he presents the Move Method refactoring.

Here’s a video walkthrough of the Move Method refactoring in Swift and when you might want to use it:

Video Transcript:

Hey, what’s up everybody? It’s Andy from cleanswifter.com back to show you another refactoring from Martin Fowler’s book, “Refactoring, Improving the Design of Existing Code.” Each week I cover a different refactoring from his book showing you how to perform it in Swift 3. This week I’ll show you the refactoring called Move Method. Move Method is finally a refactoring that is the Mac Daddy of all refactorings. Move Method is very similar to ones we’ve seen before, like Extract Method. With Move Method, we’ll see how we can move code from one class to an entirely different class. When I think about refactoring, it’s not so much about changes within a single class. A lot of the refactorings we’ve looked at so far are like that- we’re massaging code within a single class. Right now, with Move Method, it might be the first time so far in this book where we’re going to see how you can take code from one class, and move it to another class all to improve the structure of your existing code. The reason behind Move Method is because one goal of software design is to keep coupling between “things” low. While you want to minimize coupling, you want to maximize cohesion. Cohesion represents how well defined a specific class’s purpose in life is. As soon as one class starts to do more than one thing, it is then not cohesive. For instance, you’ve heard of massive view controllers. Massive view controllers do not have high cohesion. And in fact, they are also probably very tightly coupled to other objects they interact with. Cohesion and coupling go hand in hand. Things that are tightly coupled to other objects often have very low cohesion. Where the opposite is also sometimes true as well. Things that are very cohesive, are also very loosely coupled to other objects. That’s the design you want to strive for, loose coupling and high cohesion. Move Method is a refactoring that is going to let you make changes to two different classes in order to achieve that design goal.

That’s the primary motivation behind Move Method. It’s when you’re going through some code and you see that the code you’re working with, and ultimately will be refactored, is interacting with another class on a detailed level. There might be several lines of code, all bundled together interacting with another class’s instance variables and methods. If you have a method on one class doing a lot of different things on another class, you want to consider moving that method to the other class. A common place I see this in my iOS code, particularly UI code, with UI widgets on screen and what I’m doing to them in view controllers. Let’s get more specific – UILabels. Often times in our code you’re going to come up with a UILabel which has one consistent style across your app. There might be a couple variations depending on where the label is appearing. Rather than repeating code to style your labels, what you can do, and what I’ll show you you can do, is create a subclass of that UILabel and move a method from a view controller that might be styling that label into the UILabel subclass. While I’ll show you this on UILabel, it can apply to a bunch of other UIKit classes like UITextView or UIButton. Anything that appears on screen with a style where you might be writing 5-20 lines of code that would normally be in view controllers – move that to a subclass of the element that you’re styling. Let’s take a look at how to do it in Swift 3.

In this code snippet, there are three different things we’re going to be working with: a struct which represents a name and has two strings for the first and last name. Next is a UIViewController subclass. The third thing is this empty UILabel subclass. To keep this example simple, I could have added some existing behavior into the label, or I could have omitted it and we could have created it during the refactoring. I didn’t do that, so right now it’s empty. Imagine either of those two scenarios, however you want. You’ll see how we’re going to use this with the refactoring. The interesting thing here in this refactoring is this setupNameLabel() method. This is where we are going to apply the Move Method refactoring. The Move Method refactoring at its highest level says we’re going to move this method to a new place. Obviously, the first place I would think to move this to is the NameLabel UILabel subclass. What we can do here is create the new method in the new/destination class, and then, copy and paste the code. This is one of the only times it’s okay to copy and paste code. We can leave the empty shell of the method here for now. We’ll go back and fix that. Now we need to go line by line in NameLabel and fix whatever syntax errors appear. The first one is indicating that firstNameLabel can’t be found. Since we’re now in the nameLabel subclass we don’t need to specify a label, since it is itself that should be modified. Since we’re in Swift, we don’t even need to specify self. The method will set four things: the text color, the alignment, the background color, and its text based on our style for the app. Down here is another interesting thing that we need to change. It’s actually setting the text of the label based on the first name in the Name struct. This is interesting. Unfortunately, NameLabel doesn’t actually know about Name yet. We have a couple options here. How can we get the first name into this method? The first option is actually pass in the Name itself, and this would compile. By doing this, we’re actually creating a coupling between NameLabel and Name – which may or may not be desirable. I’ll just point out another option where we can prevent that coupling is instead- send in the first name directly which we know to be a String. That’s another option. I personally like this option because it’s a little more explicit doesn’t create that coupling between Name and NameLabel. Some would argue that this second option exposes too many details about what NameLabel is actually doing because you need to know to pass the first name in as a String. Ultimately, these are two options you can think through for your specific use case.

Now we have the functionally equivalent setupNameLabel method in the NameLabel subclass. Now we need to go back to our ViewController and make a few changes. First, we’re going to delete the old setupNameLabel method. The compiler will now complain that the method no longer exists. Since we have the nameLabel as a property on the view controller, we can call setupNameLabel on that property. Since setupNameLabel now requires a first name, I will pass it in as a parameter. And there we go, our refactoring Move Method has been applied.

There you have it, that’s the Move Method refactoring. We applied it in a way that we cleaned up our view controller. Anytime you can do that, in my opinion, is a win. It’s so easy as someone new to developing iOS apps, all the way to even senior engineers, to work with code and create code that results with hundreds of lines long view controllers. There have been pattern after pattern created to try to avoid doing that. I think that knowing the basics about refactorings like Move Method help you understand some fundamental ways that you can think about tearing those things apart without needing to commit to a whole new framework or pattern, and instead just write cleaner code. That’s the move method refactoring. Again, the reasons you want to do this are create objects with low coupling and high cohesion. Ultimately you’ll also think about better names for methods and better places for those methods to exist.

I hope you liked this video from cleanswifter.com. This was the Move Method refactoring from Martin Fowler’s book, “Refactoring, Improving the Design of Existing Code.” You can buy the book in the Amazon Affiliate link in the description for this video. Come back next week and I’ll have a new refactoring available.

Thanks, and happy cleaning.

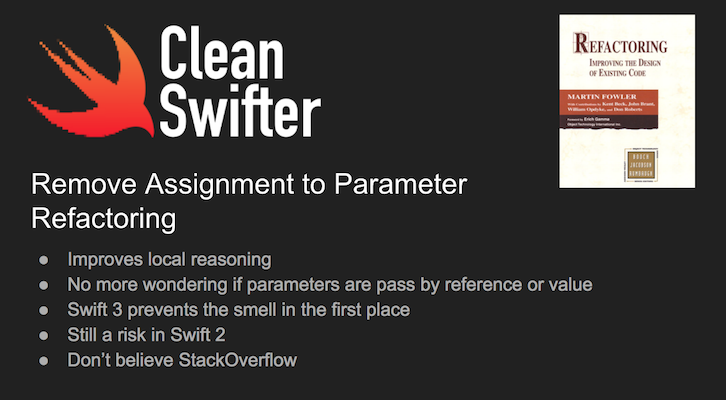
Remove Assignment To Parameter in Swift

In “Refactoring, Improving the Design of Existing Code” by Martin Fowler, he presents the Remove Assignment To Parameter refactoring.

Here’s a video walkthrough of the Remove Assignment To Parameter refactoring in Swift and when you might want to use it:

Video Transcript:

Hey what’s up everybody, it’s Andy from cleanswifter.com and I’m here to show you another video in my series covering Martin Fowler’s book, “Refactoring, Improving the Design of Existing Code.” Each week I post a different video that shows you an example of the refactoring in Swift 3 and this week we’re going to look at a refactoring called “Remove Assignment to Parameter.” This is an interesting refactoring because technically the smell that this refactoring fixes isn’t even in Swift 3. I was debating on not even creating a video for the refactoring, but what’s interesting, is that the change from Swift 2 to Swift 3 is actually what prevents this smell from happening. Long story short, if you can continue writing your Swift 2 code, it is possible to run into the smell that this refactoring fixes. But in Swift 3, it’s actually preventable by the compiler. The other thing that I wanted to bring up is that because of the reason that Martin Fowler actually presents this refactoring. It’s primarily intended to resolve issues of clarity when looking at methods wondering whether parameters are being passed in by value or by reference. I’m going to clear that up for how Swift works and show you how the parameters are handled, and again it varies from Swift 2 to Swift 3.

The overview of this refactoring is essentially that if you have a method where you’re passing parameters to that method and you see code that then assigns new values to those parameters, that’s where you should introduce a temporary variable to use instead of assigning new values to the parameters. Essentially, parameters when passed to a method, should be treated like they are final. There shouldn’t ever be anything modifying the values of those parameters. You can of course call mutating behavior on the objects themselves, but don’t ever change the assignment of that object. That can be true for reference types or value types, and both have the same rules in Swift 3. Let’s take a look at this refactoring.

Here we have a class that is a name formatter. Right now all it has is a function that formats a name provided two strings representing the first and last name. You can see in the documentation that the method is intended to provide the format of “last name, first name”. Right off the bat, this is the smelly version of this code where lastName is passed in as a parameter and then immediately assigned to with a new value. Essentially, what this is doing is modifying the value of last name by appending a comma with a space and then returning that last name with first name appended. If you’re coming from Swift 2, you might have seen code that looks like this. This is telling the compiler that lastName can be changed- it’s not a constant in the scope of this method. Now you can see in Swift 3, which is running in this playground, that the compiler won’t even allow me to do this. For instance, if you end up Googling how to make a variable writable, you might see StackOverflow answers indicating to use the var modifier in the parameter definition. This works in Swift 2. It does not work in Swift 3. If you do put this back here, the compiler will actually tell you that parameters may not have the var specifier, and it even gives you a quick fix replacement in which a temporary variable for lastName is created and then used just as we had it in the prior implementation. That in fact is the refactoring, “Remove Assignment to Parameter.”

Now you might be telling yourself, “well Strings, they’re classes so they’re going to be reference types in Swift. What about value types?” Well let’s create a struct and see if the behavior is any different because normally I’d think, “Well I’m passing a value type in here, I have no guarantees that thing is going to be final.” I would suspect that it could be changed at any time. Instead, let’s create a struct representing a name. Name has a first name, and a last name. Let’s create a new version of this same formatter method fullName which takes a Name from our struct. Similarly it returns a String. To make the compiler happy at this point we’re going to return an empty String. The first thing we should try here is to assign a new value to the name parameter. We can’t as well because by default, whether it is a struct or a class, value type or reference type, method parameters in Swift 3 are final, and only final. That is a new Swift 3 feature. Similarly, the fix here would be to create a new temporary variable and then continue on using that temporary variable.

There you have it, that’s the “Remove Assignment to Parameter” refactoring in Swift 3. Now remember, technically in Swift 3 you’ll never find yourself in a spot where you have to actually perform that refactoring because the compiler won’t let you get there. Method parameters in Swift 3 are final by always and ever. This is unlike Swift 2 where you can use the var specifier to make the parameter mutable. Remember, if you’re Googling and find a StackOverflow answer or other old dated material that tells you to use a var specifier in order to add mutability to parameters, don’t believe it and realize that is a Swift 2 convention that is no longer possible in Swift 3. Feel good that if you’re writing Swift 3 and beyond, you won’t ever run into this. And if you do run into it, remember why. It goes back to the clarify of local reasoning. You won’t ever need to remember whether that parameter was passed by value or reference. Changing parameters passed by reference is really bad because you don’t know what all could be affected.

I hope you enjoyed this video from cleanswifter.com’s video series on refactoring covering Martin Fowler’s book, “Refactoring, Improving the Design of Existing Code.” You can buy that book in the description of this video using my Amazon Affiliate link. I’ll see you next week. Happy cleaning.

Split Temporary Variable in Swift

In “Refactoring, Improving the Design of Existing Code” by Martin Fowler, he presents the Split Temporary Variable refactoring.

Here’s a video walkthrough of the Split Temporary Variable refactoring in Swift and when you might want to use it:

Video Transcript:

Hey what’s up everybody, it’s Andy from cleanswifter.com and I’m here to show you another refactoring from Martin Fowler’s book, “Refactoring, Improving the Design of Existing Code.” This week, in Swift 3, I’m going to show you how to do Martin Fowler’s refactoring “Split Temporary Variable.” This refactoring fixes a bad habit of mine that goes all the way back to my first couple classes in computer science. Specifically, this bad habit is when you create a temporary variable that you then reuse and reuse throughout a method for multiple purposes. This is bad because these variables are very poorly named and as a result, it’s really hard to figure out what they do. A general best practice is to only create a variable that will be used for a specific purpose. If you have to then create another temporary variable for a different purpose, do that rather than reuse the original. In order to do this, we’re basically going to look for cases where a temporary variable is used, and assigned to multiple times and then investigate whether that is a good candidate to be split into multiple temporary variables. Let’s take a look at some code.

Here’s a view controller in which there are a couple properties: two strings which represent first and last name, a name label, a welcome label, and a computed property which represents the person’s full name (which is their first name combined with their last name, separated by a space). Down here in viewDidLoad(), this is where things get a little ugly. First, there’s a variable named i. Who knows what i even means? And i gets assigned a string “My first name is” with the firstName value. i is assigned to nameLabels text. Later, i is also assigned a new value which is “Welcome” with the value of fullName. That new value is then assigned to the welcomeLabels text. I can see what’s going on here. It’s that two strings are being created and ultimately set on the labels, but I have no idea why this variable is named i, or why it’s being reused. The first way that you can get the compiler to be able to help you fix this, is simply change the definition of i from a var to a let. Let me show you that, in Swift, the compiler will alert you to any variables that are defined and only assigned to once. The compiler is telling us here that i was never mutated so consider changing it to a let which actually makes it a constant. I could do this. In this case where the compiler is detecting that it is only assigned to once, I can automatically use the IDE to fix it. But let’s go back to the original code. The compiler is not going to identify that as something to be changed because it’s assigned to twice despite this very poorly named variable i. So what I’m going to do here is change this to let and what that’s going to do is enable the compiler to show me all other places that i is assigned to. Those assignments are what I’m going to target for splitting out into their own thing. I’ve already made the decision that i is being inappropriately reused in was that don’t make sense. Once this is switched to a let I see the compiler gives me an error with a suggested fix. Xcode tells me to consider changing the definition of i from let to var to make it mutable. Yes. That would make this compile, that’s not what I want to do because that’s the opposite way of this refactoring. Instead, what I should do here, is actually create a new variable, and for now we’ll just call it n, and now there are two temp variables here. I need to actually use n in the new place where it should be read. Already this is an improvement because I’m using two temp variables and there’s no chance of collision between the two, and it’s a step towards making this even better. The final step in this refactoring is to actually come up with good names for the temporary variables. Let’s call these firstNameString and for the other one we’ll call it welcomeMessageString. Now be sure to take the new variable names and use them in the right place. Now you see the result of the refactoring. You can see where we started with one single temporary variable that was being reused and very poorly named such that the code was not very readable where now I have two temporary variables, both well named, and used in this resulting way.

There you have it, that’s the Split Temporary Variable refactoring from Martin Fowler’s book, “Refactoring, Improving the Design of Existing Code.” You can buy the book in the Amazon Affiliate link in the description for this video. I hope to see you next time for another refactoring, and in the meantime,

Happy cleaning.

Introduce Explaining Variable in Swift

In “Refactoring, Improving the Design of Existing Code” by Martin Fowler, he presents the Introduce Explaining Variable refactoring.

Here’s a video walkthrough of the Introduce Explaining Variable refactoring in Swift and when you might want to use it:

Video Transcript:

Hey, what’s up everybody, it’s Andy the clean swifter, and I’m back to show you another refactoring from Martin Fowler’s book, “Refactoring, Improving the Design of Existing Code.” This week, I’m going to show you in Swift I’m going to show you the refactoring “Introduce Explaining Variable.” This refactoring can be used as an alternative to Extract Method when you have a complex piece of code that you want to simplify. The way that you’re going to simplify it is to create a new temporary variable that is well named and can be used to break up some complicated logic. Imagine sometimes you’ll be creating a complicated if statement to represent some conditional code, where there’s a lot of different things you need to check. All of a sudden you end up with several different and clauses, a couple different ors, and some parens grouping them, and before you know it, you’ve created a piece of very hard to read code. That’s bad because it’s a way to introduce bugs. It’s easy to accidentally change the logic of that statement such that you create a bug. Temporary variables can be used to break it up. You’ll take a piece of that if statement, that conditional cause, extract it into a temporary variable that is well named, and then reference that temporary variable in the conditional clause to then help explain it to the reader. You might instead use extract method to put it into a brand new, well named, method that returns a boolean that also helps explain its purpose to the reader, but in the case that you don’t want to do that, sometimes it may not be worth a method of its own, you can use this to introduce a variable to help explain the complicated conditional code. Let’s take a look at Introduce Explaining Variable:

Here’s a view controller similar to last week, where in this view controller there are two strings that represent a first and last name, a label that will be set with the name, and then also a welcome label which will give a customized welcome message based on something about the name. Down here in viewDidLoad() we’re going to set the nameLabel to be the fullName but now here we’re going to do some conditional logic to set the welcomeLabel based on the person’s name. Right off the bat, I’m trying to read this code and I come across this if statement and I see there are at least four different things being checked in order to determine how the welcomeLabel will be set. This to me isn’t very readable. We can use this refactoring to help improve the readability of this code. In order to use the refactoring, Introduce Explaining Variable, what I’m going to do is that I first need to understand what the condition is checking, and then I’m going to find a way to break it apart. Looking at this, it’s checking if the firstName starts with “A” and the lastName starts with “A” and the firstName ends with “A” and the lastName ends with “A” the welcomeLabel is set with a message that indicates they have a lot of “A”s in their name because just like my name “Andy”, “A” is the best letter in the alphabet. What’s the explaining variable I’m going to introduce? Well I could create two variables to each represent whether each name starts and ends with “A”, or a variable to represent whether both names start with “A” and another to represent that both end with “A”. For instance, let firstNameStartsAndEndsWithA, and to set that, I’m going to take this code right here, cut it out, and paste it in there. So that boolean represents the fact that firstName may or may not start and end with the letter “A”. And now I’m going to do the same thing for lastName. Now update the original if statement to represent the original behavior, and you should have unit tests to actually verify this, but it’s not a requirement. Now reading through this updated code, it is easily read aloud. I can look at the if statement alone, skipping over the variable definition, and understand the logic the if statement is checking. Well named temporary variables go a long way to give you quick readability of a complicated if statement. Now I can read this and understand if the first name starts and ends with “A”, and the last name starts and ends with “A”, I give a specific welcome message that they have a lot of “A”s in their name, otherwise their name is boring. Fowler does describe you could take this even further, and instead extract both of these new temps into their own method which might be called “lots of As in name” and then call that method from the if statement. It’s just one alternative. In this case, I choose that using temporary variables is appropriate, and leave it at this.

There you have it, that’s the Introduce Explaining Variable refactoring and it’s a way that you’re going to reduce the complexity of code specifically often times in complicated conditional clauses by introducing temporary variables. I hope you liked this refactoring, Introduce Explaining Variable from Martin Fowler’s book, “Refactoring, Improving the Design of Existing Code.” You can buy the book through my Amazon Affiliate link in the description for this video. I’ll see you next time.

Happy cleaning.

Replace Temp With Query In Swift

In “Refactoring, Improving the Design of Existing Code” by Martin Fowler, he presents the Replace Temp With Query refactoring.

Here’s a video walkthrough of the Replace Temp With Query refactoring in Swift and when you might want to use it:

Video Transcription

Hey, what’s up everybody, it’s Andy from cleanswifter.com, and I’m back this week to show you another refactoring from Martin Fowler’s book, “Refactoring, Improving the Design of Existing Code.” This week we’re going to take a look at the refactoring called, Replace Temp With Query. Replace Temp With Query is a refactoring that’s a lot like Extract Method, but there’s one difference, it’s a little more specific. With Replace Temp With Query, we’re going to specifically target temporary variables within our code, and extract them into reusable pieces of code. For example, often times within your code you may create a temporary variable that’s then assigned a value based the result of some computation and then reused elsewhere in your code, especially if that value is reused in several different places. The benefit of using Replace Temp With Query is that by replacing the temp with a query, which is then going to be reusable code, you provide a much bigger availability of where that code can be reused from. Additionally, by removing the code that assigns the value to the temp, it will also consolidate the code where the temporary variable is used. Often, temporary variables lead to methods that are longer than they should be. They decrease the readability of code because you then have temporary variables that you have to read and understand where and how that variable is computed.

Let’s take a look at this refactoring in Swift for how we’re going to replace a temp with a query. Here’s a view controller that has three properties on it, two strings which represent a first and last name, and a label that’s going to be set with a name. Here in viewDidLoad() were actually going to compute a full name which represents a first name, a space, and the last name, then store that in a temporary variable called fullName and then set it as the text on the label. The first thing that should jump out at you here is the use of var to define fullName. General Swift best practice is that if a variable is created and only ever assigned to once, it should be defined as let and in fact the compiler actually tells us that here. “Variable was never mutated, please change it to a let.” And the IDE will even help you do that. This plays right into the refactoring, Replace Temp With Query, because by changing this to a let we have the confidence that this variable is never changed anywhere else after it is first assigned. This means fullName always represents this computed value. That sets us up well to do the refactoring. In Martin Fowler’s book, he actually advocates that as part of the refactoring you create a new method to contain the computation for the result. Now I think something a little more Swift like is that we can use computed properties here to actually return this value. The goal of this refactoring is that I want to delete this line of code. To do that, I’m going to create a computed property, fullName. And that’s going to have a getter on it which simply returns this value. Now that I’ve moved where the computation happens, I can continue on my mission to delete the temporary variable’s creation, and then reuse the computed value from the property. You can see a line of code was deleted from viewDidLoad(), no need to look at a temporary variable, and additionally we now have this piece of reusable code where we can access a full name from anywhere else in our code. Now in the case that it’s not so straightforward to use a computed property, you can actually create a method that returns a String (in this case full name) but I think in this case this is a good solution.

There you have it. That’s Replace Temp With Query in Swift. Again, the benefits are that you now have a reusable piece of code which represents that computed value. And additionally, you can delete the temp from the method where it’s being called from, thus consolidating the method and improving the overall readability. I hope you liked this video on this refactoring, Replace Temp With Query from Martin Fowler’s book, “Refactoring, Improving the Design of Existing Code.” You can buy the book through my Amazon Affiliate link in the description for this video. See you next time, and happy cleaning.

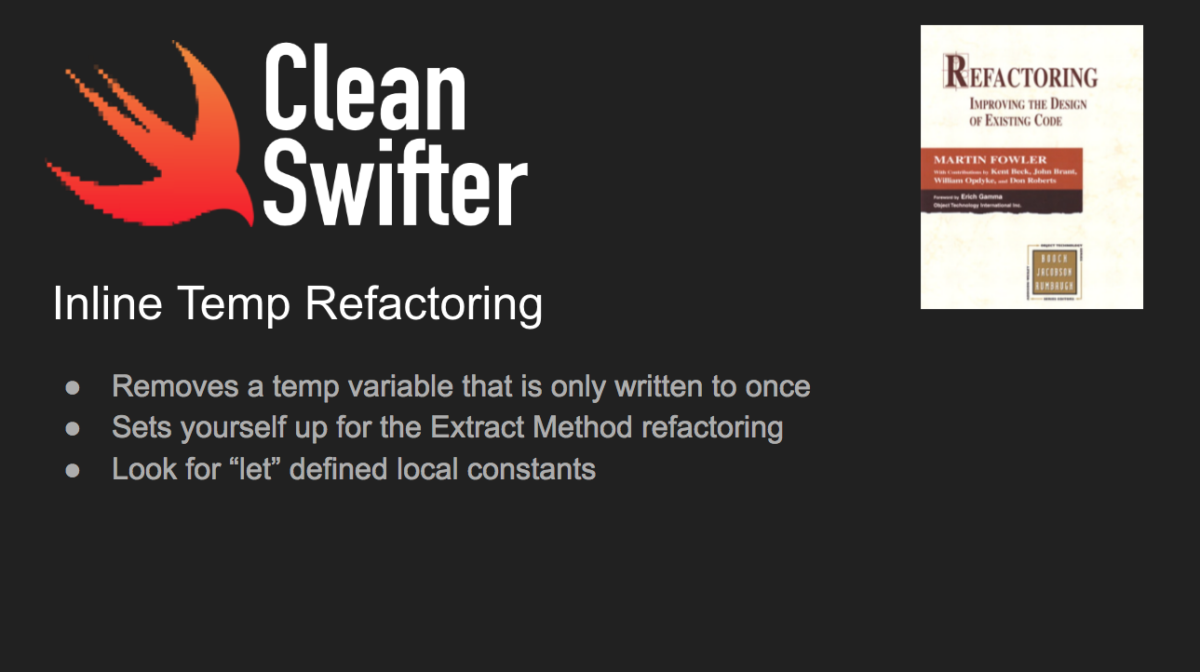
Inline Temp Refactoring in Swift

In “Refactoring, Improving the Design of Existing Code” by Martin Fowler, he presents the Inline Temp refactoring.

Here’s a video walkthrough of the Inline Temp refactoring in Swift and when you might want to use it:

Video Transcription

Hey, what’s up everybody? It’s Andy from cleanswifter.com and I’m here to show you another refactoring from Martin Fowler’s book, “Refactoring, Improving the Design of Existing Code.” This week we’re looking at a refactoring called “Inline Temp.” Inline temp is one that once you learn it, you’ll realize that you’ve been using all over for a while. Essentially what inline temp does, is that when you have a temporary variable that’s only ever written to once, you can remove that variable, and move the computation that assigns it a value into every other place it’s read. The benefit of doing this, is that it can actually help you do a larger refactoring. For example, say you had a piece of code you wanted to apply Extract Method to, if you’re using a temporary variable within that code, it might be hard to extract because, what could happen is that the temp variable could be declared many lines above the code that you want to extract, and if you extract that method, the reference to the temp variable will be lost. You’ll have to figure out how to recreate it within the extracted method. What you can easily end up doing though is inline the temp. Take whatever computation that initially populates the value (that is only getting a value written to it once), and then, replace the reference to the temporary variable in the code that you’re trying to extract with a call to the method that provides the initial value. Let’s take a look at some Swift code and see it in action.

Example

Here’s some code that is a pretty simple view controller. We’re overriding viewDidLoad() and there’s another method in here called getAppTitle(). getAppTitle() is fairly simple in that it is just returning a static string. Use your imagination here. Imagine it is calling another class that is doing something more interesting to retrieve the app title. The code that I want to apply this refactoring to is actually up here, in viewDidLoad(). You can see in viewDidLoad(), we have a temporary variable created, titleString, and that is populated from getAppTitle(). titleString is then used in two different places. It’s used first to create a label, and then set that string as the text on the label, and add it as a subview on the view. titleString is then used again later on to be set as the title on the view controller. The first indication here that we can use the inline temp refactoring is that the Swift compiler is prompting us with a warning saying that we have declared this variable as a var despite it never being mutated, which means never changed. The Swift compiler is suggesting to us that it can be defined as a let which is a constant. I’ll never be able to write to that again. To show this, if I try to assign a new value to it, now that it is defined as a let, the Swift compiler will tell me I can’t do that. What I’m getting at here is that a variable defined with let and used as a temp, it’s a good candidate to be ready for inline temp refactoring. The refactoring here is that I’m going to delete this line of code. First I’m going to then take the code that defines the value, and the apply this anywhere else that titleString is referenced. The temp is gone, and it’s been inlined with the code that referenced it. Now, what I was saying before, why might you want to use this refactoring? Well, it sets you up to then do a greater refactoring, extract method. This code that creates and populates the label could be used in several places and is probably better served as its own method. Now that the temp has been inlined, I can extract the the label creation into a new method, createTitleLabel(). That’s actually two refactorings in one. First I used Inline Temp, and then followed that up with Extract Method.

Again, inline temp is kind of straightforward. You’ll remove a temporary variable that’s only ever written to once, and then instead put the call to the actual method within each line that references the temp. I hope you liked this video from cleanswifter.com. Check back next week for another video demonstrating a refactoring from Martin Fowler’s book, “Refactoring, Improving the Design of Existing Code.” Thanks.

VIDEO: Inline Method Refactoring in Swift

In “Refactoring, Improving the Design of Existing Code” by Martin Fowler, he presents the Inline Method refactoring. It is the opposite of Extract Method, which I’ve already covered.

Here’s a video walkthrough of the Inline Method refactoring in Swift and its benefits:

Video Transcription

Hey, what’s up everybody, it’s Andy from cleanswifter.com, and I’m back here to talk about another refactoring in my video series covering Martin Fowler’s book, Refactoring, Improving the Design of Existing Code. This week we’re going to talk about Inline Method and it’s a refactoring which is actually the exact opposite of the refactoring we talked about last time, Extract Method. With Extract Method, it was all about taking common functionality from a larger piece of code and extracting it into a new method. With Inline Method, it’s doing the exact opposite. You’re going to take code in a method and delete that method, and move the functionality back to where’s it’s called from.

Why Inline Method Is Useful

This is useful for a couple reasons. In one case, if the code being called is so simplistic that putting it in another method just distracts you, you might as well just put it back in the original place and delete the simple method.

Another reason you may want to do it, is that, if you have a series of different methods that are all called from a bigger method, and those other methods being called are smaller, you can then move that functionality back to the original method, delete all those other smaller methods, and then once the functionality is back together in the calling method, then extract that as one method, that then serves a better purpose in being a cohesive unit of code that actually does something.

We’re not going to do that right now. First we’re going to look at inline method all by itself. Let’s take a look at an example.

The Example

Here we have some code that calculates the length of a hypotenuse according to the Pythagorean Theorem. This code right here adds the squares of two numbers, the base and height of a right triangle, then takes the square root of the result. That’s the length of the hypotenuse of the right triangle. Reading this line of code by itself is pretty decent. I can read this and understand what it’s doing. But then I look at all these methods being called, and all of these are just doing a single line of code, which is just built in math. I want to propose an Inline Method refactoring to delete all three of these methods and move this functionality to be directly included with this method. Let’s do this one by one.

Starting in the middle we have the numbers being squared. That’s going to be my target method to first delete. I can see that this is just multiplying two numbers together, simple enough. I can come down here and square the numbers directly, and now since square is no longer being called, I’ll delete that. Voilah, that is the Inline Method refactoring.

I’m going to do this again for add. I can then delete add, and the call to it, and instead, just put that functionality directly in this line. Now you can see that I’m adding the result of the methods being squared. Add is no longer called, so delete that custom method. And the same square root, which just wraps the Foundation function for doing the same thing, I can then delete this and instead call the Foundation function directly. You can see the refactored result.

This example is kind of simplistic, but I think the simplisticness of it is a good example of when you would want to do this refactoring. In each of these cases and methods that I deleted, there was one line of code that called a function right from Foundation: add, multiply, and square root. When looking at this code, I think it’s much more obvious what it does, and there’s not these extraneous methods that cause my eyes to jump around. Now, imagine you’re doing this in a class, or series of classes, where those methods being called actually existed in a different place. Now, not only do you need to look somewhere else, but where you have to look is in a totally different file. For me, that jumping around, especially when the method is so simple, I think it’s better served to have it right inline with the code that is performing the function.

Again, it’s just a tool to add to your toolbox. Inline Method appears in Martin Fowler’s book, Refactoring, Improving the Design of Existing Code. You can buy it in the description for this video. Again, check out the original post on my blog, cleanswifter.com. Thanks a lot for watching, and I’ll see you next time.

VIDEO: Extract Method Refactoring

In “Refactoring, Improving the Design of Existing Code” by Martin Fowler, he presents the Extract Method refactoring. It is one of the best refactorings out there. It’s one of the most common ones that I use.

Here’s a video walkthrough of the Extract Method refactoring and its benefits:

Video Transcription

Hey, what’s up everybody, it’s Andy from cleanswifter.com, and I’m back this week to actually continue our series on reading “Refactoring, Improving the Design of Existing Code” by Martin Fowler. This week for the first time, we’re going to look at an actual refactoring in code. The refactoring we’re going to look at is called “Extract Method.” Extract Method is actually a really easy refactoring, it’s often supported by IDEs and the benefit of it is that it increases the opportunity for code reuse, you’ll have less duplication of your code, it enables smaller units of code, so it helps you get rid of those really long methods. And it also reduces the semantic distance between the method name and method purpose. I really like that wording that Fowler actually used in the book. That means your method names will be very clear and close to what the method actually does. As a result, for that to happen, your method needs to be succinct and cohesive. Extract method refactoring enables this. Let’s take a look at it.

Here’s a class, AccountViewController that subclasses UIViewController. Right here in viewDidLoad() is some simple code that creates two UILabels. Three properties are set on each label: the text color, the text alignment, and the number of lines. There are actually two different labels on which these properties are being set. But what’s in common between these two pieces of code, is that, the three properties are being set on the label are exactly the same. This is a prime opportunity to leverage the Extract Method refactoring. For Extract Method, all we’re going to do is create a new method called setUpLabel. In there, I’ll add a parameter that is the label to be set, and on that label, I’ll take this code, remove it from viewDidLoad() and add it to this new method that we’re extracting, and then down in viewDidLoad(), call the new method by providing the label. Down where the second label is setup, I can also then delete this code and call that same method with the addressLabel. Now you can see we’ve removed the redundant code that is setting up the label, and now we have a dedicated method that is named very clearly for what it does: sets up a label. The redundant code for addressLabel has also been consolidated.

Let’s make the example a little more complicated. In this example we see the similar three lines of code setting up the label that configure the text color, the text alignment, and the number of lines. To make it a little more complicated, we’re actually going to set the text on the two labels as well. nameLabel will be set to “Andy” and addressLabel will be set to “Philadelphia.” Now we want to perform a refactoring that removes redundancy while also preserving the ability to set the test on the labels. We’ll start off in the same way as before, creating the new method setUpLabel. Move forward with the refactoring to get to the same point we were at in the last example. Now that a baseline for setUpLabel is extracted, we need to update it to be able to accept a String such that the text on the label may be set, and the redundant use of temporary variables in viewDidLoad() can be removed. Add a parameter to setUpLabel of type String called text. Set the text on the UILabel‘s text. Update the method call to setUpLabel in viewDidLoad to actually pass in the text to be set. Do the same thing for addressLabel. At this point, we’ve removed redundancy and consolidated the code which includes setting the label’s text based on a provided parameter. There’s one more level of complication that we can add while leveraging the Extract Method refactoring.

Increasing the complexity of the example towards something even more real-life is to add properties on the view controller for each label so the values that are created are stored. After setUpLabel is called, we’re now storing the label in the property on the class. To further reduce the redundant code, I’m going to extract the label creation into setUpLabel. That will cause me to return the created label so that it can be set on the property. The goal of what I want to do here, is delete the creation of the UILabel in viewDidLoad() and move it to setUpLabel(). I will no longer need to pass the created label in to setUpLabel(). Instead, I will create a new UILabel each time setUpLabel is called. Then using that new label, set it’s properties, and return it. Now you can see the final result of the refactoring where all the redundant code has been consolidated into one place, a method dedicated to setting up labels. viewDidLoad() now reads very clearly.

You just saw an example of the Extract Method refactoring. Just to recap it’s benefits: it increases the opportunity for code reuse by reducing duplication, it enables smaller pieces of code (as you saw viewDidLoad and setUpLabel become small). And finally, decreases the semantic distance between the method name and method purpose – which means you can create a nice small method with a nice clear name that reflects what the method does.

I hope you liked this screencast on the Extract Method refactoring from “Refactoring, Improving the Design of Existing Code” by Martin Fowler.