Xcode UI Tests Review

After writing Xcode UI tests for the first time today, immediately some things formed my initial impression. I wanted to pass along my Xcode UI tests review here on cleanswifter.com in effort to help educate others. For at least the pass year, if not longer, I’ve been using KIF for writing my functional UI tests. I love KIF. KIF is a third party, open source tool. That brings both benefits and drawbacks. Right off the bat, due to changes in the iOS 10/Xcode 8 Accessibility Inspector, KIF was broken in the beta versions of our tools. It was quickly fixed, and the impact was low, but it does make you wonder about what’s in store for the future when there are less people available to maintain it? This wasn’t the only thing that drove me towards Xcode UI tests for this project, but it was certainly a concern. I still love KIF and will continue to use it on other projects for the foreseeable future.

Background

Xcode UI tests build on an older tool from Apple called UI Automation. UI Automation enabled the iOS developer to write UI tests for their apps, and it was officially supported by Apple. “Officially supported” is certainly a loaded term, especially with UI Automation. The documentation was pretty bad. While there was some light guides on developing UI Automation tests, the actual API documentation had very little information. Combine that with the fact that the tests were written in JavaScript and run with Instruments (outside of Xcode), I was never happy with the tool.

Then last year, in WWDC 2015, Apple announced a reimagined solution for writing UI tests, Xcode UI tests. Here’s my Xcode UI tests review.

Pros

Officially Supported by Apple

This shouldn’t be underplayed. I’d live through a lot of crappy documentation just to use an officially supported tool. Apple officially supports Xcode UI tests, and that means a lot to me. It means you get WWDC videos on the subject. You get subtle integration with Xcode that only Apple could have access to. It means that your tests are less likely to break in future versions of iOS and Xcode.

Tests Written In Swift

Unlike UI Automation tests, Xcode UI tests can be written in either Objective-C or Swift. This could be the single best improvement. This means that you get everything from code completion, to compile-time syntax checking, to full Xcode integration.

Integration with Xcode

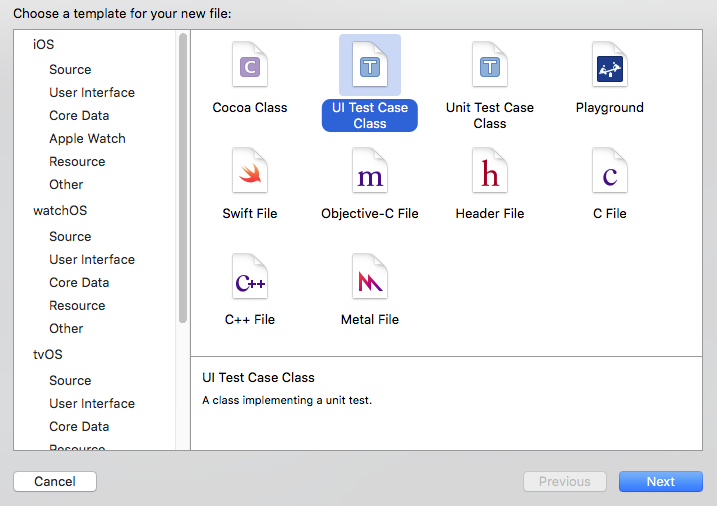
It was really annoying with UI Automation that you needed to switch to Instruments just to run your UI tests. Furthermore, JavaScript support in Xcode is pretty bad too, so one was left searching for a good editor experience when writing tests. Xcode UI tests change this. Now, the tests are first-class citizens right in the same IDE that we are using to write our actual application code. There’s even a “New File template” for Xcode UI tests.

Xcode UI Tests Review

XCTestCase subclasses

Buliding on the integration with Xcode, Xcode UI tests subclass XCTestCase just like unit tests. This means the full API of XCTest is available. Methods like XCTestAssertEqual and XCTestAssertTrue can be leveraged for writing your tests. Additionally, things like Scheme integration into your Test action enable execution of your Xcode UI tests when running tests, right from Xcode. Also, all those others niceties of running unit tests and the wonderful keyboard shortcuts can also be used with your Xcode UI tests.

Xcode UI Tests Review

UI Recording

UI Recording for Xcode UI tests is pretty cool. You can click a “Record” button in Xcode, and your app will launch in the simulator. Then, as you tap and navigate through your app, actual code will be generated in a test reflecting the path through your app that you took. It’s not perfect though, and more importantly, it doesn’t actually generate any assertions. Also, to prevent your test from being really brittle, you do need to consider breaking your tests up into cohesive chunks, and not one giant test.

Cons

Xcode UI tests aren’t without their flaws.

Documentation Is Still Light

The documentation for Xcode UI tests is still light. It’s not as bad as UI Automation was, but it’s still not perfect. KIF has been around for years. There are tons of stackoverflow.com questions and answers for it, the GitHub repository is mature, and you’ll find plenty of tutorials. I still can’t find an official piece of web-hosted API documentation for Xcode UI tests.

See the end of the article for a list of resources that I’ve been using as reference for Xcode UI testing.

Slow

Obviously all UI tests are going to be slow, regardless of whatever platform and tools you are using. Something uniquely slow jumps out at me about Xcode UI tests though. As a developer, you are required to call XCUIApplication().launch() from your tests when you want the app to launch. Each test must call this. The common pattern from what I’ve seen is to place the call to XCUIApplication().launch() in setUp(). setUp() is an overridden method from the XCTestCase base class, and is executed by the XCTest framework before each test. The thing is, XCUIApplication().launch() is REALLY SLOW. It triggers a fresh launch of your app. Now I guess this is useful from the context of resetting state in your app, but if you aren’t careful about structuring your tests, you could inadvertently introduce a lot of overhead in the speed of your tests.

iOS9 and Up

One of the main advantages of a suite of automated tests, regardless of the platform or type of tests, is to be able to run those tests in all places that your code base is supported. If you are writing a web application, this might be different browsers at different screen resolutions and window sizes. In iOS development, you can exponential benefit from running the same suite of tests across different devices of different form factors and different iOS versions. Unfortunately, Xcode UI tests put a major hamstring in this, in that they will only run on devices with iOS 9 and greater. To me, this is a big deal. We don’t all have the luxury of requiring the minimum iOS version to be the latest on the market. At the time of this post, iOS 9 is the latest iOS version, so that means I can’t even run my automated UI test suite on one version back, iOS 8. There have been so many times in my testing career in which UI tests identify and/or verify a bug that is present on one iOS version and not another. I’m really disappointed that Xcode UI tests don’t work on anything older than iOS 9. I guess I just have to hope for my applications, we’ll soon be able to require iOS 9 and greater.

XCUIElement != UIView

One of the most awesome things about KIF is the overlap between the KIF APIs and UIKit. When writing KIF tests, there are many methods like:

func waitForViewWithAccessibilityLabel(label: String!) -> UIView!

It’s so useful to have a UIView returned. This can be cast to more specialized subclasses that actually represent the object returned. And once you do that, you have full access to all the methods available on that object as defined in the actual code. Code like this is possible:

let saveButton = tester().waitForViewWithAccessibilityLabel("Save") as! UIButton
XCTAssertEqual(UIColor.blue(), saveButton.currentTitleColor)

This code is really useful because once you have a handle on the UIView, you can access so many APIs to verify behavior.

Unfortunately, there is no such intersection in Xcode UI tests. In Xcode UI tests, the object returned from similar method calls is a XCUIElement, and there’s no way to translate this to UIView (that I’ve found). As such, you are limited to the limited API available through Xcode UI tests and XCUIElement – none of which translates to a UIKit equivalent.

Final Thoughts

Despite the drawbacks, I’m still excited to use Xcode UI tests and I hope this Xcode UI tests review conveys that. It’s always fun to learn something new, and I think there are plenty of positives to using the tool. Have you used Xcode UI tests? What’s your Xcode UI tests review?

Happy cleaning.

Useful Resources

KIF Tips and Tricks

Now that you’ve written your first KIF test or two, there’s a couple more KIF tips and tricks I wanted to share with you. Nothing too fancy, just a couple nice touches I’ve developed while writing KIF tests.

Don’t Forget About XCTestCase

KIFTestCase is a subclass of XCTestCase. This means that all the goodness of the XCTest framework is available to you in KIF tests. This makes for some really nice KIF tips and tricks.

XCTAssertEqual, XCTAssertTrue and related methods

These are all methods that would be familiar to anyone writing unit tests. These are the meat of how you make assertions about outcomes and expectations when writing unit tests. You can do the same thing in KIF tests. It’s especially powerful when combined with tester().waitForViewWithAccessibilityLabel(String) since that method returns a UIView. You can cast that view to a UIView subclass, and then access any custom properties on it, and then make assertions.

For example, suppose you have a view that should change colors in response to a button being pressed. You could write this KIF test:

func testViewChangesColor_WhenButtonPressed() {
  tester().tapViewWithAccessibilityLabel("Some View")
  let redView = tester().waitForViewWithAccessibilityLabel("the supposed red view")
  XCTAssertEqual(redView.backgroundColor, UIColor.redColor())
}

In this test, you programmatically tap a view with a given accessibility label, presumably the button. Then, you get a reference to the view that should have changed colors, and make an assertion on its background color.

setUp(), tearDown(), beforeAll(), and afterAll()

setUp(), beforeAll(), and tearDown() are powerful methods that help you do common legwork before or after tests run. They help to stabilize state between tests, and remove redundant code by providing a single place for it to be executed. setUp() and tearDown() run before and after each test method in the test class. These are really useful if each test needs to assume some sort of initial state. Imagine you are testing a view that represents a form. Before each test, you want that form to be in a clean state. These methods can enable you to clean up, or set some intial state before each test runs.

beforeAll() and afterAll() run before or after all tests in a given test class. These are useful when a given test class contains tests for a certain view in the app, that isn’t the initial view of the app. Say you are trying to test the third view controller deep in a navigation stack. It would be appropriate in beforeAll() to navigate down the stack to the view to test, and then in afterAll() to pop back up to the root view for other tests to run.

This leads me to the next item in my KIF tips and tricks, some suggestions on how to break up your test classes.

Segmenting Your Tests

The key to maintainable KIF tests is good segmentation of what you’re testing, across different tests and test suites. A “test” refers to a single function in a KIFTestCase subclass. A “test suite” refers to an entire KIFTestCase subclass, and all the tests within it. I don’t have any hard and fast rules on how I break up my KIF tests. Thinking through my KIF tips and tricks, I would phrase my suggested best practice as, group tests of related functionality into a single test suite, while keeping your tests themselves standalone and cohesive. As much as you can avoid it, avoid any interdependcies between tests. If later you go back and delete tests, or add tests, you don’t want failures to crop up just because the order of execution changes based on assumptions of state you made from test to test. I might have a test class/suite called “EditModeTests” that goes through all the verification necessary for “Edit Mode” of the thing I’m building. Remember, at the end of the day, KIF tests are slow, so you don’t want a lot of redundancy between tests in terms of execution steps. So if you have the opportunity to perform verification and assertions on related items in a test, do it, as long as you aren’t totally sacrificing decoupling of that test from other tests. I know what you’re thinking, I’m proposing contradictory best practices. It’s all balance. You’ll feel it out as you go, I just wanted to bring up a couple things to be aware of. Remember, when a test fails, the best thing you can do to help yourself is to do everything possible to reduce the amount of time it takes to figure out why it failed. I see two easy ways to do this: ensure your tests don’t fail, and ensure that when your tests fail the context of why the test failed is clear.

KIFUITestActor Extension

KIF Tips and Tricks

KIFUITestActor is the class of the tester() available in KIFTestCases. It’s what you use to perform the navigation through your app. Don’t forget about extensions, they are a great way to add behavior to KIFUITestActor, especially common pieces of code for repetitive navigatoin tasks. For example, one of my apps conditionally shows an onboarding flow depending if the user is launching the app for the first time or not. I added two methods to a KIFUITestActor extension – one to check if the onboarding view was showing, and one method to close the onboarding flow if it was showing. This way, in all my KIF tests, I can reuse this code and have the confidence in the repeatability of the test. It’s KIF tips and tricks like this that make me really enjoy iOS functional testing.

Verify Something Is NOT On The Screen

KIF makes it really easy to verify that something IS on the screen, but there’s no obvious API for verifying something isn’t on the screen. You can use Swift’s do/try/catch to achieve this.

Consider this test:

func testPreviewIsNotAvailable() {
  do {
    try tester().tryFindingViewWithAccessibilityLabel("Preview")
    XCTFail("Preview should not be found.")
  } catch {
    // Nothing to do here - a throw here is a success.
  }
}

This test verifies that “Preview” is not available on the screen. KIF will throw an exception when it can’t find a view with the matching accessibility label after a 10 second timeout. That exception will be caught by the catch handler, at which point nothing is done, and the test will pass. In the case that a view with a matching accessibility label IS found, the test is explicitly told to fail. If you use this pattern, I suggest a good comment in the empty catch block so you help your future self and others understand what’s happening.

Wrap Up

I hope you find use of these KIF tips and tricks, and I hope that you are setup well to have success with your journey into iOS functional testing with KIF. This wraps up the week of KIF. I’d love to hear how you it works for you.

Happy cleaning.

Writing Your First KIF Test

Earlier this week I introduced you to the concept of functional testing on iOS. Yesterday, I showed you how to install KIF, a tool for functional testing on iOS. Today, I’m going to walk you through writing your first KIF test.

If you haven’t done so, please start by downloading the demo application, and installing KIF from yesterday’s post, . This article will continue where it left off. If you want to skip that, and just start with a fully configured demo app with KIF installed, you can download that here.

Demo Of The Demo App

From the root directory of the Demo app, KIFDemoApp, open the workspace file KIFDemoApp.xcworkspace in Xcode.

Build and run the app, and give it a try.

Writing Your First KIF Test

You’ll notice a view with a text field, and two buttons. Each button presents a new view. The difference is that one button will replay back the text that you specified in the field, and the other button just shows the next view with static text.

Step 0 – Add An Extension For KIF’s tester

Disclaimer: This should probably move to yesterday’s post on installing CocoaPods.

Before writing your first KIF test, there’s a step that must be done. The critical mechanism that the KIF API provides for enabling you to navigate through your app is called tester(). It’s implemented as a C preprocessor macro that isn’t naturally available in Swift. You’ll need to manually configure this via an extension that you create.

Create an empty new Swift file in the group and target KIFDemoAppFunctionalTests called KIF+Swift.swift. Replace it’s contents with:

extension XCTestCase {
    func tester(file : String = #file, _ line : Int = #line) -> KIFUITestActor {
        return KIFUITestActor(inFile: file, atLine: line, delegate: self)
    }
}

extension KIFTestActor {
    func tester(file : String = #file, _ line : Int = #line) -> KIFUITestActor {
        return KIFUITestActor(inFile: file, atLine: line, delegate: self)
    }
}

You will then use tester() in writing your first KIF test case. Now you need to create that new test file.

Step 1 – Create a Unit Test

You might be wondering, “Why am I creating a unit test case class? I want to create a functional test!” The answer is that it’s convenient to use Xcode’s template for unit tests, you’ll see how to then convert it to a functional KIF test next.

To create the unit test, back in Xcode, in the group KIFDemoAppFunctionalTests create a new Unit Test Case Class by clicking File -> New -> File… and then in the resulting prompt, iOS -> Source -> Unit Test Case Class. Yes, I recognize this is a little weird.

Name the new file, “MyFirstKIFTest” and make sure the Language is Swift.

Writing Your First KIF Test

On the next screen, make sure that the new file will only be added to one target, the KIFDemoAppFunctionalTests target, and click Create.

Writing Your First KIF Test

Xcode just created a unit test for you, a good ole subclass of XCTestCase. Now we’re going to convert that to a KIFTestCase.

Step 2 – Convert The Unit Test to a KIF Test

In MyFirstKIFTest.swift, change the superclass from XCTestCase to KIFTestCase. Also, delete all code within the class.

MyFirstKIFTest.swift should now look like:

import XCTest

class MyFirstKIFTest: KIFTestCase {
}

Build the app, and verify everything still compiles. Congratulations on writing your first KIF test!

Step 3 – Write A Functional Test For a Button

For writing your first KIF test, you are going to write a test that taps the Continue without saving button in the demo app, and verifies that the subsequent view is shown.

Add this method to MyFirstKIFTest

func testContinueWithoutSaving_ShowsNextScreen_WithCorrectText() {
    tester().tapViewWithAccessibilityLabel("Continue, without saving")  // 1
    tester().waitForViewWithAccessibilityLabel("Welcome Player 1")      // 2
    tester().tapViewWithAccessibilityLabel("Start Over")                // 3
}

This method is simple, yet very powerful. In 1, the tester() is told to tap something on screen with the accessibility label “Continue, without saving.” If that thing isn’t there, the test will fail. So right off the bat, this line alone provides verification that there is something on the screen with that label, AND that it can be tapped.

In 2, the tester() is told to wait for a view to appear on the screen with a accessibility label of “Welcome Player 1”. If you played around with the demo app, you would have realized that “Player 1” is a static name for players who don’t provide a name. This is the real thing that this test is verifying- that whey the user continues without providing a name, a new screen is shown with a default name.

In 3, you need to reset the app to a “default” state. This isn’t technically required, but I suggest it as a best practice. Future tests you write will automatically continue in the app wherever the prior test left off. For good decoupling of your tests, I recommend “undoing” anything that your test did in the app, so that future tests can start assuming a “fresh” app.

Run your tests by selecting Product -> Test, or use the keyboard shortcut Command-U. Watch how the iOS Simulator launches your app, and magically navigates through the screens. This part never gets old for me, I love watching my apps get automatically verified.

It’s always best to verify that tests fail as well. That way you aren’t lulled into a false sense of security, when the test was just giving false positives to begin with. You should do this all the time, not just when writing your first KIF test. Change either of the accessibility labels in the test, and re-run. You’ll see that the test fails.

Test Suite 'Selected tests' started at 2016-04-27 20:14:17.801
Test Suite 'MyFirstKIFTest' started at 2016-04-27 20:14:17.801
Test Case '-[KIFDemoAppFunctionalTests.MyFirstKIFTest testContinueWithoutSaving_ShowsNextScreen_WithCorrectText]' started.
/Users/andyo/Documents/MyGitHubProjects/KIFDemoApp/KIFDemoAppFunctionalTests/MyFirstKIFTest.swift:14: error: -[KIFDemoAppFunctionalTests.MyFirstKIFTest testContinueWithoutSaving_ShowsNextScreen_WithCorrectText] : The step timed out after 10.00 seconds: Failed to find accessibility element with the label "Continue, without savingg"
Test Case '-[KIFDemoAppFunctionalTests.MyFirstKIFTest testContinueWithoutSaving_ShowsNextScreen_WithCorrectText]' failed (10.064 seconds).
Test Suite 'MyFirstKIFTest' failed at 2016-04-27 20:14:28.022.
     Executed 1 test, with 1 failure (1 unexpected) in 10.064 (10.221) seconds
Test Suite 'Selected tests' failed at 2016-04-27 20:14:28.023.
     Executed 1 test, with 1 failure (1 unexpected) in 10.064 (10.222) seconds

In this output, also notice the message “The step timed out after 10.00 seconds.” That’s an important nuance. By default, KIF allows a 10 second grace period for a given “thing” to be found by the API. This allows for slow user interface transitions to complete without falsely failing a test.

Let me also pause to clarify and reinforce that KIF’s magic is totally driven off of accessibility labels and identifiers (and luckily this is in common with other functional tests in case you ever want to switch test tools later, as well as best practice for enabling people with impaired vision to use your app). As you create your app, and write your KIF tests, it’s much easier if you specify the accessibility information along the way.

Step 4 – Write A Functional Test For a Text Field

Now that your whistle is wet, let me further satiate your desire to write functional tests. This time, you’re going to raise the stakes by inputting text, and based on this input, verify an expected output on the second view.

Add this second test method to MyFirstKIFTest:

func testSaveAndContinueWithAName_ShowsNameOnNextScreen_WithMatchingText() {
    let name = "Clean Swifter"                                                   // 1
    tester().enterText(name, intoViewWithAccessibilityLabel: "Name field")       // 2
    tester().tapViewWithAccessibilityLabel("Save, and continue")                 // 3
    tester().waitForViewWithAccessibilityLabel("Welcome \(name)")                // 4
}
  1. Create a constant string representing the name that will be entered and verified.
  2. Enter the name into the text field.
  3. Tap the Save, and continue button
  4. Wait for the next view, reusing the name constant to verify the output string.

Run your tests. What happens?

The tests won’t pass.

Failed to find accessibility element with the label "Name field"

You never specified an accessibility label on the text field. Open Main.storyboard and set the Accessibility label on the text field. This screenshot should help you figure out how to find and do that:

Writing Your First KIF Test

Run your tests, again. All should be good!

Wrap Up

I hope you enjoyed writing your first KIF test. Well, it was a bonus because you really wrote two! With these basics, it really opens up a world of opportunity for functional iOS testing. For further reference, take a review of the methods available on KIFUITestActor. Those methods provide the comprehensive list for navigating through your app. There’s a lot of available, try it out, and let me know what creativity you come up with after writing your first KIF test! You can find the demo app with the KIF tests added in my GitHub repository.

Happy cleaning.

Installing KIF with CocoaPods for Swift Apps

If I haven’t driven it home yet this week, I love KIF for writing functional iOS tests. I want to cultivate that love in you as well, so here’s a walkthrough on installing KIF with CocoaPods for Swift Apps. Installation of KIF isn’t totally straightforward for Swift apps, I walk you through some of the finer points of installation with CocoaPods basics for getting up and running with KIF.

To help you get started with KIF, I created a demo project with the basic application code for which you’ll be able to write the functional tests. You can find it on GitHub at: https://github.com/obuseme/KIFDemoApp or download in a zip file here. We’ll use this project for the rest of the week as I go deeper and deeper into the capabilities of KIF with the next couple posts.

Installation

I recommend installing KIF with CocoaPods for Swift apps. Ensure you have CocoaPods 1.0 installed, I specifically used 1.0.0.beta.8 when writing this up. First start by creating a new target that will be dedicated for your functional tests. Open KIFDemoApp.xcodeproj in Xcode. Then, in Xcode, select File -> New -> Target…. Select iOS -> Test -> iOS Unit Testing Bundle. Name it “KIFDemoAppFunctionalTests”.

Next, create a new text file in the root of the demo project called Podfile. Add this text to it:

source 'https://github.com/CocoaPods/Specs.git'
platform :ios, '9.0'

project 'KIFDemoApp'

target :KIFDemoAppFunctionalTests do
        pod 'KIF'
end

This podfile sets up KIF to ONLY be included in the dedicated target, KIFDemoAppFunctionalTests. This is incredibly important because KIF uses private APIs, and if you accidentally include KIF in your main app target that you ship to Apple for review for the App Store, you’ll be rejected.

Then, from the command line, in the root of the project run:

pod install

and you’ll see this output:

KIFDemoApp|master⚡ ⇒ pod install
Analyzing dependencies
Downloading dependencies
Installing KIF (3.4.2)
Generating Pods project
Integrating client project

[!] Please close any current Xcode sessions and use `KIFDemoApp.xcworkspace` for this project from now on.
Sending stats
Pod installation complete! There is 1 dependency from the Podfile and 1 total pod installed.
KIFDemoApp|master⚡ ⇒ 

Follow the instructions, and close KIFDemoApp.xcodeproj and open KIFDemoApp.xcworkspace. Now KIF is installed in the workspace.

We will be writing our KIF tests in Swift. Since KIF is written in Objective-C, you must include KIF’s header file from a bridging header file in the KIFDemoAppFunctionalTests target.

To do this, right-click the group KIFDemoAppFunctionalTests and select New File.

Installing KIF with CocoaPods for Swift Apps

Then select iOS -> Source -> Cocoa Touch Class, Next. Name it anything, literally anything you want but ensure that the Language is specified as Objective-C, we’ll delete it right afterwards, click Next. On the next screen, ensure that only the KIFDemoAppFunctionalTests target is selected:

Installing KIF with CocoaPods for Swift Apps

And click Create.

Select the option in the resulting prompt to “Create Bridging Header.”

Installing KIF with CocoaPods for Swift Apps

You’ll have two Objective-C files created, as well as new file called KIFDemoAppFunctionalTests-Bridging-Header. Delete the two Objective-C files – their only purpose served to help create the bridging header.

Installing KIF with CocoaPods for Swift Apps

You can verify that everything is working now by selecting Product -> Test. Everything should compile, and an empty implementation of KIFDemoAppFunctionalTests should run (and pass).

After installing KIF with CocoaPods for Swift apps, you are all set to create your first KIF test case!

Wrap Up

I hope you found this walkthrough of installing KIF with CocoaPods for Swift apps useful. In case something didn’t work out for you, you can find the final demo project at https://github.com/obuseme/KIFDemoApp/tree/kif-installed or here. Tomorrow, we’ll go through the basics of actually writing some functional tests for the demo app. And Friday, I’m going to share a couple advanced tips and tricks to leverage when writing your KIF test cases. Be sure to check back.

Happy KIF’ing!

Three Reasons KIF is Awesome

As I introduced yesterday, KIF is a tool that enables functional testing of iOS applications. I wanted to go into a little more detail today on KIF’s capabilities by giving you three reasons KIF is awesome. Tomorrow, I’ll present an actual walkthrough of writing a KIF test case or two, so be sure to check back then.

What is KIF?

KIF stands for “keep it functional.” The name does it justice, it’s a test framework totally focused on providing a mechanism to write functional tests for your app. KIF tests hook into your app by interacting with the user interface. Similar to all automated tests of any sort, KIF enables you to write repeatable steps of verification to ensure that certain inputs determine certain outputs. Unlike a unit test where you might instantiate a model object, and then directly call a method, and verify the outcome, in KIF tests you instead write code to literally navigates through your app’s user interface and looks for things on the screen. You’ll never call viewDidLoad() explicitly from a KIF test, but you will instead simulate the tap of a button. In order to find things on the screen, KIF leverages accessibility labels and identifiers on your user interface elements.

Three Reasons KIF is Awesome

There are three main reasons why I like KIF:

  1. Tests can be written in Swift or Objective-C. For anyone that has experience with the first iteration of UI Automation test cases, THIS IS HUGE. UI Automation was Apple’s original provided tool for developers to write functional tests, and it was lame because you had to write the tests in JavaScript with a poorly documented API. Three Reasons KIF is Awesome
  2. Tests are executed as part of a normal old test target. Similarly replacing UI Automation JavaScript testing, THIS IS EVEN HUGER! Being able to execute your tests as a normal target in Xcode means first class citizenship with your build process, and thus more easily enabling repeatability and integration with continuous integration tools. With a single Command-U (the keyboard shortcut to run all tests), you can run both your unit tests and your KIF tests.
  3. KIFTestCases, the class that you subclass to write your tests, are subclasses of XCTestCase. This means that the same familiar API from writing verification in unit tests applies to KIF tests, no need to learn a new API for making assertions in your KIF tests.

Can KIF Test Swift Code?

For sure! In fact, this is where I got my first introduction to writing Swift code as part of a “real” project. The first Swift code that we started adding into our repositories on my team was in KIF tests. If you’re looking for a way to start introducing Swift code into your Objective-C project, give it a try in your tests.

Wrap Up

I’ve really enjoyed using KIF for my functional tests, and I hope I helped you by explaining why. Tomorrow, I’m excited to walk you through creating your first KIF test.

Happy cleaning.

iOS Functional Testing Overview

What is Functional Testing

iOS functional testing is the process in which an app is tested as a “black box” and in an end to end fashion. Unlike unit testing, functional tests are written with no awareness of the inner working of the code of an app. Honestly, you could even hand your project to someone, and forbid them from looking at the main source, and they would still be able to write thorough functional tests just my observing how the app behaves on a device or in a simulator. As a result, in iOS functional testing, you’ll write a lot of code that simulates gestures (taps, swipes, shakes, rotations, etc.), and perform validation based what appears on the screen in response to varied input. Of course, knowing the ins and outs of how the code for the app is written helps a lot when writing iOS functional tests. You’ll be more able to know where the edge cases are, and be able to ensure there’s coverage for each nook and cranny.

iOS functional testing

I’m someone cloudy on how iOS functional testing might differ from “acceptance” testing or “integration” testing or “UI testing”, and a lot of the time I interchangeably use the terms. In more complex systems than iOS apps, there may be more nuances to where boundaries are drawn between these processes.

How to do Functional Testing on iOS

Unlike manual tests, iOS functional testing is performed via written tests that enable this outside-in approach in an automated and repeatable way. I’m currently using and loving KIF for my iOS functional testing. As a result, I’m going to make a couple other posts this week dedicated to writing great tests with KIF.

KIF isn’t without its limitations. There’s also a bunch of other tools available for iOS functional testing, including:

Down the road, I plan to cover each of these in-depth as well as KIF.

Can you do TDD with iOS Functional Testing?

Hell yes, you can do TDD with iOS Functional Testing. In fact, I believe in it, and advocate it, though there are caveats you should be aware of. Often, it will end up redundant with unit tests. And, if you are purely following the red, green, refactor cycle, you won’t often end up with compilation errors as a result of your iOS functional tests, and instead you’ll have to run your tests more frequently. And iOS functional testing is slow, so as a result, I end up usually spending my TDD cycles with unit testing, and then after the fact, perform my iOS functional testing with KIF.

Often, as bugs are found in the app, I might start with iOS functional testing in order to ensure that I have a functional test that actually leverages the broken code. That way, I have the confidence to know that the bug will never surface again.

Don’t Rely on iOS Functional Testing Alone

As much as I love iOS functional testing, I believe it should be used side by side with unit tests. There’s simply large pieces of code that will go untested if you only rely on iOS functional testing. Additionally, because these test are slow, the more you write, the more slow they get. And finally, depending on how many other “things” like persistence layers or backend services that your app uses, your iOS functional testing will rely on these to be “working” and reliable as well – a dependency that just isn’t there with unit tests, and thus they are more reliable. I liked this article on the Google Testing blog that goes into this in more detail.

Wrapping Up

iOS functional testing sit at the top of the testing pyramid. They are a powerful way to test your app in an end to end, blackbox fashion, simulating a user testing your app. Check back throughout the week for more detailed posts on my favorite functional testing tool, KIF.

Happy cleaning.