Weekend Reading, September 9, 2016

Weekend Reading, September 9, 2016, click here

Happy Friday fellow Clean Swifters, I’d like to welcome a bunch of new readers who discovered cleanswifter.com from Dave Verwer’s iOS Dev Weekly. I’m heading down onto the Chesapeake Bay this weekend for some fishing and crabbing. It’s been a banner year for Blue Claw crabs. In the downtime, here’s what I’ll be reading to catch up from the week.

Also, I’m wondering: What do you to to improve your software development skills?

Get “Weekend Reading” delivered in your email, as well as every other cleanswifter.com post, and receive a free screencast on iOS automated testing by signing up here. “Weekend Reading” is created through AWeber’s app, Curate, which I helped create and is entirely written in Swift.

Happy cleaning

Post Weekend Reading for August 29, 2016

Post Weekend Reading for August 29, 2016, click here

Happy Monday fellow Clean Swifters.

First off, my apologies for not getting this weekend-reading published on Friday! I wouldn’t be human I couldn’t admit that the end of the summer is really busy, and while I wanted to get this out on Friday, life got in the way. That doesn’t mean the links stop coming though, or that you should skip sharpening that axe. I’ll just be setting aside a little more time this week to catch up. Here’s what caught my eye last week.

Get “Weekend Reading” delivered in your email, as well as every other cleanswifter.com post, and receive a free screencast on iOS automated testing by signing up here. “Weekend Reading” is created through AWeber’s app, Curate, which I helped create and is entirely written in Swift.

Happy cleaning

Weekend Reading for August 5, 2016

Weekend Reading for August 5, 2016, click here

Happy Weekend fellow Clean Swifters. Aside from checking out this year’s incredible Perseid meteor shower , I found some good reading.

Get “Weekend Reading” delivered in your email, as well as every other cleanswifter.com post, and receive a free screencast on iOS automated testing by signing up here. “Weekend Reading” is created through AWeber’s app, Curate, which I helped create and is entirely written in Swift.

Happy cleaning

Weekend Reading for July 29, 2016

Weekend Reading for July 29, 2016, click here

Happy Weekend fellow Clean Swifters. I was on vacation last week in Sea Isle City, New Jersey. You might know it as “the Jersey shore.” The downtime at the beach felt great and now I’m back at it this week, recharged and refreshed. Here’s what I’ll be catching up on this coming weekend.

Get “Weekend Reading” delivered in your email, as well as every other cleanswifter.com post, and receive a free screencast on iOS automated testing by signing up here. “Weekend Reading” is created through AWeber’s app, Curate, which I helped create and is entirely written in Swift.

Happy cleaning

Asynchronous Xcode UI Testing

As I continue to delve into Xcode UI tests, I’m starting to discover some of the lesser advertised benefits and drawbacks of the tool. One specific nuance that has caught my eye is how to deal with asynchronous Xcode UI testing. Xcode UI tests are asynchronous in that they simulate end user interaction with your application. End user interaction triggers animation (and in some cases waiting on remote services), and animation doesn’t happen instantaneously. There is a disconnect between the speed at which the lines of code in your tests can be executed, and whether the simulator (where the app under test is located and running) can keep up or not. In most cases, the simulator can’t keep up. As a result, you need to explicitly instruct your tests to wait for the app to catch up in the simulator. There are two ways to do this that I’ve been using.

Smart Waiting

waitForExpectationsWithTimeout(_:handler:)

When performing asynchronous Xcode UI testing, it’s often really useful to be able to verify something has appeared on screen. This way you know that the application is a certain state, and can continue executing a test script. For example, imagine an application with a tab bar, selecting a different tab should show a different view controller. If you were writing a test that relied on features within the second tab of the tab bar, it’s important have some assurances that when you instruct your test to tap the second tab, the tab actually appears. Furthermore, the act of waiting for something on screen can also act as a test in itself. If tapping the second tab doesn’t actually show what you expect, something probably went wrong and the test should fail.

Inspired from Joe Masilotti’s Cheat Sheet for Xcode UI testing, here’s how you can leverage waitForExpectationsWithTimeout(_:handler:) to verify that something appeared on screen:

// 1
let goLabel = self.app.staticTexts["Go!"]
let exists = NSPredicate(format: "exists == true")
expectationForPredicate(exists, evaluatedWithObject: goLabel, handler: nil)

// 2 
app.buttons["Ready, set..."].tap()

// 3
waitForExpectationsWithTimeout(5, handler: nil)
XCTAssert(goLabel.exists)

Here’s an explanation for this code:

  1. Define a NSPredicate to be used in a XCTestExpectation to verify that the Go! button exists in the app.
  2. Tap the Ready, set… button.
  3. Wait for the Go! button to appear.

waitForExpectationsWithTimeout(_:handler:) will repeatedly look for the NSPredicate to be true within the timeout provided, in this case 5 seconds.

This approach to verifying that something exists on the screen is incredibly useful. It’s very much like my old favorite KIF API waitForViewWithAccessibilityLabel. The thing is, it isn’t perfect.

Not Perfect

I’ve observed a number of cases when using this approach has led to false positives that an element “exists” on the screen. Essentially the XCTest UI framework observes that the element exists, but isn’t actually tappable, or in a state that a human-end-user would consider “on the screen.” If seen this most often happen when this technique is used in combination with animations happening in conjunction with the test action. For example, if you have an application that taps a button, which triggers a navigation controller to push a new view controller onto the stack, there’s a relatively slow animation that happens. With the predicate approach laid out above, asynchronous Xcode UI testing will actually identify incoming screen elements as “existing” before they are in their “final resting spot” at the end of the animation. So if you gate further steps of your test on the presence of something on the screen as determined by the XCTest UI framework, you’ll get false positives that the element is on the screen and ready for further interaction. Essentially, Xcode UI tests will tell you, “Yes, that button exists on the screen,” but in reality it isn’t yet “on the screen.” Don’t worry though, there’s a solution, and it’s incredibly dumb.

Dumb Waiting

sleep(1)

In those cases when you need to a little extra pause in your asynchronous Xcode UI testing in response to an asynchronous event like an animation, I’ve found that just using a sleep(1) goes a long way. Essentially this will block your tests from continuing for the specified duration of time, while the application under test is allowed to continue. To update the example code above, I add the sleep(1) in conjunction with the NSPredicate technique as follows:

let goLabel = self.app.staticTexts["Go!"]
let exists = NSPredicate(format: "exists == true")
expectationForPredicate(exists, evaluatedWithObject: goLabel, handler: nil)

app.buttons["Ready, set..."].tap()

waitForExpectationsWithTimeout(5, handler: nil)
XCTAssert(goLabel.exists)
sleep(1)

Notice that the sleep(1) happens right after the NSPredicate is determined to be true. This follows my discovery that Xcode UI tests identify things as “existing” before they are actually on screen. Using the NSPredicate technique with the sleep(1) let’s you verify the presence of specify UI elements, while also giving the app time to complete long running tasks like animations before continuing.

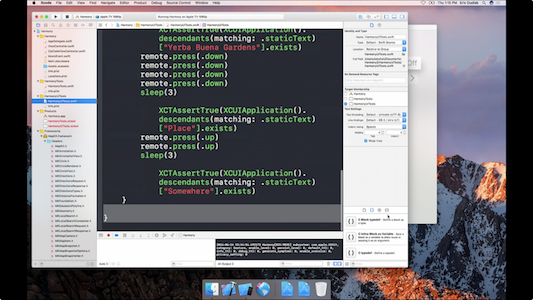
What’s funnier is that this sample code shown on screen at WWDC 2016 caught my eye:

asynchronous Xcode UI testing

Turns out, Apple uses the same technique!

Assertions in Closures

Another useful technique in asynchronous Xcode UI testing is to perform assertions on user-interface elements in response to closure execution. Often, indication of completion of long running calls like web service retrievals will be implemented with closures. I’ve written Xcode UI tests that explicitly call the web service separate from the application in order to cross-check data returned. Basically, I’ll ensure that the data the raw web service returns matches what is in the application. Whether this is your use case or not, you can use this pattern to make assertions in the closure on callback completion. The only requirement is that Xcode UI API calls need to happen on the main thread:

// 1
let expectation = expectationWithDescription("API Request Complete")
var response: Response?

// 2
RequestUpManager().get(id: "3688840") {
  (response: Response?, error: NSError?) -> () in
  
  if let response = response {
    response = response

    // 3
    dispatch_async(dispatch_get_main_queue(),{
      // Verify there is something on screen that matches what the API provided.
      let cell = self.app.cells.elementBoundByIndex(0)
      XCTAssertEqual(cell.staticTexts[response!.position].identifier, "Position")
      expectation.fulfill()
     })
  }
  else {
    // 4
    XCTFail("Unexpected object returned from API")
    expectation.fulfill()
  }
}
// 5
waitForExpectationsWithTimeout(WAIT_TIMEOUT, handler: nil)
  1. Use expectations to keep the test running while the request loads.
  2. Synchronously load data from the API.
  3. Tell the main thread to verify what’s on screen. (This will crash if not done on the main thread).
  4. Explicitly fail the test if unwrapping the optional data returned from the API fails.
  5. Using XCTestExpectations, wait for the asynchronous code to complete.

Wrap Up

These are just a couple little tricks I’ve learned for asynchronous Xcode UI testing when taking my first dive into the API. It’s always nice to get in and try out a tool beyond what’s shown in documentation or videos, you get a much better handle for nuances of what’s available. Have you come up with any solutions for these challenges in asynchronous Xcode UI testing?

Happy cleaning.

Weekend Reading, July 1, 2016

Weekend Reading for July 1, 2016, click here

Happy Friday fellow Clean Swifters. We’re looking at a 3-day weekend here in the United States, I can’t wait. More time to catch up on WWDC sessions! Here’s some other suggested reading if you find yourself with free time this weekend.

Get “Weekend Reading” delivered in your email, as well as every other cleanswifter.com post, and receive a free screencast on iOS automated testing by signing up here. “Weekend Reading” is created through AWeber’s app, Curate, which I helped create and is entirely written in Swift.

Happy cleaning

How to Disable Tests in Xcode

It’s easy to disable tests in Xcode, but not entirely obvious. A lot of people give Xcode flack in terms of how far behind other IDEs it is with regard to its support for automated testing. I don’t entirely disagree with this. On the other hand, it’s come so far from just five years ago and I’m thankful for that.

Why Disable Tests

You might be wondering, if I’ve spent all this time writing tests, why would I ever want to disable tests in Xcode? I’m not advocating permanently disabling them, instead, I’m advocating disabling them temporarily to speed up your development or to unblock progress. Just this week, I returned to an old project of mine, one that hasn’t had an app store update in over a year. It still uses CocoaPods version 0.33.0, and Swift 1. Needless to say, it needed some work getting it up to speed. (Side note: I have a lot of ammunition for future blog posts on how to NOT let a project get this stale, but we’ll save those for a future camp fire). First, I needed to get the project to actually compile. Second, I needed to get the tests passing. And finally, I needed to update our continuous integration machines and jobs to also compile and successfully run the tests. I had my work cut out for me.

When working with a project this old, sometimes advanced techniques like TDD aren’t immediately useful if you can’t even get the project to simply compile. When working through compilation errors and test failures at a large scale, it’s useful to selectively turn off a subset of the errors or test failures so you can eliminate noise, focus on a piece of the problem, and make progress. You can easily disable tests in Xcode in two ways: disable compilation, and disable test execution. Both of these are scheme changes. Here’s how:

How To Disable Tests

Disable Tests From Building

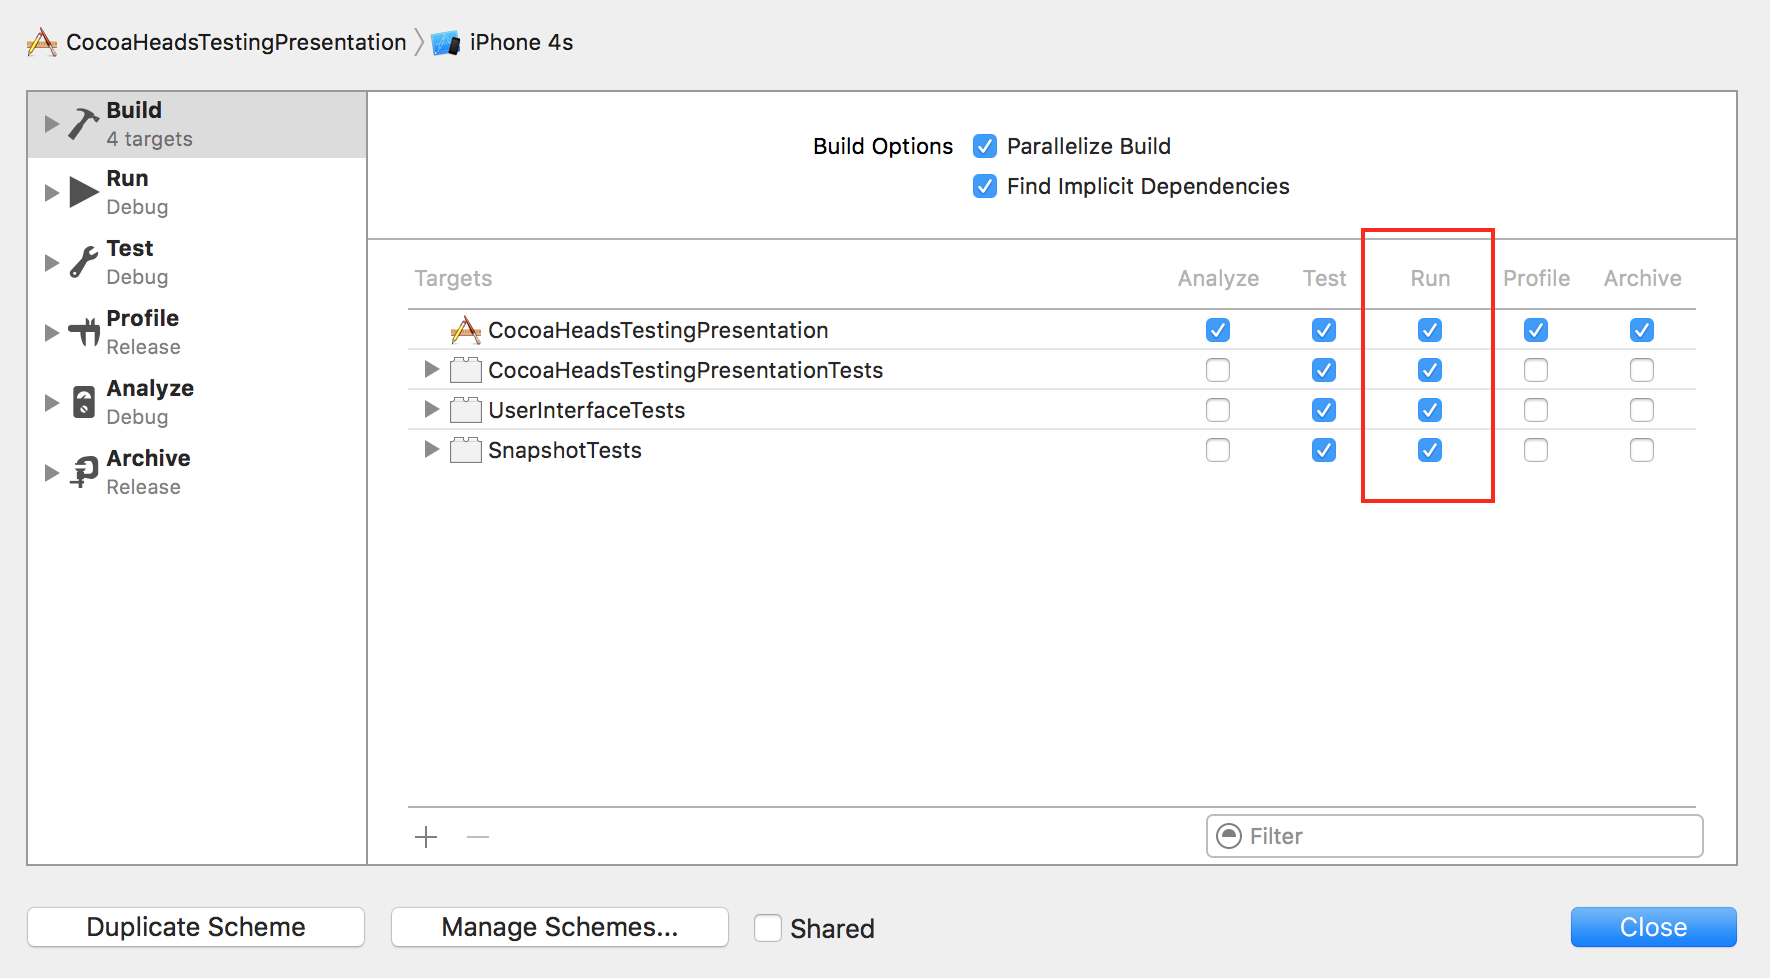
To simply disable all your tests from building, you can do this in the Scheme editor. From the menu bar, select Product -> Scheme -> Edit Scheme.

In the left hand bar, select Build.

Then in the main pane, you can disable tests from compiling for any action in your project. If you’re project is in a really bad state, you can disable tests from compiling when running your application.

disable tests in Xcode

By disabling any of those checkboxes, when you run your application, anything in the associated targets will not be compiled.

Disable Tests From Running

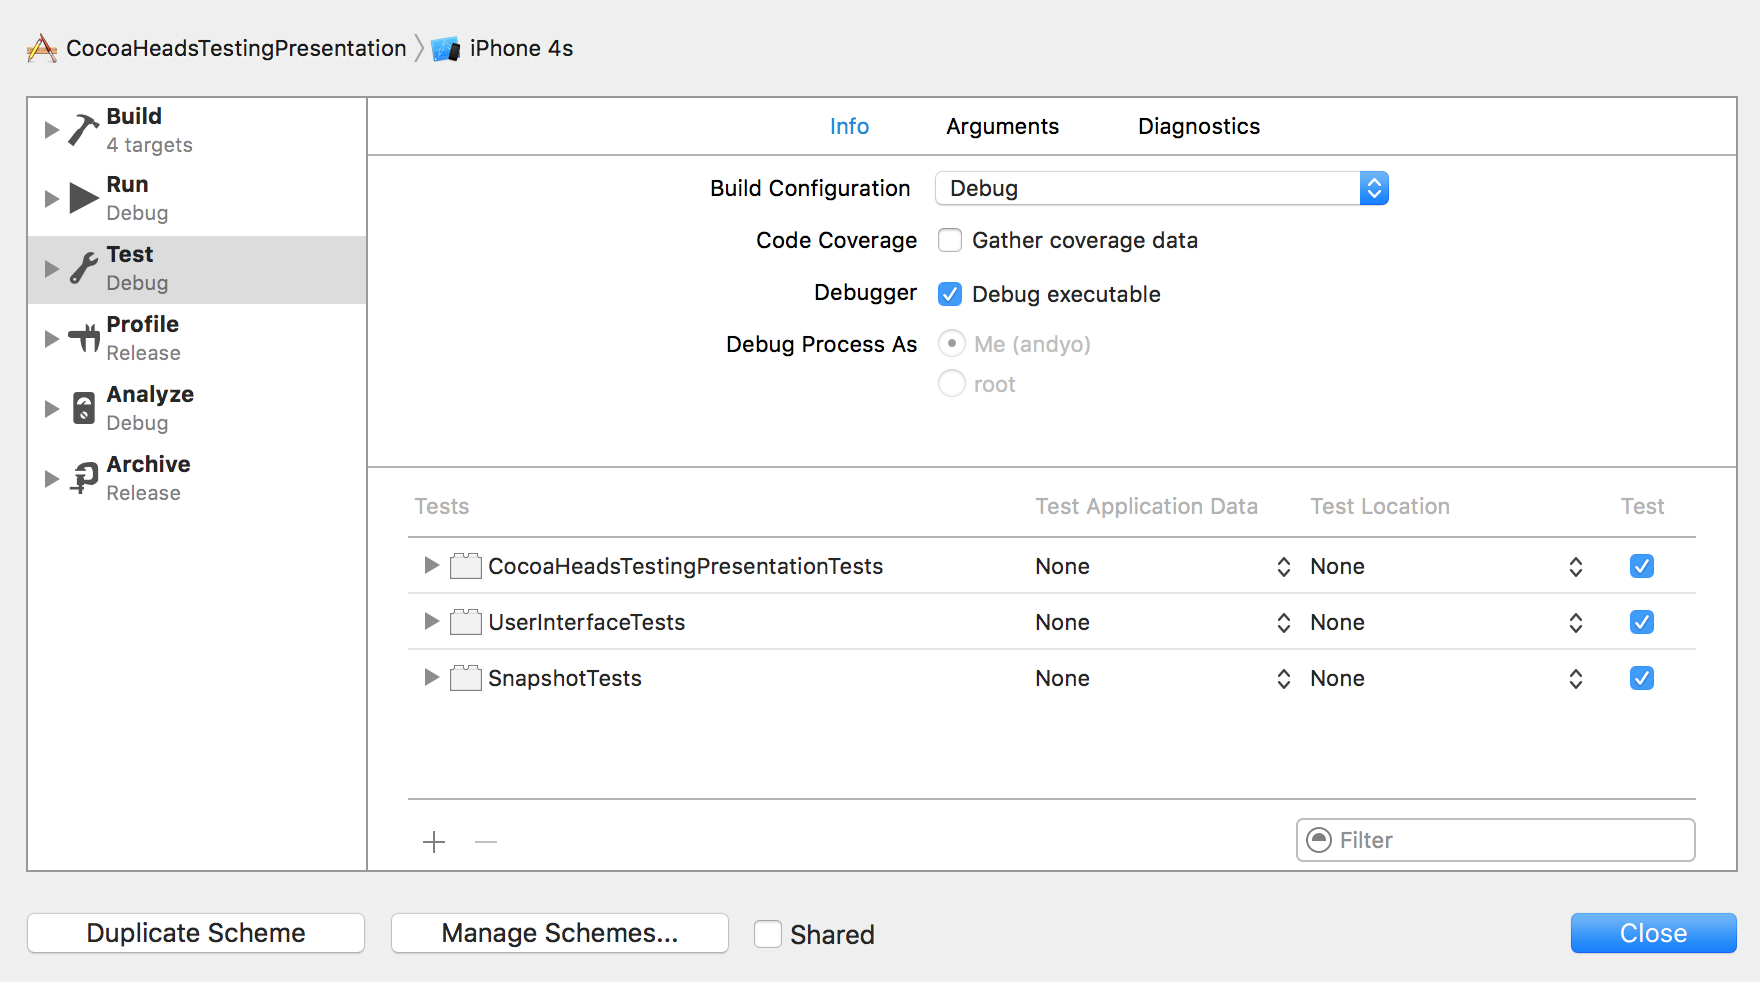
Similarly, you can use the Scheme Editor for selectively turning tests and off. Still in the Scheme Editor, select Test in the left hand bar. Then, in the main pane, you’ll see each target associated with tests. The checkbox will let you enable or disable the tests from being run when you run tests for your project (Command-U, or Product -> Test).

disable tests in Xcode

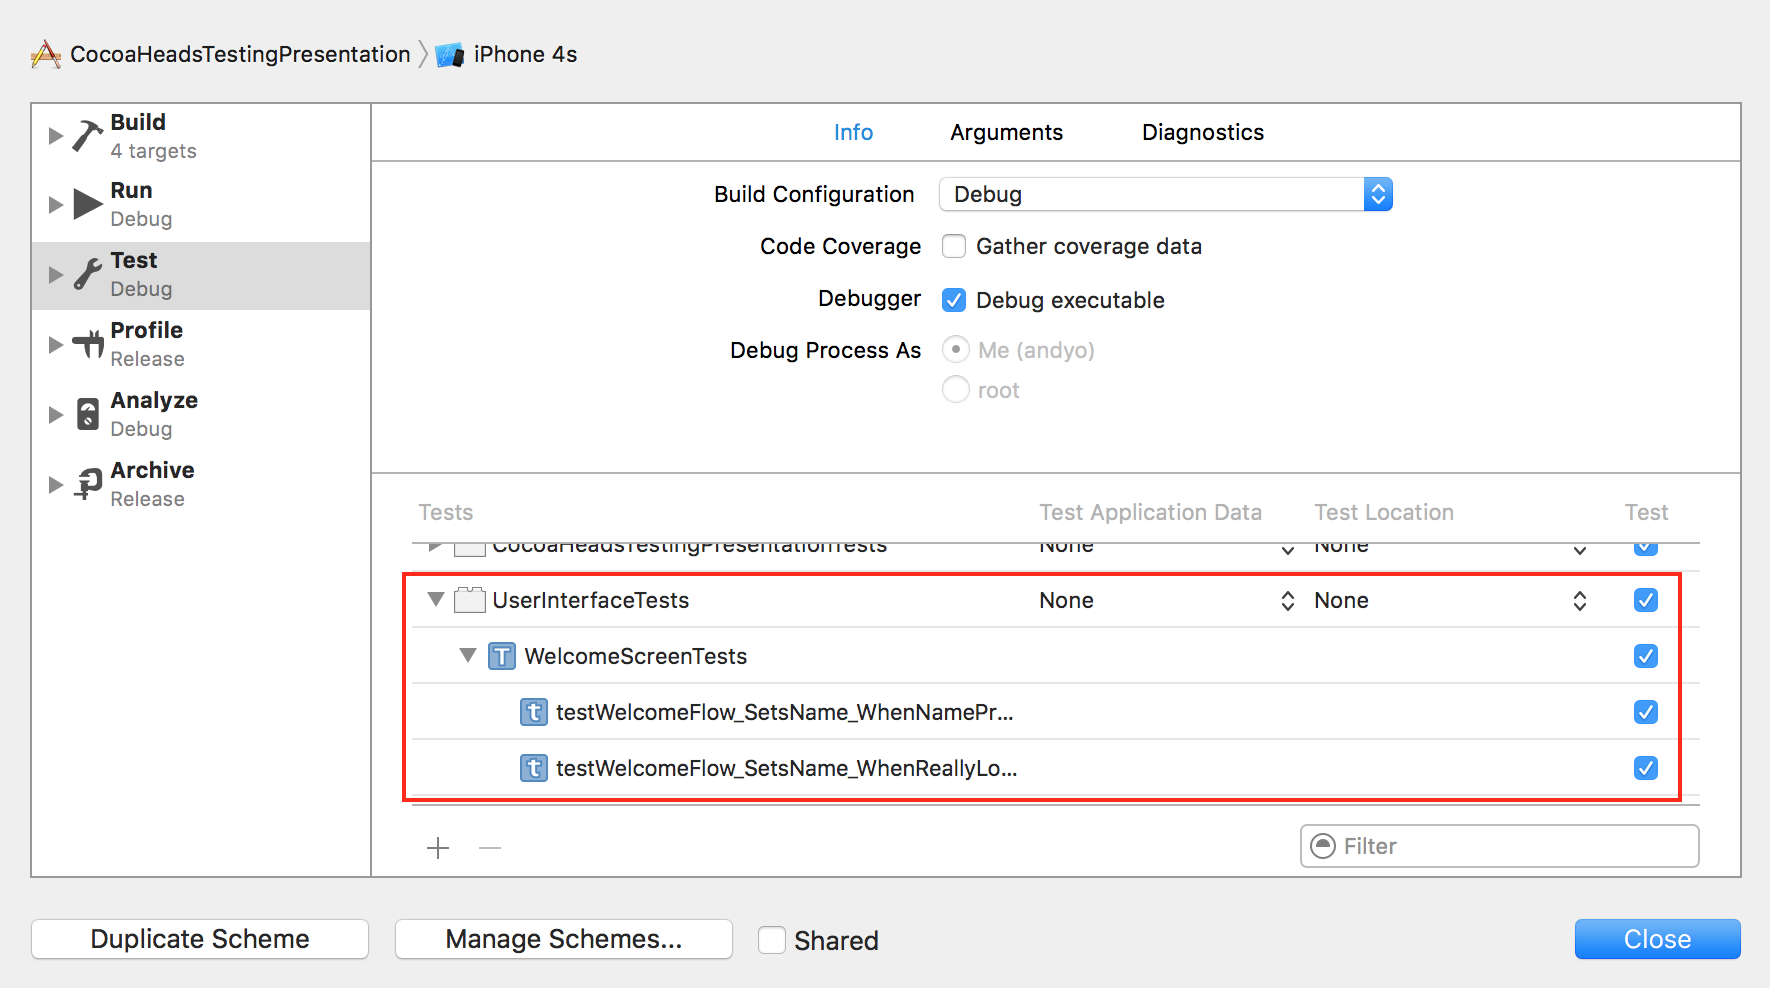
Disabling an entire target may not be as granular as you’d like. In fact, it’s pretty coarse. You can expand any of the targets in that list and see specific test classes, and then selectively enable or disable tests by test class. And if that isn’t granular enough, you can drill one level deeper and then selectively turn tests on or off by test method!

disable tests in Xcode

Give it a try.

xcodebuild in Xcode 8

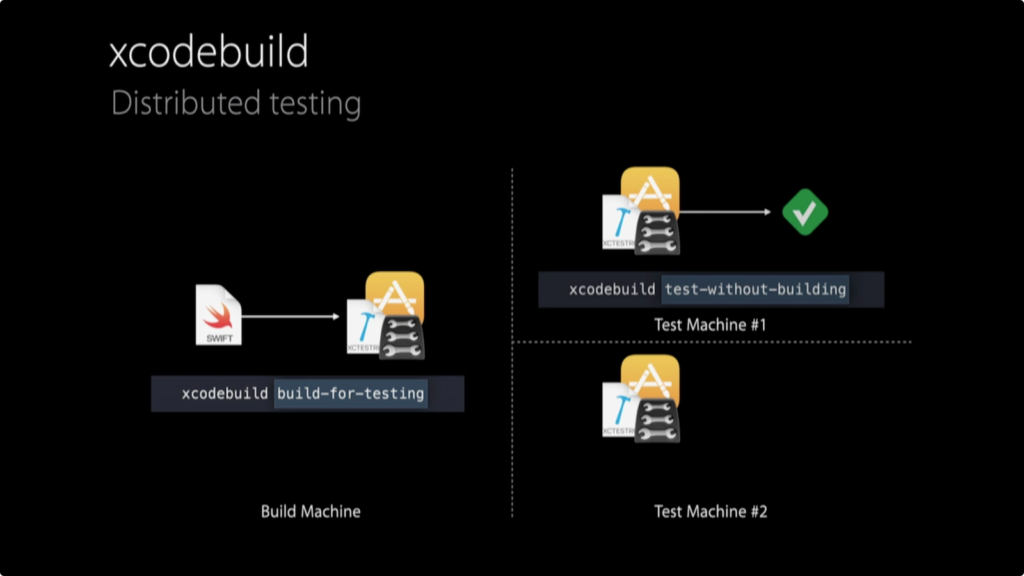
One thing I’m really excited for in Xcode 8 is that xcodebuild, the command line interface for building Xcode projects, was updated with similar functionality. With xcodebuild in Xcode 8 you can selectively pick which tests are built and executed. The use case is a little different for this tool. xcodebuild is often used as part of a continuous integration setup. With the new changes, you no longer need to compile tests to run them. xcodebuild will be able to run tests previously compiled. This means that you can compile your app and tests on one machine, and then distribute the load of testing it across other machines!

disable tests in Xcode

To build you app for testing, but not actually run the tests:

xcodebuild build-for-testing -workspace <path>
                             -scheme <name>
                             -destination <specifier>

Then you can use the produced bundle on different machines to run the tests without compiling! Combine that with the following steps for selectively running tests, and you’ll be able to distribute the execution of your test suite across different machines, in parallel!

To selectively specify which tests to run for xcodebuild:

xcodebuild test -workspace <path>
                -scheme <name>
                -destination <specifier>
                -only-testing:TestBundleA/TestSuiteA/TestCaseA
                -only-testing:TestBundleB/TestSuiteB
                -only-testing:TestBundleC

You can also specify tests to be skipped:

xcodebuild test -workspace <path>
                -scheme <name>
                -destination <specifier>
                -skip-testing:TestBundleA/TestSuiteA/TestCaseA

Don’t Abuse It

With great power comes great responsibility. Please don’t disable tests in Xcode, either from running or compiling, and leave it that way. That’s like driving without a seatbelt. Only do it if you are working in effort to improve your project. I know that working with a dusty and stale project isn’t the only time that it may be useful to disable tests in Xcode. I’m sure you’ll find your own reasons. I’d love to hear what they are.

Happy cleaning.

Xcode UI Tests Review

After writing Xcode UI tests for the first time today, immediately some things formed my initial impression. I wanted to pass along my Xcode UI tests review here on cleanswifter.com in effort to help educate others. For at least the pass year, if not longer, I’ve been using KIF for writing my functional UI tests. I love KIF. KIF is a third party, open source tool. That brings both benefits and drawbacks. Right off the bat, due to changes in the iOS 10/Xcode 8 Accessibility Inspector, KIF was broken in the beta versions of our tools. It was quickly fixed, and the impact was low, but it does make you wonder about what’s in store for the future when there are less people available to maintain it? This wasn’t the only thing that drove me towards Xcode UI tests for this project, but it was certainly a concern. I still love KIF and will continue to use it on other projects for the foreseeable future.

Background

Xcode UI tests build on an older tool from Apple called UI Automation. UI Automation enabled the iOS developer to write UI tests for their apps, and it was officially supported by Apple. “Officially supported” is certainly a loaded term, especially with UI Automation. The documentation was pretty bad. While there was some light guides on developing UI Automation tests, the actual API documentation had very little information. Combine that with the fact that the tests were written in JavaScript and run with Instruments (outside of Xcode), I was never happy with the tool.

Then last year, in WWDC 2015, Apple announced a reimagined solution for writing UI tests, Xcode UI tests. Here’s my Xcode UI tests review.

Pros

Officially Supported by Apple

This shouldn’t be underplayed. I’d live through a lot of crappy documentation just to use an officially supported tool. Apple officially supports Xcode UI tests, and that means a lot to me. It means you get WWDC videos on the subject. You get subtle integration with Xcode that only Apple could have access to. It means that your tests are less likely to break in future versions of iOS and Xcode.

Tests Written In Swift

Unlike UI Automation tests, Xcode UI tests can be written in either Objective-C or Swift. This could be the single best improvement. This means that you get everything from code completion, to compile-time syntax checking, to full Xcode integration.

Integration with Xcode

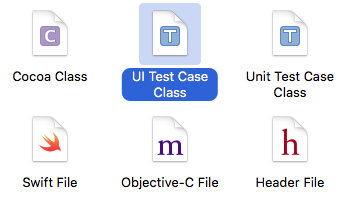
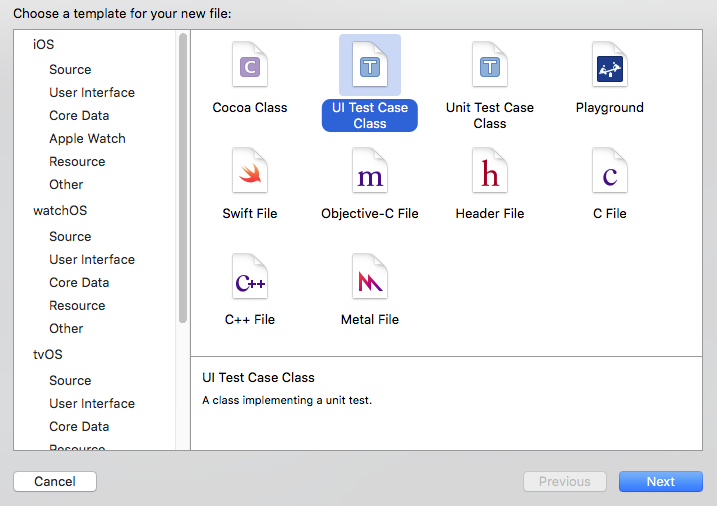
It was really annoying with UI Automation that you needed to switch to Instruments just to run your UI tests. Furthermore, JavaScript support in Xcode is pretty bad too, so one was left searching for a good editor experience when writing tests. Xcode UI tests change this. Now, the tests are first-class citizens right in the same IDE that we are using to write our actual application code. There’s even a “New File template” for Xcode UI tests.
Xcode UI Tests Review

XCTestCase subclasses

Buliding on the integration with Xcode, Xcode UI tests subclass XCTestCase just like unit tests. This means the full API of XCTest is available. Methods like XCTestAssertEqual and XCTestAssertTrue can be leveraged for writing your tests. Additionally, things like Scheme integration into your Test action enable execution of your Xcode UI tests when running tests, right from Xcode. Also, all those others niceties of running unit tests and the wonderful keyboard shortcuts can also be used with your Xcode UI tests.

Xcode UI Tests Review

UI Recording

UI Recording for Xcode UI tests is pretty cool. You can click a “Record” button in Xcode, and your app will launch in the simulator. Then, as you tap and navigate through your app, actual code will be generated in a test reflecting the path through your app that you took. It’s not perfect though, and more importantly, it doesn’t actually generate any assertions. Also, to prevent your test from being really brittle, you do need to consider breaking your tests up into cohesive chunks, and not one giant test.

Cons

Xcode UI tests aren’t without their flaws.

Documentation Is Still Light

The documentation for Xcode UI tests is still light. It’s not as bad as UI Automation was, but it’s still not perfect. KIF has been around for years. There are tons of stackoverflow.com questions and answers for it, the GitHub repository is mature, and you’ll find plenty of tutorials. I still can’t find an official piece of web-hosted API documentation for Xcode UI tests.

See the end of the article for a list of resources that I’ve been using as reference for Xcode UI testing.

Slow

Obviously all UI tests are going to be slow, regardless of whatever platform and tools you are using. Something uniquely slow jumps out at me about Xcode UI tests though. As a developer, you are required to call XCUIApplication().launch() from your tests when you want the app to launch. Each test must call this. The common pattern from what I’ve seen is to place the call to XCUIApplication().launch() in setUp(). setUp() is an overridden method from the XCTestCase base class, and is executed by the XCTest framework before each test. The thing is, XCUIApplication().launch() is REALLY SLOW. It triggers a fresh launch of your app. Now I guess this is useful from the context of resetting state in your app, but if you aren’t careful about structuring your tests, you could inadvertently introduce a lot of overhead in the speed of your tests.

iOS9 and Up

One of the main advantages of a suite of automated tests, regardless of the platform or type of tests, is to be able to run those tests in all places that your code base is supported. If you are writing a web application, this might be different browsers at different screen resolutions and window sizes. In iOS development, you can exponential benefit from running the same suite of tests across different devices of different form factors and different iOS versions. Unfortunately, Xcode UI tests put a major hamstring in this, in that they will only run on devices with iOS 9 and greater. To me, this is a big deal. We don’t all have the luxury of requiring the minimum iOS version to be the latest on the market. At the time of this post, iOS 9 is the latest iOS version, so that means I can’t even run my automated UI test suite on one version back, iOS 8. There have been so many times in my testing career in which UI tests identify and/or verify a bug that is present on one iOS version and not another. I’m really disappointed that Xcode UI tests don’t work on anything older than iOS 9. I guess I just have to hope for my applications, we’ll soon be able to require iOS 9 and greater.

XCUIElement != UIView

One of the most awesome things about KIF is the overlap between the KIF APIs and UIKit. When writing KIF tests, there are many methods like:

func waitForViewWithAccessibilityLabel(label: String!) -> UIView!

It’s so useful to have a UIView returned. This can be cast to more specialized subclasses that actually represent the object returned. And once you do that, you have full access to all the methods available on that object as defined in the actual code. Code like this is possible:

let saveButton = tester().waitForViewWithAccessibilityLabel("Save") as! UIButton
XCTAssertEqual(UIColor.blue(), saveButton.currentTitleColor)

This code is really useful because once you have a handle on the UIView, you can access so many APIs to verify behavior.

Unfortunately, there is no such intersection in Xcode UI tests. In Xcode UI tests, the object returned from similar method calls is a XCUIElement, and there’s no way to translate this to UIView (that I’ve found). As such, you are limited to the limited API available through Xcode UI tests and XCUIElement – none of which translates to a UIKit equivalent.

Final Thoughts

Despite the drawbacks, I’m still excited to use Xcode UI tests and I hope this Xcode UI tests review conveys that. It’s always fun to learn something new, and I think there are plenty of positives to using the tool. Have you used Xcode UI tests? What’s your Xcode UI tests review?

Happy cleaning.

Useful Resources

Three New Xcode 8 Testing Features

I’m in the middle of watching the Platforms State of the Union from WWDC 2016, and there were three new Xcode 8 testing features announced for Xcode 8 that are so exciting for me. They are all related to automated testing. Did you catch them? They were:

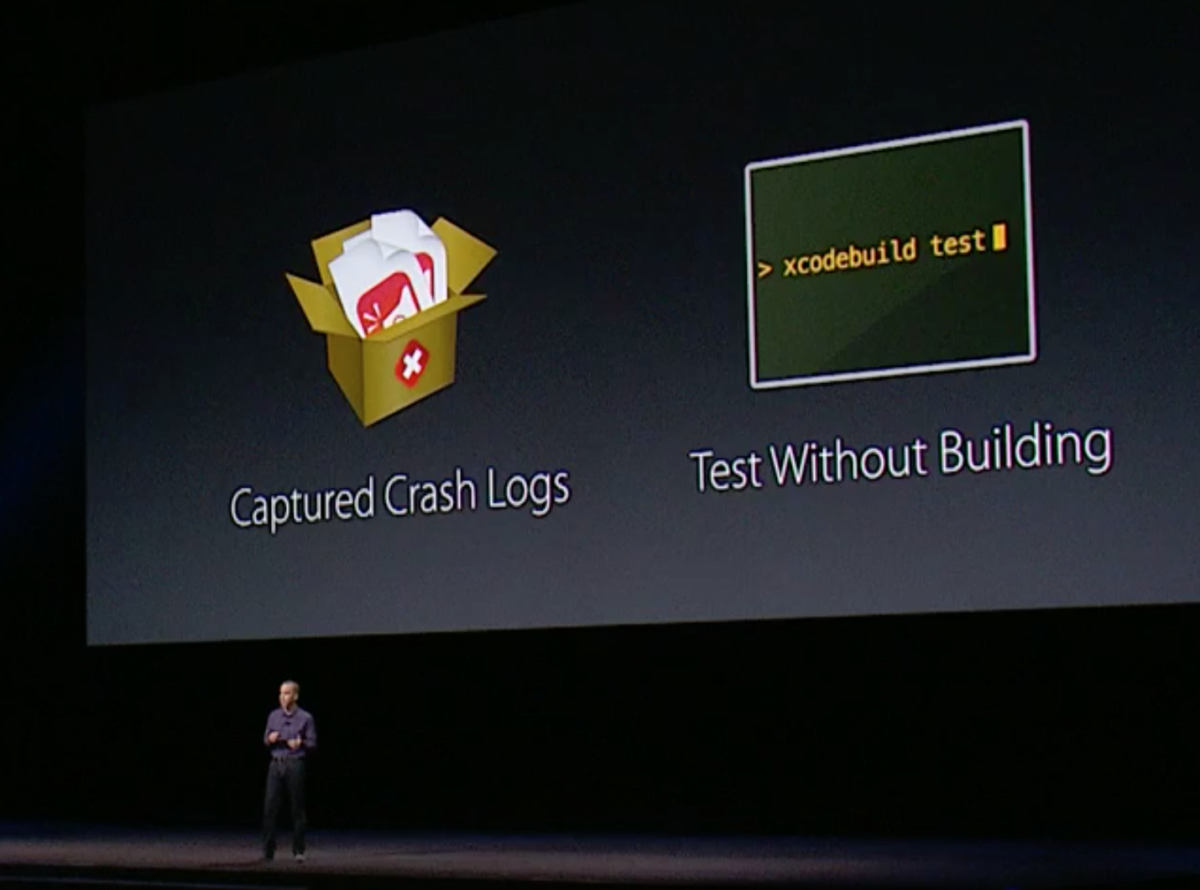
  1. Test crash logs are captured.
  2. xcodebuild can now run with pre-built tests.
  3. Indexing tests is now 50x faster.

Capturing Crash Logs

Have you ever ran a test, unit or UI, that triggered an app crash? It just happened to me today. I bug when animating a UIPresentationController surfaced on iOS8. Unfortunately, Xcode 7 doesn’t capture crash logs when a test triggers a crash. Instead, you have to go back, re-run the test several times, set some breakpoints, and hone in on the code that caused the crash. Luckily, this is changing in Xcode 8 as crash logs will automatically be captured when a test crashes. This means you’ll instantly know the offending line of code that caused the crash, and will be able to fix it that much faster, and move on to building other pieces of your app.

Running with Pre-Built Tests

There’s no way in Xcode 7 to provide a pre-built bundle of compiled tests to be executed against a new instance of your app. This is changing in Xcode 8 with the new xcodebuild. You’ll be able to specify a pre-compiled bundle of tests to be run against a freshly-compiled instance of your app. This has the potential to vastly reduce your compile times. By default (at least in Xcode 7), all of your tests will go into the same target. Each time you need to run your tests, your entire app and all the tests will be recompiled. This isn’t always efficient, especially if there are pieces of your app that haven’t changed. With this new feature of Xcode 8, you’ll be able segregate these tests on their own, so that they can still be run, but they don’t have to be compiled. Awesome.

Faster Test Indexing

Xcode 8 testing features

In Xcode 7, it’s really frustrating when I open a project in Xcode, and I have to wait several minutes for Xcode to finish “Indexing” my tests before I can run them. Have you experienced this? Seeing that I’m only working with a couple projects at a time, and the number of my tests creeps up slowly as I work on the projects, there really isn’t a huge cliff where performance all of a sudden drops off. Instead, one day, it will catch my eye that I noticed the indexing took longer than usual, or got in my way from actually performing a build. Then I wait. And eventually I can resume what I intended to do.

I was happy to hear that in Xcode 8, Apple has vastly improved the performance of this indexing process. In the Platforms State of the Union, it was stated that there is a 50x speed increase when tests are indexed. I can’t wait to experience this in my real projects during my day to day development.

It’s been great to watch how Apple’s support of automated testing has evolved over the years, and these three new Xcode 8 testing features continue that trend. You can measure tangible jumps in automated testing support with each WWDC since the iPhone’s original introduction. I can’t wait to see what else the rest of the week holds with regards to further enhancements to testing in Xcode 8.

Happy cleaning.

VIDEO: Building Tests

Chapter 4 of “Refactoring, Improving the Design of Existing Code by Martin Fowler, titled “Building Tests” provides an introduction to automated testing.

Here’s my perspective on the chapter:

Video Transcription:

Hey, what’s up everybody, it’s Andy from cleanswifter.com and I’m here to talk about the next chapter in Martin Fowler’s book, “Refactoring, Improving the Design of Existing Code.” You can buy that book in the Amazon Affiliate link in the description for this video. Last week we talked about chapter 3, Bad Smells in Code. In that chapter, Fowler presents some ideas of what to look for in your code to know it’s time to actually refactor it. This week, chapter 4, titled “Building Tests” Fowler actually talks about some techniques for introducing automated tests within your code. If you’ve been following any of my posts on cleanswifter.com, you’ll know I have a huge passion for automated testing of software. I was kind of excited for this chapter. When I finally got around to actually reading it, it fell short of what I was looking for. Fowler clarifies that this book is not about testing. And the reason I interpret he chose to include this chapter is to recognize the value of automated testing, especially in the time of refactoring. He doesn’t even mention test driven development in this chapter. Now, if you remember test driven development, one of the key steps to test driven development, is that final third step, to refactor everything you’ve done. Test driven development. You start off writing a failing test. Then you write the production code to make that test pass. And then you refactor. Now just bringing it back to Fowler’s book, he doesn’t actually talk about anything in detail with regard to test driven development. In fact I think he kind of just puts this chapter in here to recognize that when you go out to use this as a recipe book of refactoring, that you should keep in mind the value that can be adding tests throughout the process.

If you’re not familiar with automated testing, or haven’t been following any of my posts on <cleanswifter.com> is that remember, automated tests’ value is that it is code testing code. You can execute an entire test bed at the click of a button. Where your entire code base is tested in a matter of seconds. You do actually have to go through the effort of writing these tests, and that’s no small effort. Then you can make changes to the rest of your code base without risk of introducing new bugs. Additionally, when you find a bug, whether that’s reported through QA or an end user, you can first write a test to verify that bug, and then go fix the code to make sure the test passes, you can now have the confidence that that bug will never surface again in your code. For me, that’s really the value of adding tests, knowing that when I find a bug, I can write a test that verifies the bug does actually exist, then I can go fix that code, make the bug go away, make sure the test passes, then never again will that bug surface. This is especially relevant to the iOS development community because at a recent presentation I gave to the local CocoaHeads group here in Philly, there continues to be the majority of iOS development community that doesn’t write automated tests for their code. In that meeting we talked about some of the reasons this may be. For an independent or contract developer, that they don’t feel it is worth their time. Or hard to justify to their client, whether that is them for their own product, or someone else paying them for their time), that it is worth the time to write tests. It’s a 1:1 ratio, for every hour you spend writing production code, you’ll need to spend an hour writing test code. I think until you learn the lesson the hard way, and then see the value of automated tests correcting that, you’ll never be able to justify the cost. It’s like a catch-22, because if you never try it you’ll never be able to justify it to yourself. On the otherhand, if you’re going to wait to see the value before you try it, you’re never going to try it. I think one takeaway from this chapter, that even Fowler calls out, is that specifically, go try to write a couple tests. Don’t spend a lot of time writing an entire big test suite for your entire application, worrying about every edge case, and instead focus on just 1 or 2 tests that are going to add value, and I guarantee you that sometime down the road, you will have your butt saved by the fact that you had automated tests. You will write automated tests, and sometime down the road they will fail because some code change you made introduced an unexpected, but tested for bug. You’ll be happy since you caught the bug and not an end user.

Fowler clarifies the difference between unit and functional tests. Again, I have a ton of documentation on <cleanswifter.com> that helps differentiate and define each of these for iOS development. For unit testing, you’ll be using XCTest as provided by Apple. It’s code that tests other code at the smallest level. You’ll write a test method for each path of conditional code in another class. It requires intimate knowledge of the code you’re testing. Consider it white box testing. You can see the code, to know the conditional paths, and know how to test it. This is in contrast to functional testing. Functional testing is where you would call it black box testing. You don’t have intimate knowledge of the code. Instead, all you’re doing is testing the code from the outside in. This means that you are simulating an end user swiping, tapping, and navigating your app. There are a bunch of tools out there to do this. Apple’s provided tool is called Xcode UI Tests and I personally use a different tool, called KIF. It stands for Keep-It-Functional. It’s open source. Some of the benefits I like of KIF are that it is mature, been in the community for years, you can write your tests in either Objective-C or Swift. I haven’t spent enough time with Xcode UI Tests to know it’s pros and cons, but I did use its predecessor, UI Automation which was Javascript driven and a poorly documented API. It’s soured me on Apple’s provided functional testing tools, so that’s why I haven’t gone back yet. I’ll do that soon and write about it on <cleanswifter.com>.

Another important thing to keep in mind when you write your first test, regardless of whether you are doing TDD or not, and in fact if you are just starting out I don’t recommend jumping right into TDD. But one thing to keep in mind when writing your tests is that you want to see that test fail when you expect it to fail. For example, say you are writing a test for a method that adds numbers. You want to first verify that adding 1 and 2, never returns anything other than 3. Otherwise, you won’t have the confidence that when someting actually goes wrong, that test will actually fail. That gives you a baseline assurance that that test is actually providing that quality check you’re looking for. And trust me, I’ve seen plenty of cases where I’ve written a test and not done this, only to find out that it wasn’t actually verifying, what I thought it was verifying.

It was a pretty short chapter, chapter 4 in Martin Fowler’s book, “Refactoring” where he just introduces the concept of tests. If you’re watching this video and haven’t checked out anything I’ve posted on <cleanswifter.com> around automated tests. And if you’re not writing automated tests for your iOS apps, you should definitely go try that out.

Looking ahead, I’m really excited for the rest of this book. Chapter 4 is the end of the preamble before the actual list of refactoring recipes. Going forward, week by week, I’m going to make a screencast of that refactoring, showing it in action with Swift code, and post it on <cleanswifter.com>. It will demonstrate the transformation from smelly code to nice clean code. That will be done in a screencast where you can go back and watch. The first refactoring we’ll try in the book is Extract Method. It’s a really easy one, but also a really effective one. I’m looking forward to showing you that. Check back next week for that. In the meantime, be sure to checkout <cleanswifter.com>.

Happy cleaning.