Final By Default, Yes Please

Two worlds collided for me this week. There has been a ton of Internet chatter about Swift proposal SE-0117. Officially it’s titled “Allow distinguishing between public access and public overridability” but a lot of people are simply summing it up as changing classes and their members to be final by default. This is the opposite of Swift 1, 2, and 3, as well as Objective-C and Java. Just as I was trying to keep up with the Internet discussion about this proposal, I came across Charles Scalfani’s article on Medium “Goodbye, Object Oriented Programming.” I could relate to every single point he made in that article, the first of which is that the biggest advertised benefit of object oriented programming, inheritance, is also its biggest shortcoming. After having professionally written object orient code for over 10 years, I absolutely agree. The thing is, object oriented programming is part of me.

Why Is Inheritance Bad?

In object oriented programming, inheritance is one of the fundamental principles that define the programming model. With inheritance, you can define one object to “inherit” from another object. This means that the child object has all the behavior of the parent object, as well as any new behavior it defines. It can also override behavior from the parent class when needed or desired. In his article, Charles Scalfani both gives a great description as to what inheritance is, with simple code examples as well. Take a look if you’re unfamiliar with inheritance. He also gives a perspective on why inheritance bad that I totally relate to. In my own mind, the most dominant piece of resentment against inheritance is the tight coupling that is created between parent and child class. The thing is, it’s so easy to think about classes in terms of inheritance. It’s so easy to understand that a square is also a rectangle, or that a dog is an animal. My mind naturally thinks like this. And back to the foundations of my programming education with C++, I was taught to think in terms of object oriented principles, and this means to look out for relationships between “things” that can relate to each other with “is a” relationships.

Often it’s easy to initially construct a design that appears to creatively leverage inheritance to remove redundant code and take advantage of that “is a” relationship. The thing is, as you maintain your code, make enhancements in response to new end user features, perform refactorings to clean up other pieces of code, you’ll quickly find the need to change either the parent and/or child classes in the inheritance relationship. This is where you will run into trouble. It will not be clear how changes to the parent class may affect the child class. On the flip side, it will not be clear how changes to the child class may violate assumptions made in the parent class. And in some cases, desired changes simply won’t be possible as it would break the “is a” relationship that inheritance brings.

Why Will Final By Default Be Better?

Not only is it easy to simply think in terms of inheritance when mapping out objects in your object oriented system, but both the languages and frameworks we use make it so easy to continue applying this anti-pattern. (Yes, I just went there. Okay, well not necessarily an anti-pattern, but a sledgehammer for all nails, even tiny finishing nails. Get it? Just because you have a tool doesn’t mean it’s appropriate for all jobs.) I’m not going to accuse all code authors as having not thought through the ramifications of inheritance, but think about it for a minute from the perspective of any class you might write. Is thinking about use of a final keyword in the forefront of your mind to apply to the class or its members in order to prevent subclassing in times you don’t intend for it? I know in my experience, both in code I’ve written, as well as classes I’ve collaborated with others on, we almost never discuss whether it might be appropriate for others to subclass the given class, in order to correctly designate constructs as final. The conversation simply doesn’t happen, and thus the object is left open to be subclassed, either by us later on, or future team members, or in the case of open source code, or frameworks distributed to others, those consumers of the code.

The fact of the matter is, since this consideration hasn’t happened, there’s no guarantees that the class will work at all as a super class. What about as a super super class? Or a super super super class? Inappropriate subclassing could happen, totally be accident, and fast forward 1000 lines of code later, and you’re stuck with this incredibly tightly wound nest of coupled spaghetti code. Composition over inheritance is nothing new. By changing the fundamentals of Swift such that classes and their members will be final by default will go a long way to prevent accidental subclassing. This decision in the language will facilitate forethought at system design time to think and ponder the question, “Is there any reason for this class to be subclassed?” And only if the answer is yes, may you then use the proposed declaration modifier open indicating that the class or class member may be overriden.

To The Future, and Beyond

Honestly, it’s a struggle to continue to wrestle my mind away from object oriented programming techniques. Like I already wrote, these are fundamentals driven into my brain since adolescence. Not only that, but it’s also very naturally to look for patterns between “things” in the manner that inheritance conveys, and then program them that way. The thing is, as easy as this is to do, I’ve also seen how ugly it can get. And just like Charles Scalfani proposes, it’s a false premise to think that inheritance leads to maintainable code. What side of the fence are you on with this debate?

Happy cleaning.

As a bonus, if you’ve gotten this far, I’m reminded of a cheesy programmer joke:

What’s the object oriented way to get rich?

Inheritance

Swift Playground Books

Swift Playground Books are going to usher in an entirely new interactive experience to learning a programming language. There have been various creative ways to learn new programming languages for years, but nothing like what Swift Playground Books will provide. I see two key factors that will enable Swift Playground Books to revolutionize the way that programming languages are learned, while also making Swift mega popular:

  1. Apple controls the whole ecosystem – iPad, IDE, and language. Well ya okay technically Swift is open source, but at least Apple controls the hardware and the IDE. The hardware being the iPad, and the IDE being the Swift Playgrounds app. Just like they’ve done for years, by controlling the whole ecosystem, Apple gets to ensure a top notch experience.
  2. iPad learning – Learning on a tablet, an iPad to be specific, will appeal to a much wider audience in a much wider set of circumstances. Ya the iPad has lost some appeal lately, but despite that, I foresee huge sections of people in new age groups using Swift Playground Books to learn the Swift programming language (not just “kids”).

Why Playground Books?

The new iOS 10 iPad app, Swift Playgrounds, is pretty cool on its own. Awesome autocompletion, touching and dragging brackets around, immediate feedback on written code, and more all contribute to a whole new way of programming. I’m not going to rehash the app in detail, this blog has a nice summary, and I also suggest watching the WWDC 2016 session “Introducing Swift Playgrounds”. (The last 10 minutes are super cool where a Sphero robot is controlled from an iPad, live on stage).

We can’t actually create apps in Swift Playgrounds yet, so until then, Swift Playgrounds is pretty much designated an exploratory and educational tool, and I’m okay with that. Regarding informal exploration of the Swift language, I see a lot of this happening in one-off playgrounds themselves. A standalone playground file is the perfect resource to try things out, learn about a specific topic, and just have fun. Swift Playground Books though is a giant step forward in organized and collated learning. Rather than just consuming a single playground, Swift Playground Books allow authors to aggregate content into an actual book-like, yet interactive experience.

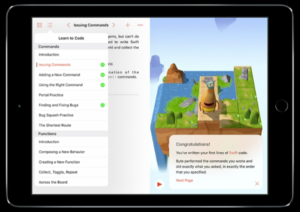
Playground Books support a nested chapter and page structure, just like a real book. Additionally, there’s a cool new type of “page” called a cut-scene. Imagine that you complete a chapter in the book, and as a reward get to watch a little animation celebrating your victory, while also setting up the next challenge. As an author, you can also programmatically designate assessments on a chapter – did the user complete it successfully? This shows up in the Table of Contents as a green checkmark.

swift playground books

Striving to get all the green checkmarks like that are what make me so prone to get sucked into compulsively completing something, and in this case learning. 🙂

In addition to the assessments, there is built in support for the following:

  • Glossary – You can link terms at the tap of a finger.
  • Regions – Annotate pieces of code so that the user literally only needs to fill in specific parts to complete the challenge.
  • Shortcuts – Control what shows in the Helper Bar.
  • Hints – After the user has provided a response, if it isn’t quite correct you can code a “hint” to be displayed.
  • Resetting – The reader can either reset a page, or the entire document to start all over.
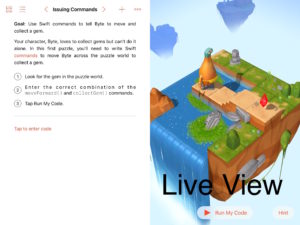
  • Live View – You can trigger a Live View to interact with that takes up half the screen. The idea is that the user writes code on the left hand side of the window – the Contents View, while interactive results are displayed on the right hand side – the Live View.

swift playground books

(There are actually some specific APIs to use in order to pass data back and forth between the Contents View and the Live View. See PlaygroundLiveViewMessageHandler, PlaygroundValue, and PlaygroundRemoteLiveViewProxy.

Playground Book Format

Swift Playground Books are easy to create. They are literally just a folder, with a particular structure, and a couple configuration files. Check Apple’s official documentation for details on setting up the directory and file structure, it’s dead simple. And since it’s all just text and folders, it can be version managed just like any other code or project!

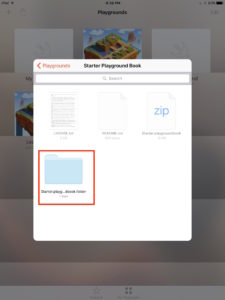
Despite it being simple, I’ve had some issues getting it actually working on iOS 10 Developer Beta 1 and 2. For some reason, Swift Playgrounds isn’t recognizing my Swift Playground Books as something it can read. Instead, it just lets me browse the directory hierarchy, never actually opening it as a Swift Playground Book.

swift playground books

This folder should be detected as a Swift Playground Book that may be opened. Apple even recognizes the .folder extension in their documentation as something expected, and something that should be there. Maybe it’s just too early of a beta, or maybe I’m having problems since I’m trying to create these on OS X El Capitan rather than Sierra? I’ll continue to dig and post and update when I figure it out.

Playground Book Store?

One thing on my mind is whether Apple will provide some sort of store front for the Swift Playground Books. I could see significant effort and time spent on developing complex books that could provide hours of entertainment and learning for end users through discovery within a Swift Playground Book. It’s certainly a ripe business opportunity. Right now, there are only two tabs in the Swift Playground app: Featured, and My Playgrounds. I wonder if they will eventually create a store front to purchase Swift Playground Books through? And if so, will be be protected my DRM at all?

Learning More

I have so many ideas for content to create and distribute in Swift Playground Books. And besides that, I can’t wait to sit on the couch with my kids and reveal the amazing world of computer programming to them through Swift Playgrounds. How about you?

Happy cleaning.

Xcode UI Tests Review

After writing Xcode UI tests for the first time today, immediately some things formed my initial impression. I wanted to pass along my Xcode UI tests review here on cleanswifter.com in effort to help educate others. For at least the pass year, if not longer, I’ve been using KIF for writing my functional UI tests. I love KIF. KIF is a third party, open source tool. That brings both benefits and drawbacks. Right off the bat, due to changes in the iOS 10/Xcode 8 Accessibility Inspector, KIF was broken in the beta versions of our tools. It was quickly fixed, and the impact was low, but it does make you wonder about what’s in store for the future when there are less people available to maintain it? This wasn’t the only thing that drove me towards Xcode UI tests for this project, but it was certainly a concern. I still love KIF and will continue to use it on other projects for the foreseeable future.

Background

Xcode UI tests build on an older tool from Apple called UI Automation. UI Automation enabled the iOS developer to write UI tests for their apps, and it was officially supported by Apple. “Officially supported” is certainly a loaded term, especially with UI Automation. The documentation was pretty bad. While there was some light guides on developing UI Automation tests, the actual API documentation had very little information. Combine that with the fact that the tests were written in JavaScript and run with Instruments (outside of Xcode), I was never happy with the tool.

Then last year, in WWDC 2015, Apple announced a reimagined solution for writing UI tests, Xcode UI tests. Here’s my Xcode UI tests review.

Pros

Officially Supported by Apple

This shouldn’t be underplayed. I’d live through a lot of crappy documentation just to use an officially supported tool. Apple officially supports Xcode UI tests, and that means a lot to me. It means you get WWDC videos on the subject. You get subtle integration with Xcode that only Apple could have access to. It means that your tests are less likely to break in future versions of iOS and Xcode.

Tests Written In Swift

Unlike UI Automation tests, Xcode UI tests can be written in either Objective-C or Swift. This could be the single best improvement. This means that you get everything from code completion, to compile-time syntax checking, to full Xcode integration.

Integration with Xcode

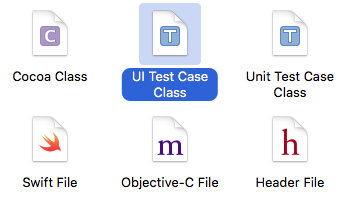
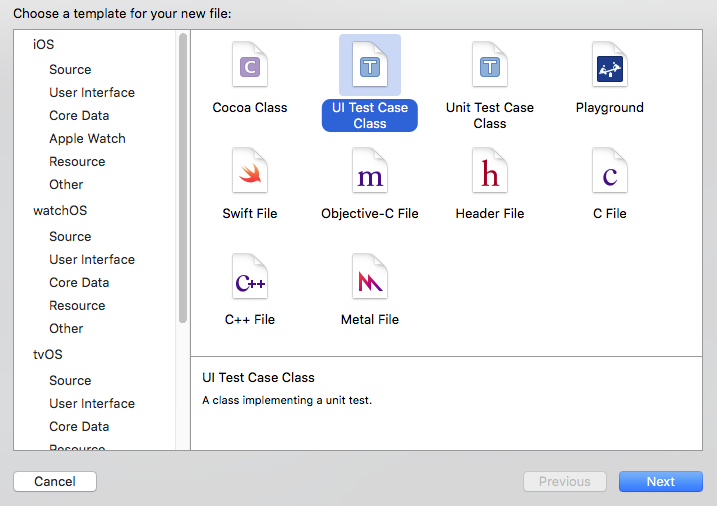
It was really annoying with UI Automation that you needed to switch to Instruments just to run your UI tests. Furthermore, JavaScript support in Xcode is pretty bad too, so one was left searching for a good editor experience when writing tests. Xcode UI tests change this. Now, the tests are first-class citizens right in the same IDE that we are using to write our actual application code. There’s even a “New File template” for Xcode UI tests.

Xcode UI Tests Review

XCTestCase subclasses

Buliding on the integration with Xcode, Xcode UI tests subclass XCTestCase just like unit tests. This means the full API of XCTest is available. Methods like XCTestAssertEqual and XCTestAssertTrue can be leveraged for writing your tests. Additionally, things like Scheme integration into your Test action enable execution of your Xcode UI tests when running tests, right from Xcode. Also, all those others niceties of running unit tests and the wonderful keyboard shortcuts can also be used with your Xcode UI tests.

Xcode UI Tests Review

UI Recording

UI Recording for Xcode UI tests is pretty cool. You can click a “Record” button in Xcode, and your app will launch in the simulator. Then, as you tap and navigate through your app, actual code will be generated in a test reflecting the path through your app that you took. It’s not perfect though, and more importantly, it doesn’t actually generate any assertions. Also, to prevent your test from being really brittle, you do need to consider breaking your tests up into cohesive chunks, and not one giant test.

Cons

Xcode UI tests aren’t without their flaws.

Documentation Is Still Light

The documentation for Xcode UI tests is still light. It’s not as bad as UI Automation was, but it’s still not perfect. KIF has been around for years. There are tons of stackoverflow.com questions and answers for it, the GitHub repository is mature, and you’ll find plenty of tutorials. I still can’t find an official piece of web-hosted API documentation for Xcode UI tests.

See the end of the article for a list of resources that I’ve been using as reference for Xcode UI testing.

Slow

Obviously all UI tests are going to be slow, regardless of whatever platform and tools you are using. Something uniquely slow jumps out at me about Xcode UI tests though. As a developer, you are required to call XCUIApplication().launch() from your tests when you want the app to launch. Each test must call this. The common pattern from what I’ve seen is to place the call to XCUIApplication().launch() in setUp(). setUp() is an overridden method from the XCTestCase base class, and is executed by the XCTest framework before each test. The thing is, XCUIApplication().launch() is REALLY SLOW. It triggers a fresh launch of your app. Now I guess this is useful from the context of resetting state in your app, but if you aren’t careful about structuring your tests, you could inadvertently introduce a lot of overhead in the speed of your tests.

iOS9 and Up

One of the main advantages of a suite of automated tests, regardless of the platform or type of tests, is to be able to run those tests in all places that your code base is supported. If you are writing a web application, this might be different browsers at different screen resolutions and window sizes. In iOS development, you can exponential benefit from running the same suite of tests across different devices of different form factors and different iOS versions. Unfortunately, Xcode UI tests put a major hamstring in this, in that they will only run on devices with iOS 9 and greater. To me, this is a big deal. We don’t all have the luxury of requiring the minimum iOS version to be the latest on the market. At the time of this post, iOS 9 is the latest iOS version, so that means I can’t even run my automated UI test suite on one version back, iOS 8. There have been so many times in my testing career in which UI tests identify and/or verify a bug that is present on one iOS version and not another. I’m really disappointed that Xcode UI tests don’t work on anything older than iOS 9. I guess I just have to hope for my applications, we’ll soon be able to require iOS 9 and greater.

XCUIElement != UIView

One of the most awesome things about KIF is the overlap between the KIF APIs and UIKit. When writing KIF tests, there are many methods like:

func waitForViewWithAccessibilityLabel(label: String!) -> UIView!

It’s so useful to have a UIView returned. This can be cast to more specialized subclasses that actually represent the object returned. And once you do that, you have full access to all the methods available on that object as defined in the actual code. Code like this is possible:

let saveButton = tester().waitForViewWithAccessibilityLabel("Save") as! UIButton
XCTAssertEqual(UIColor.blue(), saveButton.currentTitleColor)

This code is really useful because once you have a handle on the UIView, you can access so many APIs to verify behavior.

Unfortunately, there is no such intersection in Xcode UI tests. In Xcode UI tests, the object returned from similar method calls is a XCUIElement, and there’s no way to translate this to UIView (that I’ve found). As such, you are limited to the limited API available through Xcode UI tests and XCUIElement – none of which translates to a UIKit equivalent.

Final Thoughts

Despite the drawbacks, I’m still excited to use Xcode UI tests and I hope this Xcode UI tests review conveys that. It’s always fun to learn something new, and I think there are plenty of positives to using the tool. Have you used Xcode UI tests? What’s your Xcode UI tests review?

Happy cleaning.

Useful Resources

iOS 10 UICollectionView Highlights

Did you get a chance to watch the WWDC 2016 session, “What’s New in UICollectionView in iOS10″ yet? I watched it today. There is some good stuff in the session, and I want to recap it for you in this post. The session is broken into three segments that capture everything that’s new for an iOS 10 UICollectionView :

Improvements to:

  • Smooth Scrolling
  • Self-Sizing Cells
  • Interactive Reordering

There is a special bonus fourth segment as well, but I’ll save that for later.

Smooth Scrolling Enhancements

In iOS 10, there are several enhancements that will improve the performance of your UICollectionViews – some of which you will manually need to leverage, and some you will get for free. Before dropping into the new features of iOS 10 UICollectionView, the presenter gives a nice overview of what it means to “drop frames” and what it’s bad.

Don’t Drop Frames

In order for your app to have “buttery smooth” performance, a hallmark of iOS apps, you must strive for app animation that performs at 60 frames per second. This means that a given frame of the user interface must be displayed in less than 16.67ms in order for the animation to appear “smooth.” Otherwise, when the frame rate drops lower than that, it’s apparent to the user in the form of a choppy animation. The easiest way to make the frame rate drop, is to do things like add blocking, long running method calls on the main thread in the middle of your animation. Here’s an in-depth article from Facebook on how they measure and ensure a highly performant news feed in their app.

Less Aggressive Loading and Unloading Cells

In a UICollectionView, the lifecycle of a cell is as follows:

  1. prepareForReuse
  2. cellForItemAtIndexPath – The heavy lifting of populating your cell’s data from your model happens here.
  3. willDisplayCell – Lightweight preparation for when you cell is about to go onscreen.
  4. Cell comes on screen, and as scrolling continues starts to move offscreen.
  5. didEndDisplayingCell

In general, this flow is unchanged between iOS 9 and iOS 10. The different is when these methods are called. Apple has optimized when willDisplayCell is called. In iOS 10, it’s now called at the very last minute before the cell goes on screen. This helps to balance out the CPU performance in drawing cells, but not executing that code too early. Additionally, another enhancement Apple has made in iOS 10 UICollectionView is that cells are not put on the reuse queue as aggressively as in the past. Instead, after a cell leaves the screen, it is kept around a little longer in case the user decides to swipe the cell back on screen.

Cell Pre-fetching

Apple also enhanced UICollectionView such that by default, cells are pre-fetched. This means that you can get even earlier awareness of when data for a cell is needed such that you can retrieve it. For example, if you are building a UICollectionView full of remote images. Leveraging the UICollectionViewDataSourcePrefetching, UIKit will call:

collectionView(_:prefetchItemsAt:)

to allow for you to start downloading the images with Grand Central Dispatch of an NSOperationQueue such that when the cells containing the images comes on screen, the images will be downloaded and ready to go.

If you need to, you can opt out of this behavior by setting isPrefetchingEnabled to false, but why would you?

As part of pre-fetching, realizing that cellForItemAtIndexPath may be called for cells that never end up coming on screen – because the user stopped scrolling before they were shown. Also, it’s really important that you keep the work in willDisplayCell and didEndDisplayingCell really light. All the heavy lifting goes in cellForItemAtIndexPath. Apple described pre-fetching as an “adaptive technology” which I assume to mean that it’s level of “predictiveness” varies by use case for a given application.

And as bonus, this exact same pre-fetching API is also available on UITableView via UITableViewDataSourcePrefetching.

Self Sizing Enhancements

Prior to iOS 10, estimatedItemSize has existed on UICollectionViewFlowLayout in order for you to provide an estimate size for the items in your collection view. Sometimes it’s hard to predict the size of items in your UICollectionView. Realizing this, Apple has introduced automatic item sizing for your UICollectionViewFlowLayout. Simple set the item size to the constant UICollectionViewFlowLayoutAutomaticSize and UIKit will make smart guesses based on past measurements of your items in order to automatically predict item sizes for future items.

According to Apple:

It will keep a running tally of all the cells it’s already sized, and use that to influence its future sizing estimates…making the sizing much more accurate…leading to better performance and a more accurate layout.

Interactive Reordering Enhancements

Reordering a iOS 10 UICollectionView has also undergone some improvements as well. Prior to iOS 10, if you didn’t already know (and I only learned recently), it’s really easy to enable reordering on your UICollectionView – in your UICollectionViewDelegate, simply implement:

func collectionView(_ collectionView: UICollectionView, targetIndexPathForMoveFromItemAt originalIndexPath: IndexPath, toProposedIndexPath proposedIndexPath: IndexPath) -> IndexPath

There are some additional methods on UICollectionView that you should take a peak at too that enable you to add more advanced animation and update your data model if appropriate.

New in iOS 10 UICollectionView is the ability to reorder with paging!

collectionView.isPagingEnabled = true

That’s it! The presenter describes it as an interaction that feels just like moving icons between pages on your home screen.

The Bonus

Finally, the big reveal happens. It’s as if this is such exciting news worthy of a WWDC reveal, but there is no other session appropriate for it. The presenters reveal that pull to refresh will be supported on:

  • UIScrollView
  • UITableView
  • UICollectionView

If it wasn’t awesome enough that UIScrollView and UICollectionView got the control, but you are also no longer constrained to needing a UITableViewController if you want an out of the box pull to refresh control (which was a pretty annoying prior limitation in my opinion).

Final Thoughts

I have plans to do an in-depth example of how to use pre-fetching with Grand Central Dispatch in order load remote images in a UITableView sometime in the future. I recently ran into a problem in one of my apps that this exact thing would have solved. Essentially I had cells in a UITableView that were of varied height based on a remote UIImage being loaded. I ended up needing to set a static height on the cells to achieve a high frame rate and scaling the images, instead of properly sizing the cells according to the natural height of the image. It wasn’t the end of the world, but there was some extra white space in the cells that wasn’t needed. How do you plan on using these new changes to iOS 10 UICollectionView?

Happy cleaning.

Three New Xcode 8 Testing Features

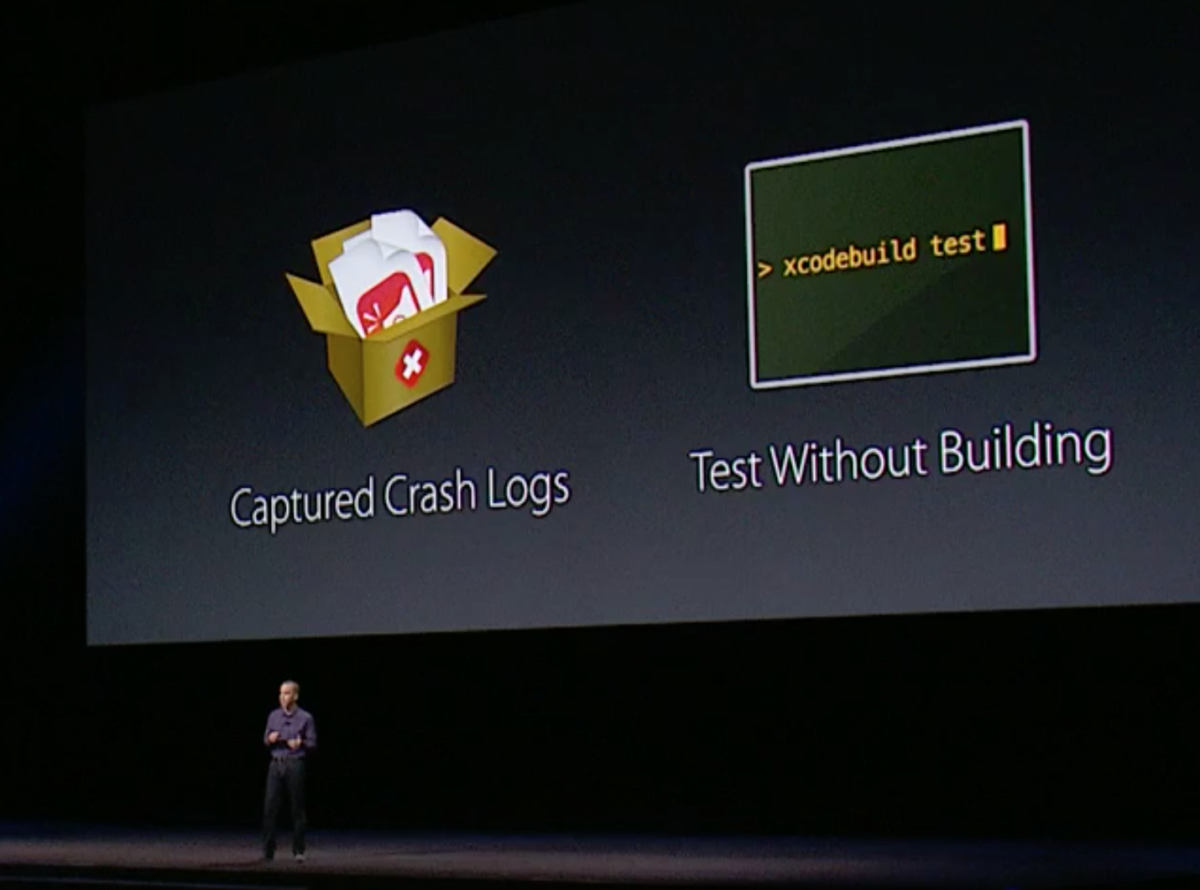
I’m in the middle of watching the Platforms State of the Union from WWDC 2016, and there were three new Xcode 8 testing features announced for Xcode 8 that are so exciting for me. They are all related to automated testing. Did you catch them? They were:

  1. Test crash logs are captured.
  2. xcodebuild can now run with pre-built tests.
  3. Indexing tests is now 50x faster.

Capturing Crash Logs

Have you ever ran a test, unit or UI, that triggered an app crash? It just happened to me today. I bug when animating a UIPresentationController surfaced on iOS8. Unfortunately, Xcode 7 doesn’t capture crash logs when a test triggers a crash. Instead, you have to go back, re-run the test several times, set some breakpoints, and hone in on the code that caused the crash. Luckily, this is changing in Xcode 8 as crash logs will automatically be captured when a test crashes. This means you’ll instantly know the offending line of code that caused the crash, and will be able to fix it that much faster, and move on to building other pieces of your app.

Running with Pre-Built Tests

There’s no way in Xcode 7 to provide a pre-built bundle of compiled tests to be executed against a new instance of your app. This is changing in Xcode 8 with the new xcodebuild. You’ll be able to specify a pre-compiled bundle of tests to be run against a freshly-compiled instance of your app. This has the potential to vastly reduce your compile times. By default (at least in Xcode 7), all of your tests will go into the same target. Each time you need to run your tests, your entire app and all the tests will be recompiled. This isn’t always efficient, especially if there are pieces of your app that haven’t changed. With this new feature of Xcode 8, you’ll be able segregate these tests on their own, so that they can still be run, but they don’t have to be compiled. Awesome.

Faster Test Indexing

Xcode 8 testing features

In Xcode 7, it’s really frustrating when I open a project in Xcode, and I have to wait several minutes for Xcode to finish “Indexing” my tests before I can run them. Have you experienced this? Seeing that I’m only working with a couple projects at a time, and the number of my tests creeps up slowly as I work on the projects, there really isn’t a huge cliff where performance all of a sudden drops off. Instead, one day, it will catch my eye that I noticed the indexing took longer than usual, or got in my way from actually performing a build. Then I wait. And eventually I can resume what I intended to do.

I was happy to hear that in Xcode 8, Apple has vastly improved the performance of this indexing process. In the Platforms State of the Union, it was stated that there is a 50x speed increase when tests are indexed. I can’t wait to experience this in my real projects during my day to day development.

It’s been great to watch how Apple’s support of automated testing has evolved over the years, and these three new Xcode 8 testing features continue that trend. You can measure tangible jumps in automated testing support with each WWDC since the iPhone’s original introduction. I can’t wait to see what else the rest of the week holds with regards to further enhancements to testing in Xcode 8.

Happy cleaning.

Xcode Extensions- Your Life Will Change

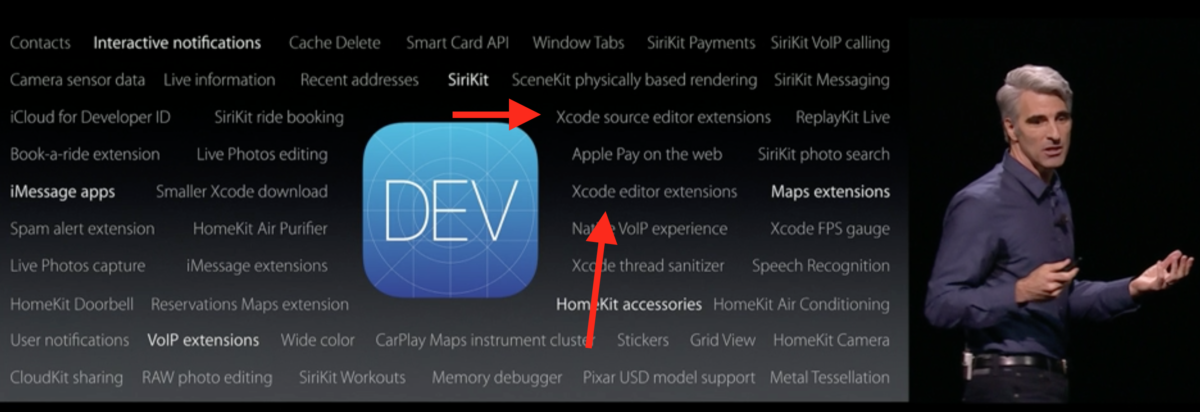
Did you get a chance to watch the WWDC 2016 Keynote or Platforms State of the Union today? Or were you lucky enough to be there in person? I wanted to bring to your attention what I believe will be one of the most impactful changes to your life as a developer, Xcode Extensions. In fact, Apple didn’t actually even mention it aloud during the keynote. You had to be closely watching the slides. Xcode Extensions appeared in the slide that Craig Federighi presented that was tag-cloud like in showing off all the new developer features available for iOS10. You can see it at minute mark 100:48. Xcode Extensions are also featured prominently on the What’s New page for Xcode 8:

xcode extensions

Later in the day, Xcode Extensions got a solid shoutout and description during the Platforms State of the Union, which you can see at minute mark 37:38.

Third Party Extensions Have Been Hard

Overall, during the keynote, I was a little surprised by the lack of new APIs available to iOS developers that were presented during this keynote. So when this slide appeared highlighting the new features available to iOS developers, I paused the video to scour each bullet. I’ve always loved customizing my development environment, and I’ve been a Alcatraz user for years. Alcatraz is a third-party extension (or plugin) manager for Xcode plugins. You can get anything from different source code highlighting templates, to extensions that significantly change the behavior of Xcode (usually in good ways). Unfortunately, creating Xcode extensions up until now has not been supported by Apple. I had the honor of working with Derek Selander on his monster 3-part raywenderlich.com tutorial on creating your own Xcode Plugin (I tech edited the article), and it revealed just how hard it is to create an Xcode extension, up until now. It’s a huge pain in the butt, and is really hard to do. You end up decompiling assembly code, running multiple instances of Xcode, and end up guessing a lot. And then, when new versions of Xcode are released, it’s possible that your plugin won’t work and will need to be updated.

Officially Supported Xcode Extensions Will Be Awesome

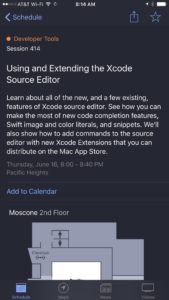
Other IDEs like Android Studio or Eclipse have APIs available for easily creating plugins. I’m assuming that Xcode Extensions are going to be just that, a way for developers to easily create Xcode extensions or plugins, through a Apple-supported API. Looking at the WWDC schedule, now that it’s been declassified, session 414 on Thursday is titled “Using and Extending the Xcode Source Editor.” It’s description contains the following:

We’ll also show you how to add commands to the source editor with new Xcode Extensions that you can distribute on the Mac App Store.

xcode extensions

During the Platforms State of the Union, the following were described as examples of Xcode extension functionality:

  • Content addition and deletion
  • Content transformation
  • Content selection
  • Pasteboard modification
  • In-file navigation

I was happy to see that Xcode extensions will be supported anywhere Xcode 8 runs – on both macOS Sierra and El Capitan. And furthermore, to be able to actually SELL THEM- something which isn’t possible with today’s backwards way of reverse engineering to create your own Xcode extension, will be awesome.

I think this will have a profound effect on our lives as developers. JetBrains and Reveal will no longer need to create standalone apps to help developers. Instead, they’ll be able to provide their awesome 3rd party functionality and features right within Xcode. I can’t wait for Xcode extensions.

Signed Libraries

Remember the hacked version of Xcode called XcodeGhost that was being distributed on third party download sites? Hackers had created a malicious version of Xcode that would inject malicious code into your iOS apps. Luckily, this only ever made it onto 3rd party download sites, which you shouldn’t use anyway, but people still do use because of slow overseas download speeds. The technique used to create Xcode extensions prior to Xcode 8 enabled this type of malicious hackery of Xcode. Luckily, with changes to Xcode 8, this doesn’t look like it will be possible any longer.

Xcode is now secured by System Integrity Protection, which means only trusted libraries and extensions can interact with the IDE and your code.

I interpret this to mean that the “old” way to hacking your own plugins into Xcode will no longer work, and you’ll instead have to play within the boundaries defined for official Xcode extensions.

WWDC week is so exciting. I’ll be going through videos each day and finding exciting and new APIs, features, and SDK changes to relay to you here, right on cleanswifter.com. What are you finding most exciting?

Happy cleaning.

WWDC 2016 Wish List

WWDC 2016 is less than one week away. I’ve only been to the actual conference once, and that was the 2014 instance. I had such a great time, met people that I continue to stay in contact with despite not having seen them since, and learned so much. That was the WWDC where Swift was unveiled to the world. With such a huge announcement as introducing a new programming language, I think it’s a WWDC that will stand the test of time. In a lot of ways, WWDC is like the one time of year that we developers get a new delivery of gifts from Apple. Gifts that we can use to create new business ventures, deliver new delightful features to our customers, and even gifts that will make our own lives easier- both as developers within Apple’s platform, as well as end users of many apps ourselves. I have no shortage of things that I’d like to see from Apple, both from a developer perspective, as well as an end user perspective. Here’s my WWDC 2016 wish list:

I tried to keep this list in the realm of possibility, and it is ordered by a mild amount of prioritization.

  1. Xcode Swift Support. Yes, you can build Swift apps in Xcode, and I do. And yes, there have been improvements in this area. There are just some fundamental things broken with building Swift apps in Xcode. For example, I hope I never have to see that “Xcode can only refactor C and Objective-C code.” dialog again.

Screen Shot 2016-06-06 at 12.19.29 PM

Frankly, I would be embarrassed if I had to put an error message in one of my apps to the tune of, “sorry, you tried to do something legitimate that we just don’t support.” And then to think that this message has been around for going on two years!?!?! Additionally, while less frequent as a year ago, I still get SourceKit crashes in Xcode. That’s when all of a sudden syntax highlighting of your source code stops, and there is no autocompletion. It’s usually paired with an error message. And often, there’s no suggested course to correct whatever you did to crash SourceKit. It’s usually the case that you typed in some non-compilable Swift that rather than getting a nice error message, your IDE stops working. Do you think a third-party IDE would survive with shortcomings like this? I don’t.

  1. Automated Test Support. Reflecting over the past five or so years of WWDC, it’s been amazing to watch the progress Apple has made in supporting automated testing of iOS apps. I remember when first joining the iOS dev community, being astounded by how little Apple made available for automated testing (compared to the Java world that I came from). Fast forward to today, and it’s a fairly comprehensive suite of tools for testing your apps. A couple gaps that I would like filled include:

    • Faster test execution – I heard that Visual Studio, the .NET IDE, actually will run your test bed anytime you save a source file in your project. That sounds AMAZING! In order for that to be possible, test execution must be fast. Right now, just to run a suite of a couple hundred XCTest unit tests, it’s about 20 seconds. That needs to be sped up.
    • Headless test runners – Right now, running tests (unit or otherwise), require a simulator or device to fire up your app, and run through the tests. This shouldn’t be needed. It would be so nice to run tests without the overhead of the iOS simulator or device.
  2. Continuous Integration Improvements – Xcode Server is a start, but so far from being something that would stand our as a continuous integration solution. I’d love to see Apple take strides to better supporting cloud-based continuous integration. This may even include some amount of supporting xcodebuild on non-OS X based systems (Linux?). Headless test runners would help here too. Right now, without the help of something like Buildasaur, I can’t even get the status of a Xcode Server integration on a pull request. That’s a huge hole in me adopting Xcode Server as the sole solution for continuous integration. Oh ya, and what about even automating some of the process of app deployment, like submission to iTunes Connect? Wouldn’t that be delicious!?

  3. WatchKit Performance. I’ll state right off the bat that I don’t actually have any WatchKit code in production apps at this point. I do have an Apple Watch that I wear everyday. I buy-in to the concept of wearables, especially for health and exercise tracking. The thing is, using the watch is so darn slow and unreliable. Whether I’m asking Siri to start a timer, or using the Strava watch app’s “Start Run” button, either the action simply won’t happen, it will take too long, or some random nasty side effect will happen (like my Strava workout will clobber the corresponding entry in HealthKit). Until WatchKit apps are speedy, and reliable, there’s no chance of success for the Apple Watch in the future. New hardware is not the answer here. It may be part of the solution, but the software stack needs a total revamp.

That’s my WWDC 2016 wish list. If I didn’t say it before, I’ll just reiterate how exciting this time of year is for me, and should be for you too. Even if you need to support older iOS versions, don’t worry, the new features that are announced are still fun to play with, and you’ll eventually get to use them in your production applications. What’s on your WWDC 2016 wish list? If you didn’t see, Apple will be live streaming sessions daily, and posting videos or all sessions throughout the week. Starting next week, I’ll be posting recaps and highlights of all the sessions I find interesting as I consume all this great content from the comfort of my couch.

Happy cleaning.

Ellen Shapiro on Code Coverage

Source: Fabio Oliveira, Twitter

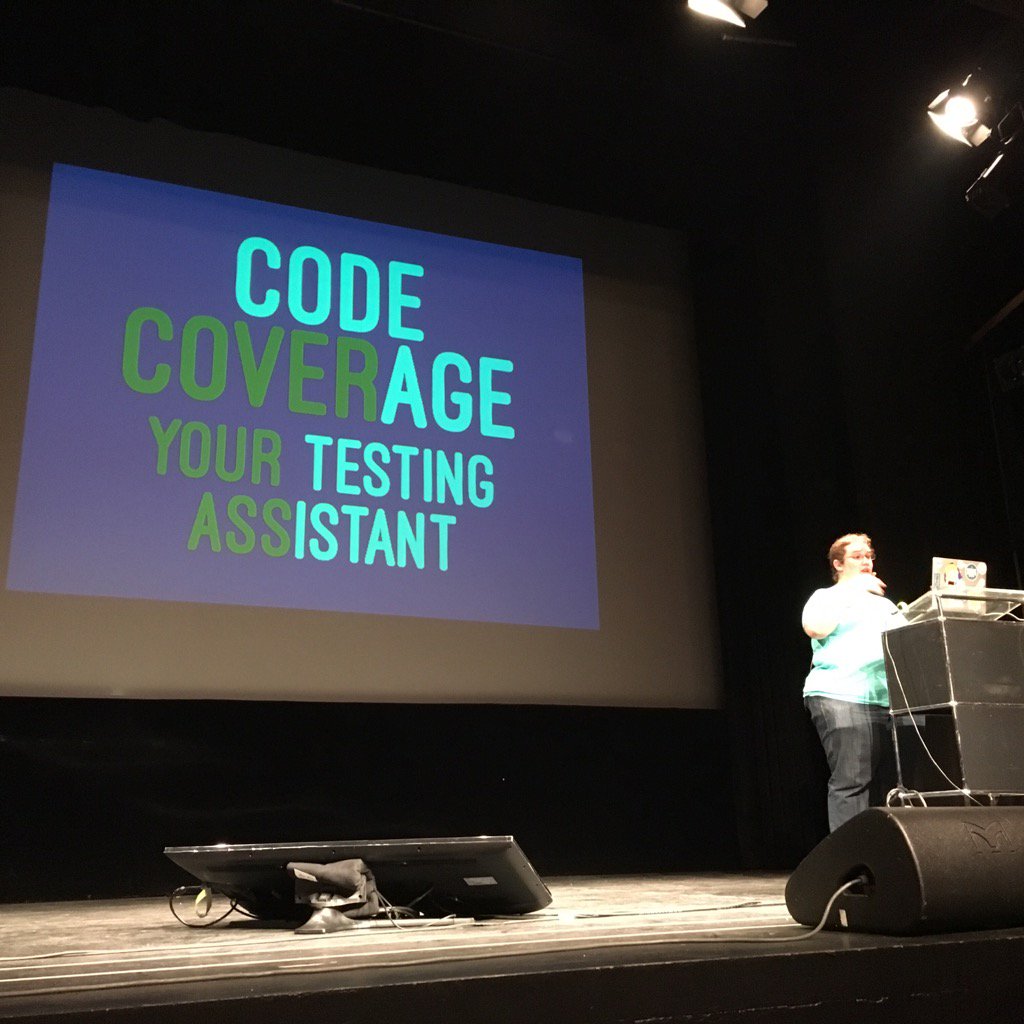
I caught this great picture on Twitter of Ellen Shapiro presenting at UIKonf last week in Berlin.

Now, I’m not totally sure of the topic of the talk, but having heard first hand of Ellen’s passion on automated testing, and seeing this slide, I’m pretty sure it’s content would be something that I would endorse here at cleanswifter.com.

If you aren’t following Ellen, you should be. I’ve seen her present several times, and she is my colleague on the raywenderlich.com iOS team. Besides Twitter, here’s an appearance of her’s on the raywenderlich.com podcast that you’ll enjoy.

I’ll even leave you with a fun story from the first time that I met her. This was back at a CocoaConf in the fall of 2014 in Boston. During an impromptu lunch time session where developers could show off their own apps, Ellen stepped up to give a demo of Hum. It’s an app for musicians to help record little bits of audio so they can remember it later, for use when you’re songwriting. A major part of the app has to do with recording audio so you can listen to it later. Ellen blew people away in the demo by belting out, herself, solo and acapella, the opening line to Black Dog by Led Zeppelin. I think I speak on behalf of the whole room, that I was blown away by its awesomeness. I was a fan for life, and that’s before I came to learn about her passion for high quality iOS code.

If you ever get to meet Ellen, tell her the Clean Swifter says Hi.

Happy cleaning.

PS – Thirsting for a tutorial? I’ve got something good planned for tomorrow- how to run your first XCTest on Amazon Device Farm. Be sure to come back and check it out.

libdispatch in Swift 3, an evolutionary step

Are you following any of the lists.swift.org mailing lists? You can subscribe for emails to follow the open source development of Swift. I’m on the swift-evolution-announce list, and it ends up with a couple emails a day. To me, that’s a reasonable volume. The thing I like about that list is that it’s a broadcast of the approved or rejected changes, no discussion. While it would probably be interesting, I don’t have the bandwidth to be reading through in-depth discussions about how Swift should evolve. Simply catching the end result of the discussion and decision is good enough for me now. When the email arrives, I usually just do a quick glance at the subject to see if it’s something I’m interested in, and recently, oh boy, was there one that caught my eye, it’s related to libdispatch in Swift 3.

Modernize libdispatch for Swift 3 naming conventions

Proposal SE-0088 was accepted to modernize libdispatch in Swift 3 naming conventions. libdispatch, aka Grand Central Dispatch is a modern and easy way to add multithreading to your applications. If you want to learn about it, here’s a great tutorial on Ray Wenderlich’s site (the tutorial is in Objective-C).

libdispatch in Swift 3
Grand central….

For whatever reason, I have such a hard time memorizing any of the C APIs that we use when building our apps. For me, most commonly this is libdispatch. I must have written this code hundreds of times:

Old Way

dispatch_async(dispatch_get_main_queue(),{
    // do something UI-ish on the main thread, like dismiss a view controller
})

but for some reason, I’m never confident in being able to write it based on memory. I almost always have to either lean on code completion, or even go look up a different place I wrote it to copy and paste. And this just scratches the surface of Grand Central Dispatch.

Now, this will all change with Swift 3, as there will be a modernized API available for libdispatch in Swift 3. So that old C code I wrote above will be written as:

New Way

let queue = DispatchQueue.main
queue.asynchronously {
    // do something UI-ish on the main thread, like dismiss a view controller
}

That makes me so happy. Hopefully this modernization of libdispatch in Swift 3 gives you a gist of the cool developments that are happening on the Swift mailing lists and you might even go sign up for them yourself. Let me know, what cool things did you discover?

Happy cleaning.

Swift Pattern Matching Is Powerful

In Natasha The Robot’s weekly Swift newsletter, I caught a pretty awesome series of articles written by Olivier Halligon on Swift pattern matching. After reading this four-post series, my mind is sufficiently blown in thinking about all these new ways to use Swift pattern matching.

swift pattern matching
]4 Pattern matching in the real world.

Here are the articles:

According to Apple’s documentation on Swift Patterns:

A pattern represents the structure of a single value or a composite value. For example, the structure of a tuple (1, 2) is a comma-separated list of two elements. Because patterns represent the structure of a value rather than any one particular value, you can match them with a variety of values. For instance, the pattern (x, y) matches the tuple (1, 2) and any other two-element tuple. In addition to matching a pattern with a value, you can extract part or all of a composite value and bind each part to a constant or variable name.

Basically, this means that if you have a value like a struct, the struct can be represented by any number of “patterns” that generally describe the type. You can then use patterns in conditional checks to selectively filter for values that match the pattern.

Switches, Not Just Integers

From Olivier’s articles:

In Swift, you’re not restricted to use switch on integer values or enums like in ObjC. You can actually switch on a lot of stuff, including (but not restricting to) tuples.

This was an incredible discovery for me. It’s little nuggets of discovery like this that so easily slip through the cracks when learning new languages.

This Is Scary

Switch case statements are evaluated in order. This feels scary to me.

Here’s Olivier’s example:

let point = CGPoint(x: 7, y: 0)
switch (point.x, point.y) {
  case (0,0): print("On the origin!")      // 1
  case (0,_): print("x=0: on Y-axis!")     // 2
  case (_,0): print("y=0: on X-axis!")     // 3
  case (let x, let y) where x == y: print("On y=x")
  default: print("Quite a random point here.")
}

This gets my nerves going big time. You could easily inadvertently swap the order of lines 1, 2, and 3, with no compiler warning, and have vastly different functionality of your code. You MUST pair code like this with tests, or just avoid relying on the order of the cases altogether.

Exhaustive, no defaulting

One of the things I like best about Swift is how the language easily enables you to be totally explicit about how you intend for things to behave. switch statements are another example in that the compiler simply won’t let you write a switch statement there may be a condition that doesn’t match. Furthermore, I also like this advice from Olivier:

I strongly recommend you to not use default when possible, and instead make your switch exhaustive, this way if you happen to add a new value to your enum you’ll be forced to think about what to do with it instead of it being ignored or eaten up by the default without you realizing.

In other words, Command-Shift-F for “default” and inspect any switch statement you find that uses it, and do everything possible to refactor it out.

Your Own Objects

If you want to use Swift pattern matching on your own objects, just override the ~= operator as:

func ~= (lhs: Affine, rhs: Int) -> Bool

When doing that though, keep in mind this advice from Olivier:

Don’t mix up the parameters order: the first parameter of the infix ~= operator (commonly named lhs, for left-hand side) is the object you’re gonna use in your case statements. The second parameter (commonly named rhs for right-hand side) is the object you’re switch-ing over.

A Real World Example

A lot of this blog series focused on theoretical uses of value types like Movies or Books. I really like when Olivier brought it back to the real world, or at least my real world with an example of using guard case let for checking the HTTP response code for a remote API call.

Looking Forward

I’m really excited to find uses for Swift pattern matching in my own code now that I know all about it. I recommend Olivier’s full article series and guarantee that you’ll learn something along the way. It’s a concise read and won’t take much of your time. Come back and let me know what you learned.

Happy cleaning.