
Amazon Device Farm has been on my radar for some time now. It offers the ability to remotely test your iOS apps on physical devices that are located somewhere else. Remember my post about cattle vs pets, and how your continuous integration box should not be a pet? I wanted to test out how well Amazon Device Farm XCTest actually worked, and report back here on my experience so you know how to do it as well.
Extensive List of Supported Devices
Not only does moving your automated testing to the cloud move you away from owning a “pet” build box, but it is also a cost effective way of testing your application across a large number of devices and OS versions. You won’t need to go buying old iOS devices on eBay. Amazon Device Farm supports all the way back to iOS 7. Ever accidentally upgrade your old iOS8 test device, only to realize that you can’t downgrade? With cloud based testing, you no longer need to worry about that. Amazon Device Farm supports many devices and OS versions, across iOS AND Android. You can take a look at the actual list of supported devices here.
The Goal
The goal is to evaluate and document getting a project executing Amazon Device Farm XCTest runs. I’m going to reuse my sample project from my CocoaHeads presentation, you can find it here. The project actually has three test targets setup: unit tests with XCTest, KIF tests, and FBSnapshotTestCase tests. My primary goal here get Amazon Device Farm XCTest running for unit tests. Getting the other two test targets running would be icing on the cake.
Running Amazon Device Farm XCTest Cases
TLDR
If you’ve gone through Amazon’s documentation, and are still stuck, there are two key things that I discovered that made this work for me:
- Properly create the .ipa file – I achieved this by Archive -> Save for Adhoc Deployment, etc.
- Properly create and find the .xctest folder – I had a hard time finding the .xctest folder to zip up. It’s buried in your Derived Data folder. I used the command line find command to locate it. Also, Amazon Device Farm requires you to include any class under test in the test bundle as well.
More details on those two steps later, so read on!
Overview of Amazon Device Farm
Amazon Device Farm breaks down your work into Projects and Runs. Amazon describes a Project as:
A project in Device Farm represents a logical workspace in Device Farm that contains runs, one run for each test of a single app against one or more devices. Projects enable you to organize workspaces in whatever way you choose. For example, there can be one project per app title, or there can be one project per platform. You can create as many projects as you need.
You basically have the freedom to use Projects as wide or as narrow as you want. I’m imagine a Project to be analogous to a Jenkins job. Just like a Jenkins job, a Project will consist of any number of Runs, which are basically just an execution of a given test script.
Access Your Account
To use Amazon Device Farm, you’ll need a Amazon Web Services account. Follow the instructions here for creating an account and setting it up. It’s a little more involved than just registering. You can actually create additional users within your AWS account to help segregate identities and access management, and it’s recommended that you do this to be used with Amazon Device Farm.
Once you have your account setup, sign in to the Amazon Device Farm at https://console.aws.amazon.com/devicefarm.
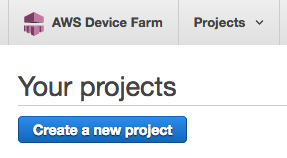
Create Your Project
Now that you’re logged in, you’ll need to create your first Project.
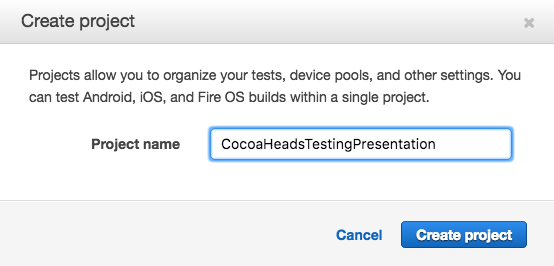
For this simple trial, I reused my Xcode project name for my Amazon Device Farm project name, “CocoaHeadsTestingPresentation”.
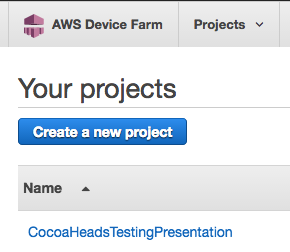
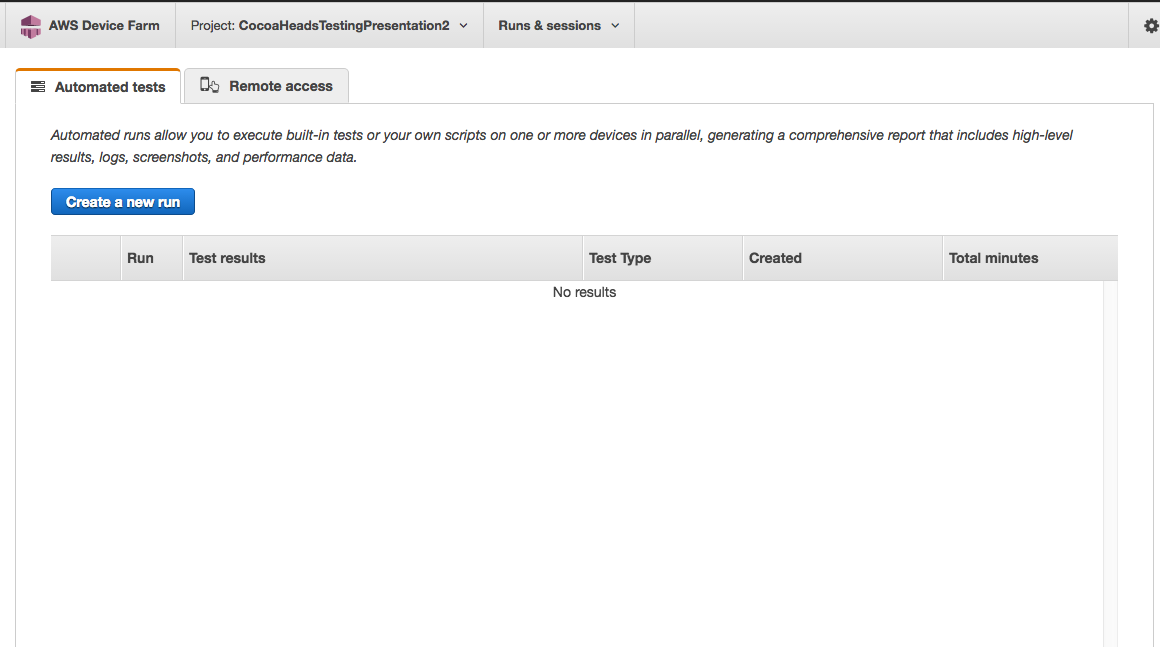
After you’ve created your project, you’ll see it in the list of projects:
Create Your Run
Select your project from the project list, and you’ll see a page that will eventually show your test runs. Since you have no test runs at this point, the page is empty. Now, you’ll create your first Run. Select Create a new run.
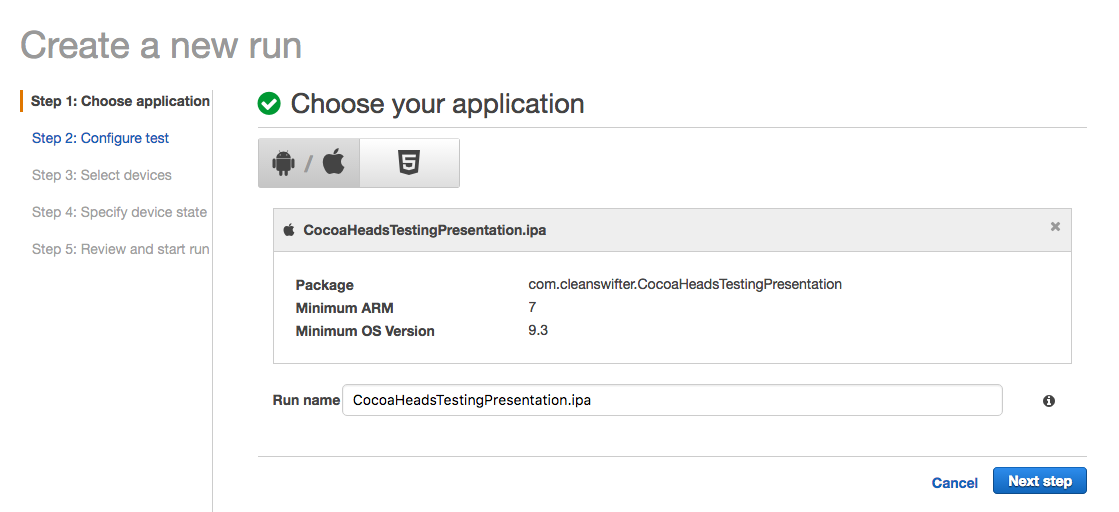
On Step 1, select the button that shows the Android and Apple icons to indicate that you are going to create a run for a native app.
Prepare And Upload Your Build
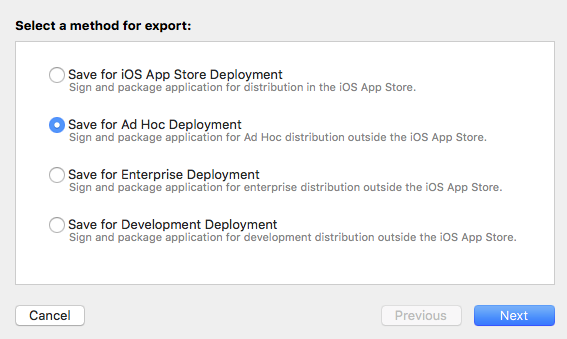
Now you need to prepare your application for execution within the Amazon Device Farm XCTest Run. This was a little tricky, and under documented in Amazon’s documentation, so I think this part will really help you. Jump over to Xcode, and Archive a build. Archiving a build will inherently enforce you to make sure you are building for device, as this is also a requirement of running Amazon Device Farm XCTest cases, since they actually run on devices. Once your build has finished archiving, select the build and **Export…* it from Xcode:

Select Save for Ad Hoc Deployment:
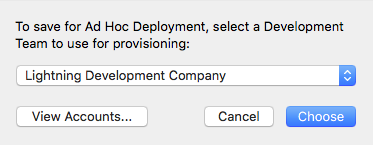
Ensure that the same identify as your build settings is used for code signing:
And then ensure that you Export one app for all compatible devices:
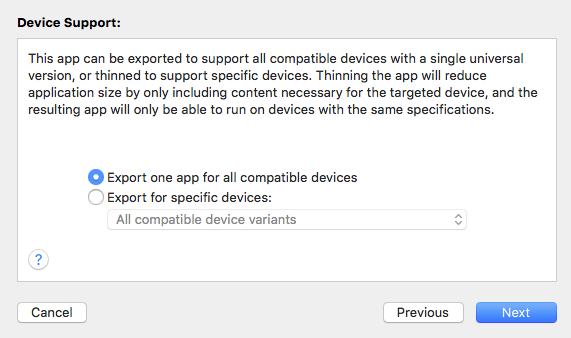
After selecting Next, follow through another couple prompts selecting the default options, and specify a location for your .ipa file and Xcode will code sign your application and create an .ipa file that will be uploaded to Amazon Device Farm. Go back into your browser that was left off on Step 1 of Create a new run in your first Amazon Device Farm project. Click Upload and navigate to your new .ipa file, and upload it.
You’ll know it was successful when Amazon Device Farm shows you information about the .ipa file:
Click Next step.
Specify and upload your XCTests
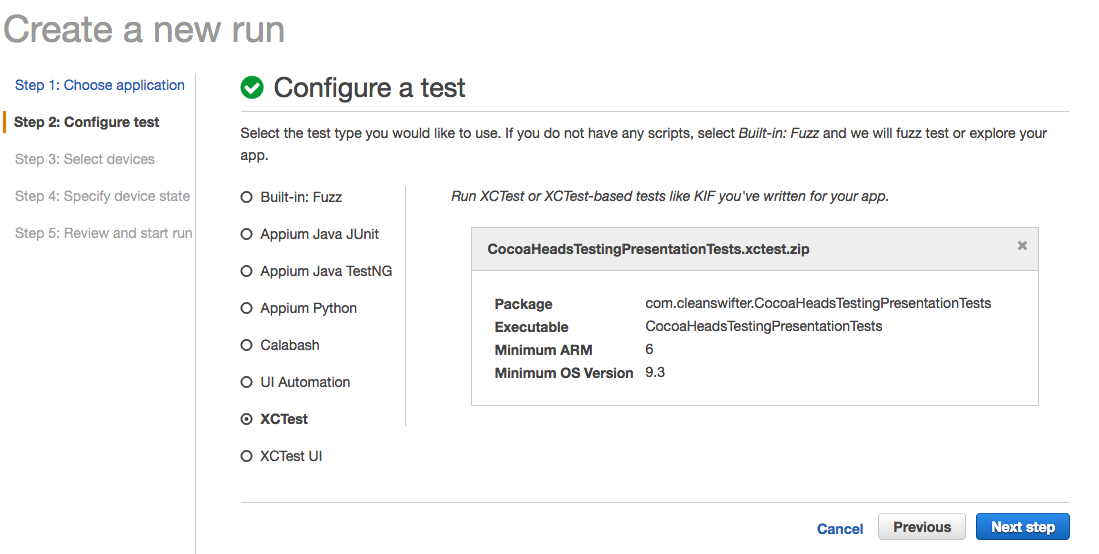
On Step 2, select XCTest as the test type, and then you’ll need to upload your XCTests. This was the hardest part of the process to get right, and also the most under-documented in Amazon’s documentation. Here’s a couple things to tweak and double check in Xcode to make sure you are setup:
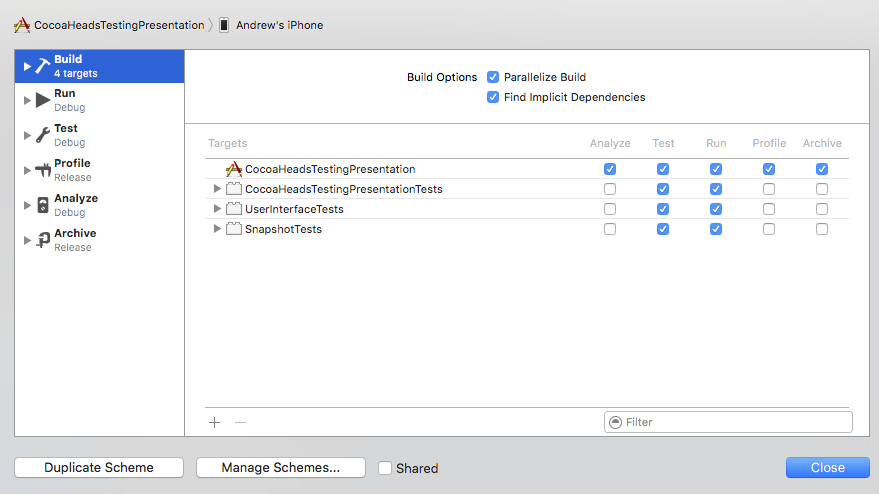
- Unit tests will compile with each build – This should be the default setting, but it’s worth double checking. Open the Build action settings for the scheme in the Scheme Editor. Verify that in the Run column, your test targets are checked. This means that when you type Command-B or even run your app, your tests will be compiled too.
- SUT Classes are included with the test target – In order for your classes under test (aka SUT) to be available within the test bundle, you need to ensure they are included with test target membership. In my project, WelcomeViewController.swift was a class under test, so I needed to actually add it to the test target membership since this isn’t technically required in a Swift world with the
@testableannotation for importing modules.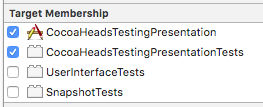
- Build tests for devices – Your XCTest bundle must be built for device, not simulator. Select a device, rather than a simulator.

Now that you are all setup, build your tests with Command-B. Now, you need to find the .xctest folder, compress it, and then upload it. I used a find command from Terminal to find it:
CocoaHeadsTestingPresentation|⇒ find . -type d -name '*.xctest'
./Carthage/Checkouts/ios-snapshot-test-case/DerivedData/FBSnapshotTestCase/Build/Products/Release-iphoneos/FBSnapshotTestCase iOS Tests.xctest
./Carthage/Checkouts/ios-snapshot-test-case/DerivedData/FBSnapshotTestCase/Build/Products/Release-iphonesimulator/FBSnapshotTestCase iOS Tests.xctest
./DerivedData/CocoaHeadsTestingPresentation/Build/Products/Debug-iphoneos/CocoaHeadsTestingPresentation.app/PlugIns/CocoaHeadsTestingPresentationTests.xctest
./DerivedData/CocoaHeadsTestingPresentation/Build/Products/Debug-iphoneos/CocoaHeadsTestingPresentation.app/PlugIns/SnapshotTests.xctest
./DerivedData/CocoaHeadsTestingPresentation/Build/Products/Debug-iphoneos/CocoaHeadsTestingPresentation.app/PlugIns/UserInterfaceTests.xctest
./DerivedData/CocoaHeadsTestingPresentation/Build/Products/Debug-iphonesimulator/CocoaHeadsTestingPresentation.app/PlugIns/CocoaHeadsTestingPresentationTests.xctest
./DerivedData/CocoaHeadsTestingPresentation/Build/Products/Debug-iphonesimulator/CocoaHeadsTestingPresentation.app/PlugIns/SnapshotTests.xctest
./DerivedData/CocoaHeadsTestingPresentation/Build/Products/Debug-iphonesimulator/CocoaHeadsTestingPresentation.app/PlugIns/UnitTestBundle2.xctest
./DerivedData/CocoaHeadsTestingPresentation/Build/Products/Debug-iphonesimulator/CocoaHeadsTestingPresentation.app/PlugIns/UserInterfaceTests.xctest
CocoaHeadsTestingPresentation|⇒
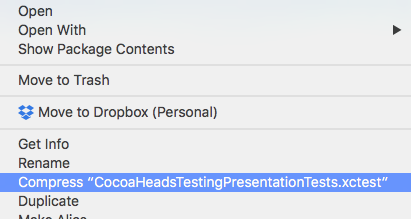
Remember, you want the bundle built for device, not simulator. That means you’ll use the one in the directory Debug-iphoneos, not Debug-iphonesimulator. The directory you need to compress to a zip file is:
./DerivedData/CocoaHeadsTestingPresentation/Build/Products/Debug-iphoneos/CocoaHeadsTestingPresentation.app/PlugIns/CocoaHeadsTestingPresentationTests.xctest
Compress it as a standard zip file (you can use Finder for this), and Upload it back in the Amazon Device Farm browser.
You’ll know the upload was successful when you see details about the XCTest zip file:
Click Next step to select your devices for the run.
Select Devices
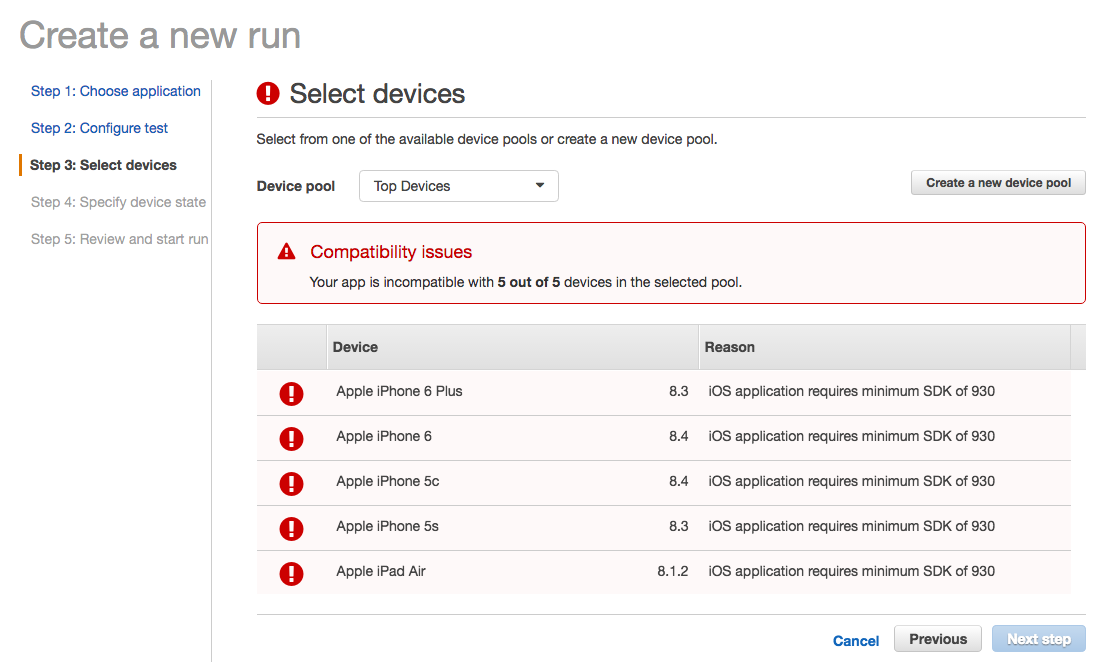
One thing that annoyed me with setting up my first Run for an Amazon Device Farm XCTest was that when I finally got to the screen to select which devices to execute my Run on, the default list contained five devices, none of which were supported by my app. I would have rather’d some smarts on Amazon’s part to look at the lowest iOS version supported by my app, and then only show me “Top Devices” for that minimum iOS version.
Since the suggested list didn’t work for me, the first thing to do was Create a new device pool, which is what you should click to do that:
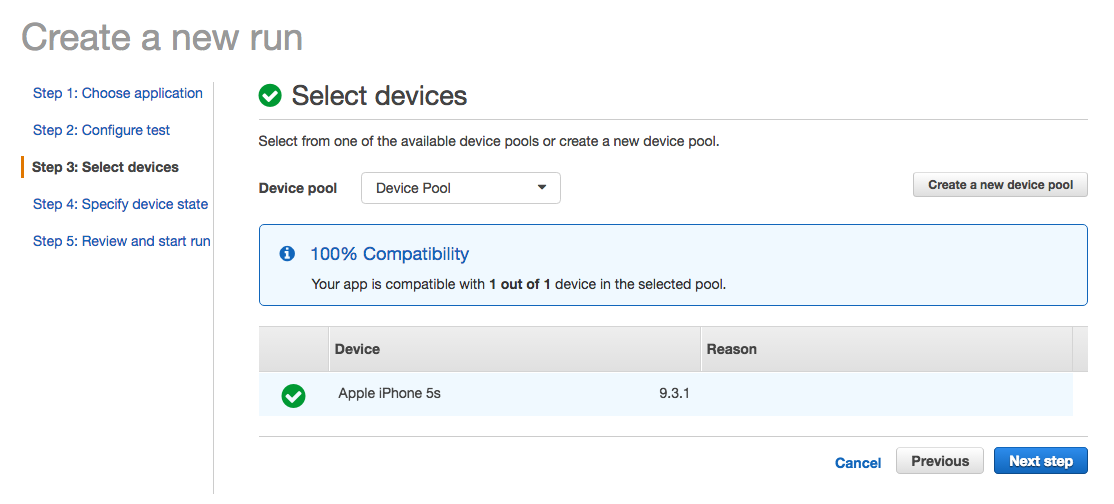
On the resulting screen, it’s obvious enough to select devices for a new “pool” – just make sure you select devices compatible with your app’s minimum version, because you won’t be prevented from doing that.
Once you create a pool of compatible devices, you’ll see a message about “100% Compatibility”
Select Next step to specify initial device state.
Specify Device State
In Step 4, you can specify other initial aspects of the device’s initial state, like other apps to load, a geographic location, or which locale to use:
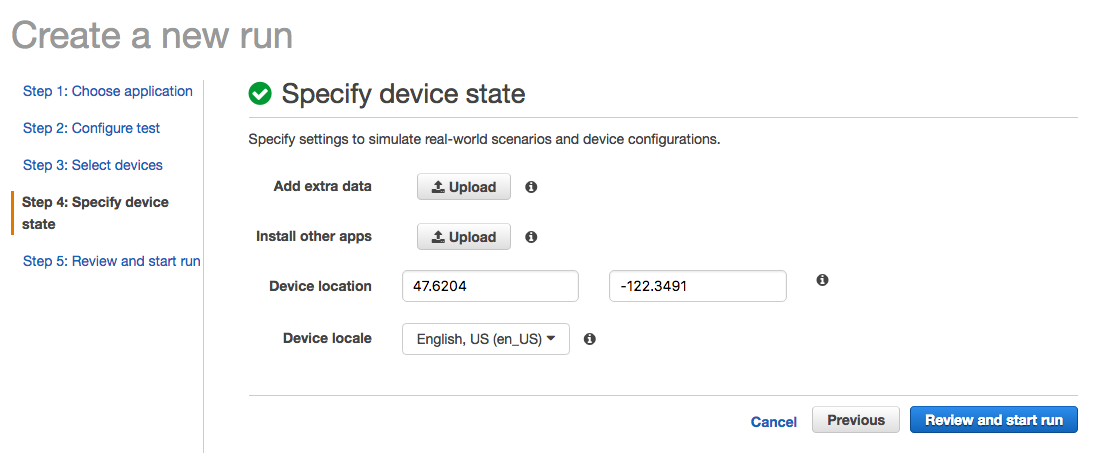
I didn’t change any of these values from the default for my app.
Next, click Review and start run. The next page reviews your Run’s settings, and allows you to start it. Click “Confirm and start run” to start it.
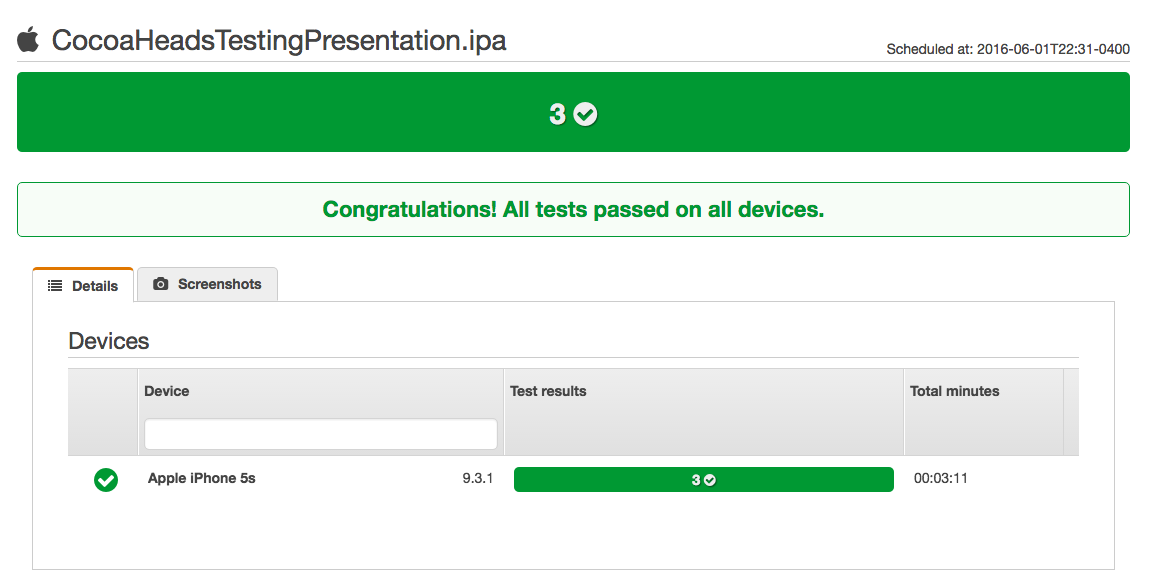
Boom, that’s it! At this point, you’re basically done. If all is configured correctly, your Amazon Device Farm XCTest will be running. Congrats!
Observations of Amazon Device Farm XCTest
Here’s a couple observations from going through this setup for Amazon Device Farm XCTest.
Setup Is Too Manual
Next, I really need to investigate automating this. There’s no way I would frequently go through this in order to run my tests. It’s so much faster to run it from Xcode locally. There’s just too much clicking through prompts. Ideally, I want to connect this with my continuous integration server, so that’s the next thing I’ll look into.
Tests Are Slow
Just the simple act of running tests is really slow. For my sample project, that is totally bare bones, with ONE XCTest unit test, it took just over three minutes to run in Amazon Device Farm. That’s compared to like one second locally in Xcode. I’d like to try this with a larger code base and observe how long it takes. I hope the duration doesn’t lengthen with the size of the project or number of tests, but it probably will. At this point, I don’t think I’d put such long running tests in the middle of my code review workflow, but rather integrate these as nightly builds across a large number of devices.
Documentation Lacked Key Steps
The hardest part of getting this setup was getting the precise build settings right, both for the app binary ipa itself, and the .xctest bundle as well. Amazon totally glossed over this in their documentation, which really prompted me to write this article. The good news is that in Googling around, I noticed Amazon support employees actually answering questions on Stack Overflow, and also participating in Amazon’s own dedicated form for supporting Amazon Device Farm.
Wrap Up
I noticed that there is a command line reference for Amazon Device Farm. In order to integrate Amazon Device Farm XCTest with my continuous integration procedures, I know I need to test this with more complicated projects, and also automate it. I’ll do that in a future post.
Happy cleaning.