VIDEO: Building Tests

Chapter 4 of “Refactoring, Improving the Design of Existing Code by Martin Fowler, titled “Building Tests” provides an introduction to automated testing.

Here’s my perspective on the chapter:

Video Transcription:

Hey, what’s up everybody, it’s Andy from cleanswifter.com and I’m here to talk about the next chapter in Martin Fowler’s book, “Refactoring, Improving the Design of Existing Code.” You can buy that book in the Amazon Affiliate link in the description for this video. Last week we talked about chapter 3, Bad Smells in Code. In that chapter, Fowler presents some ideas of what to look for in your code to know it’s time to actually refactor it. This week, chapter 4, titled “Building Tests” Fowler actually talks about some techniques for introducing automated tests within your code. If you’ve been following any of my posts on cleanswifter.com, you’ll know I have a huge passion for automated testing of software. I was kind of excited for this chapter. When I finally got around to actually reading it, it fell short of what I was looking for. Fowler clarifies that this book is not about testing. And the reason I interpret he chose to include this chapter is to recognize the value of automated testing, especially in the time of refactoring. He doesn’t even mention test driven development in this chapter. Now, if you remember test driven development, one of the key steps to test driven development, is that final third step, to refactor everything you’ve done. Test driven development. You start off writing a failing test. Then you write the production code to make that test pass. And then you refactor. Now just bringing it back to Fowler’s book, he doesn’t actually talk about anything in detail with regard to test driven development. In fact I think he kind of just puts this chapter in here to recognize that when you go out to use this as a recipe book of refactoring, that you should keep in mind the value that can be adding tests throughout the process.

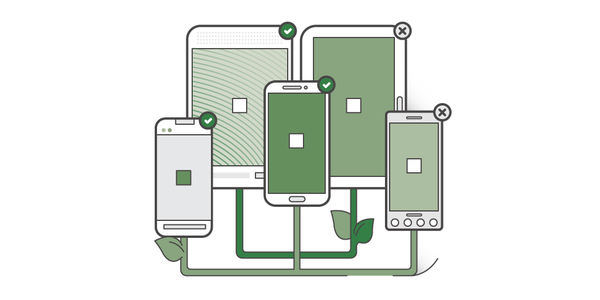
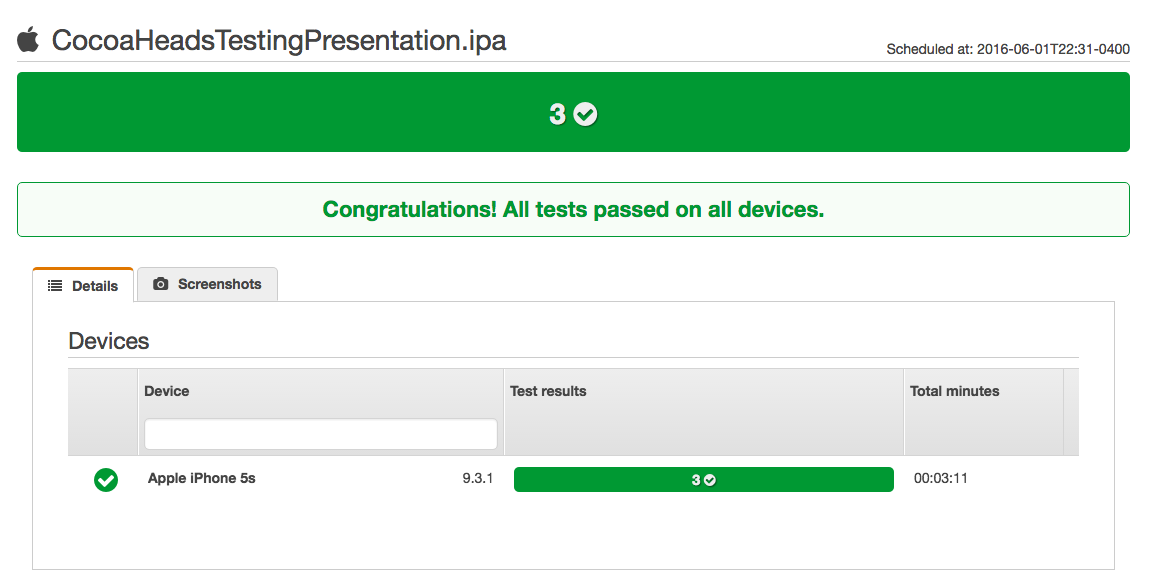
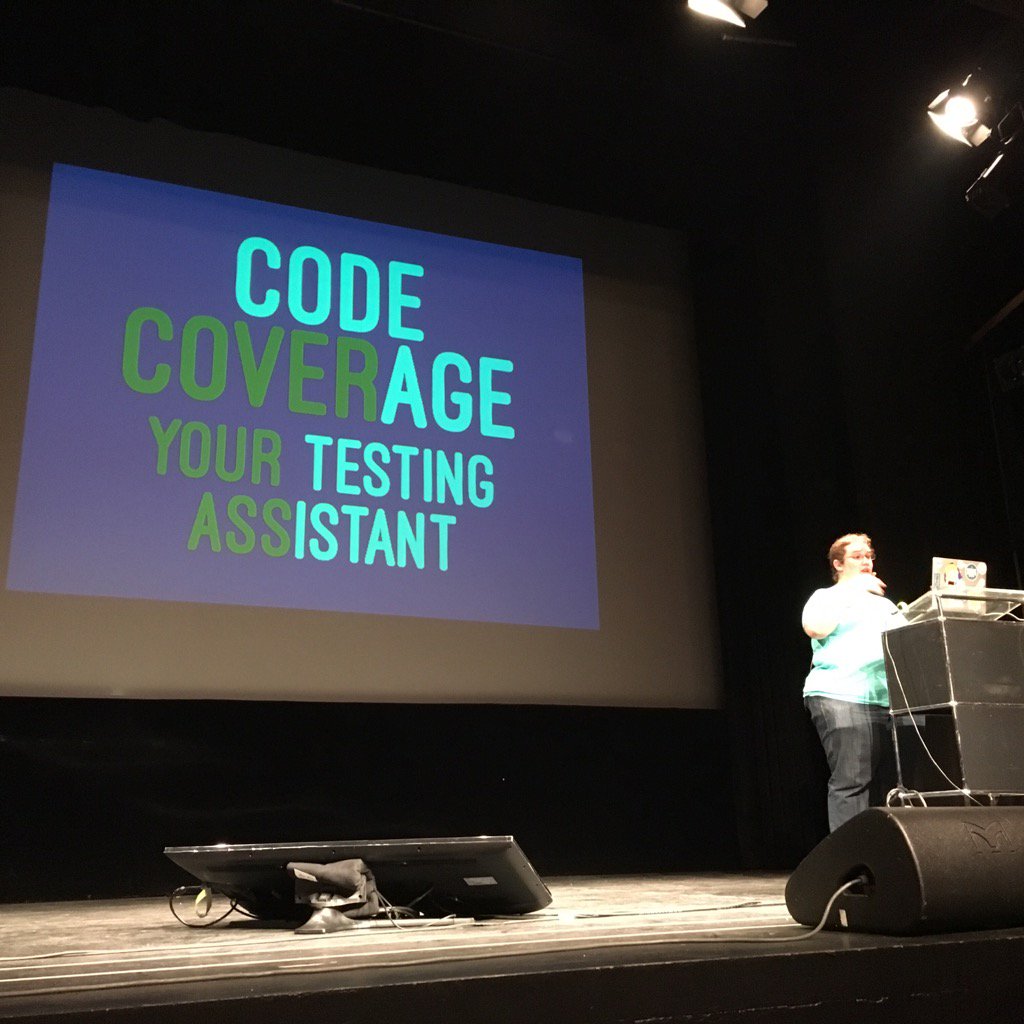
If you’re not familiar with automated testing, or haven’t been following any of my posts on <cleanswifter.com> is that remember, automated tests’ value is that it is code testing code. You can execute an entire test bed at the click of a button. Where your entire code base is tested in a matter of seconds. You do actually have to go through the effort of writing these tests, and that’s no small effort. Then you can make changes to the rest of your code base without risk of introducing new bugs. Additionally, when you find a bug, whether that’s reported through QA or an end user, you can first write a test to verify that bug, and then go fix the code to make sure the test passes, you can now have the confidence that that bug will never surface again in your code. For me, that’s really the value of adding tests, knowing that when I find a bug, I can write a test that verifies the bug does actually exist, then I can go fix that code, make the bug go away, make sure the test passes, then never again will that bug surface. This is especially relevant to the iOS development community because at a recent presentation I gave to the local CocoaHeads group here in Philly, there continues to be the majority of iOS development community that doesn’t write automated tests for their code. In that meeting we talked about some of the reasons this may be. For an independent or contract developer, that they don’t feel it is worth their time. Or hard to justify to their client, whether that is them for their own product, or someone else paying them for their time), that it is worth the time to write tests. It’s a 1:1 ratio, for every hour you spend writing production code, you’ll need to spend an hour writing test code. I think until you learn the lesson the hard way, and then see the value of automated tests correcting that, you’ll never be able to justify the cost. It’s like a catch-22, because if you never try it you’ll never be able to justify it to yourself. On the otherhand, if you’re going to wait to see the value before you try it, you’re never going to try it. I think one takeaway from this chapter, that even Fowler calls out, is that specifically, go try to write a couple tests. Don’t spend a lot of time writing an entire big test suite for your entire application, worrying about every edge case, and instead focus on just 1 or 2 tests that are going to add value, and I guarantee you that sometime down the road, you will have your butt saved by the fact that you had automated tests. You will write automated tests, and sometime down the road they will fail because some code change you made introduced an unexpected, but tested for bug. You’ll be happy since you caught the bug and not an end user.

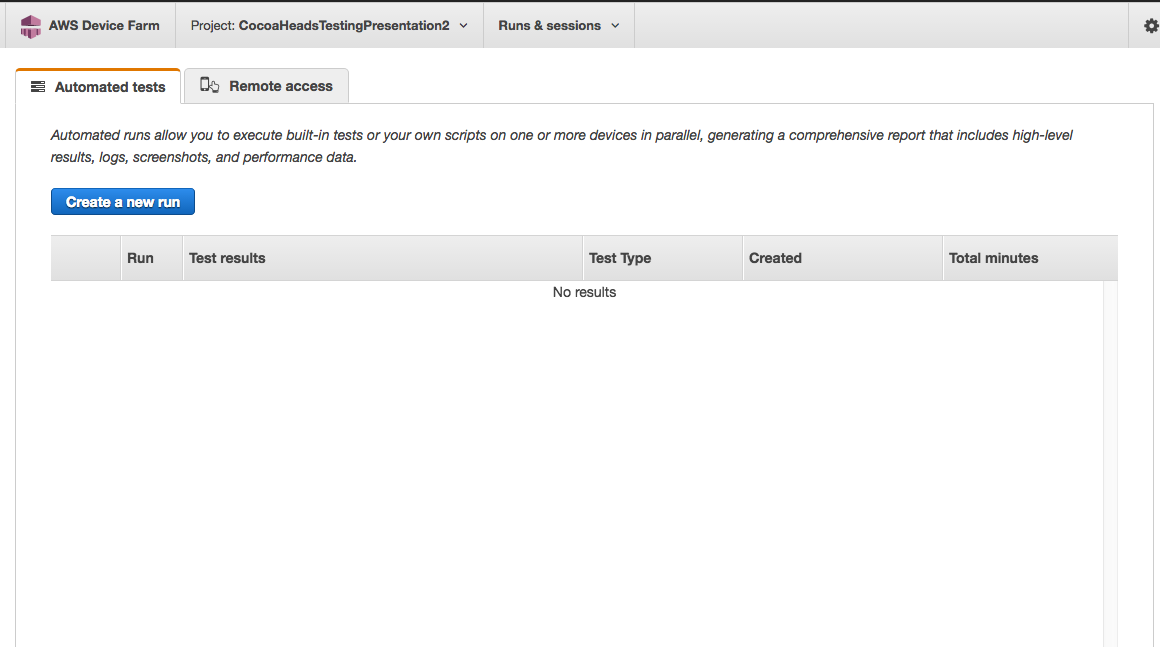
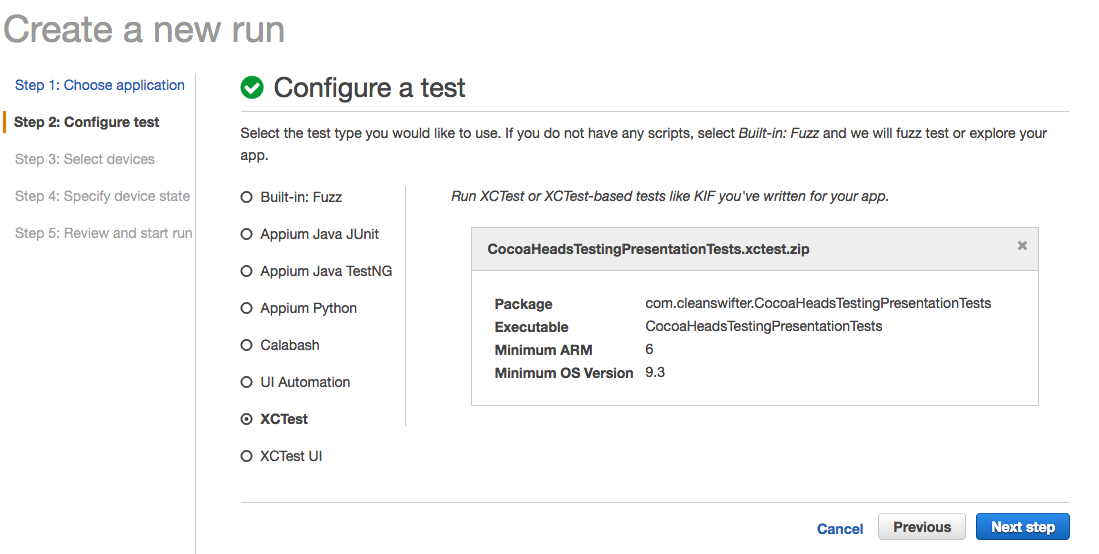
Fowler clarifies the difference between unit and functional tests. Again, I have a ton of documentation on <cleanswifter.com> that helps differentiate and define each of these for iOS development. For unit testing, you’ll be using XCTest as provided by Apple. It’s code that tests other code at the smallest level. You’ll write a test method for each path of conditional code in another class. It requires intimate knowledge of the code you’re testing. Consider it white box testing. You can see the code, to know the conditional paths, and know how to test it. This is in contrast to functional testing. Functional testing is where you would call it black box testing. You don’t have intimate knowledge of the code. Instead, all you’re doing is testing the code from the outside in. This means that you are simulating an end user swiping, tapping, and navigating your app. There are a bunch of tools out there to do this. Apple’s provided tool is called Xcode UI Tests and I personally use a different tool, called KIF. It stands for Keep-It-Functional. It’s open source. Some of the benefits I like of KIF are that it is mature, been in the community for years, you can write your tests in either Objective-C or Swift. I haven’t spent enough time with Xcode UI Tests to know it’s pros and cons, but I did use its predecessor, UI Automation which was Javascript driven and a poorly documented API. It’s soured me on Apple’s provided functional testing tools, so that’s why I haven’t gone back yet. I’ll do that soon and write about it on <cleanswifter.com>.

Another important thing to keep in mind when you write your first test, regardless of whether you are doing TDD or not, and in fact if you are just starting out I don’t recommend jumping right into TDD. But one thing to keep in mind when writing your tests is that you want to see that test fail when you expect it to fail. For example, say you are writing a test for a method that adds numbers. You want to first verify that adding 1 and 2, never returns anything other than 3. Otherwise, you won’t have the confidence that when someting actually goes wrong, that test will actually fail. That gives you a baseline assurance that that test is actually providing that quality check you’re looking for. And trust me, I’ve seen plenty of cases where I’ve written a test and not done this, only to find out that it wasn’t actually verifying, what I thought it was verifying.

It was a pretty short chapter, chapter 4 in Martin Fowler’s book, “Refactoring” where he just introduces the concept of tests. If you’re watching this video and haven’t checked out anything I’ve posted on <cleanswifter.com> around automated tests. And if you’re not writing automated tests for your iOS apps, you should definitely go try that out.

Looking ahead, I’m really excited for the rest of this book. Chapter 4 is the end of the preamble before the actual list of refactoring recipes. Going forward, week by week, I’m going to make a screencast of that refactoring, showing it in action with Swift code, and post it on <cleanswifter.com>. It will demonstrate the transformation from smelly code to nice clean code. That will be done in a screencast where you can go back and watch. The first refactoring we’ll try in the book is Extract Method. It’s a really easy one, but also a really effective one. I’m looking forward to showing you that. Check back next week for that. In the meantime, be sure to checkout <cleanswifter.com>.

Happy cleaning.

How To Start A Programming Blog

In commemoration of this, the 50th post on cleanswifter.com, I wanted to get a little meta and reflect on some learnings I’ve had of how to start a programming blog. I wanted to capture: What has gone well? What improvement areas are there? What success have I had? Where do I want to go from here?

Start With Why

In case you didn’t catch my About Me page, there were three reasons I created cleanswifter.com:

  • I want to improve my Swift, and the best way to learn something is to teach it to others.
  • Dogfooding is invaluable. At AWeber, my day job, we provide a service digital marketers. Bloggers fit this category. My maintaining a blog, I’ll be able to better relate to our customers.
  • Help others learn. I know I have so much to learn with Swift and iOS app programming. On the same note, I also have a lot of experience building apps for the past 8 or so years. With this experience, and my continued learning, maintaining a blog is a great way to give back to the community and help others learn as well.

While I didn’t really write these down until later on, I had a good grasp as to why I wanted to start a blog right from the very beginning, before I wrote any post or even tried a content management system. Having this foundation, or core values even, has been a driving factor in being able to “stick with it.” I absolutely urge you think through the same thing if you want to start anything in life- why are you doing it? This way, anytime self-doubt creeps in, or you need a sounding board for making a decision related to your project, you can always return to this foundation for guidance. It’s helped me immensely.

Build Your Tribe

With each post, I imagine that there are people out there looking at my blog everyday to follow what I’m going to post next. When I write my posts I imagine that I’m writing directly to these people. To help better connect with your raving fans, I also urge you to start an email list from day one. You may not even necessarily know how you’ll eventually use this list for yourself down the road (trust me there are plenty of ways, http://www.smartpassiveincome.com/ – Pat Flynn’s site is a little heavy on the fluff, but there is some major insight there on monetizing your following). For me, this is where some of the dogfooding comes into play, AWeber is a software as a service specifically for email marketers. I want to build my own email list of my raving fans. I use SumoMe‘s WordPress plugins to help collect email addresses on cleanswifter.com. This then automatically sends collected email addresses to my AWeber list. Right now, anyone who signs up will get each post to cleanswifter.com delivered right to their inbox. Looking at Google Analytics to see that people are visiting my site is energizing, but looking at my email subscribers reliably opening my emails and clicking the links is a whole other world. These are my tribe, and it’s exactly them who I have in mind when I write each post.

Picking A CMS

For me, picking a content management system was a big decision. I had been using Squarespace for my personal site, <andyobusek.com> and it worked well enough, but I wasn’t thrilled. It seemed targeted to an end user less technical than me. I had also played around with a more static solution like jekyll, and while that worked well enough for the pure function of writing blog posts, it wasn’t easily extensible and it was almost more low level than I wanted. I have been using WordPress for my work with raywenderlich.com and the AWeber Engineering Blog so I’m familiar with it from an end user standpoint, but never really an Admin. It intrigued me, so I purchased some shared hosting from DreamHost (affiliate link) and I haven’t looked back. It’s no joke that WordPress runs the Internet, and now I see why. You can totally customize your website and not write a single line of HTML.

Here’s a list of plugins I’m using:

Start A Programming Blog

SEO Is King

SEO really is king for starting a programming blog. I’ve loosely been running a test to see how I can grow my traffic by purely focusing on SEO. Besides tweeting once about one of my posts on Storyboard Code Review, and including a link to Xcode Testing Shortcuts with my appearance on the raywenderlich.com podcast, I haven’t done any social sharing of articles on cleanswifter.com. I have tried posting links back to cleanswifter.com on a couple other relevant blogs in comments of related articles on those sites. I know I’m missing out, but I also didn’t want to revel in vanity metrics of page views from my mom. I wanted to focus purely on driving traffic to my blog in organic ways.

Yoast Rocks

The Yoast SEO plugin for WordPress is freakin awesome. It gives you a gamified way to optimize your post for SEO. You just try to get all the little lights green, and then your post if good to go for SEO. One caveat is that it’s kind of incompatible with other WordPress plugins for Markdown. That’s okay though, because even though the bubble isn’t green, you’re still good from an SEO perspective.

start a programming blog

Google Search Console

I have yet to dig into the Google Search Console to its fullest extent, but it’s important to get it setup from the very beginning. Essentially, the Google Search Console does at least two important things: it let’s you refine how Google sees and indexes your site, and 2) shows you data on what people are searching for when they see your site in search results (and whether they clicked on it or not).

Post Everyday

I have yet to definitively tie this to SEO, but I’ve read all over the web that there are two things really important to driving traffic to your site: post frequency, and post frequency consistency. This means, pick a frequency for posts, and do it no matter what. For me, I’ve chosen to get a post out Monday through Friday each week. It’s tough to sustain for sure. I can see a future position where I dial this back. Once a week feels too infrequent, but I’d like to still have time to work up that monster post, while also surrounding it with some solid content curation.

There are a TON of other tips on SEO available on the web, just Google it.

Figuring Out Content

For me, one of the biggest hurdles in my output is figuring out what to write about. Assuming that what I’ve read about SEO is true, that posting everyday leads to higher SEO rankings, that means I need to post everyday. Whew, let me say that again, I need to post everyday. That…is…a…lot…of…content. One of the things that is most stressful to me, is coming up with that content. I want to make sure the content is relevant and valuable as well. Now, I’m not talking massive 3500 word tutorial posts, but Yoast suggests a minimum length of 300 words. Here’s some strategies I’ve come up with to keep the content flowing:

  • Content Brainstorm List – I have a Google Sheet where I just jot down post ideas as they come to me. It’s long, somewhere between 50-100 items. It’s great for capturing an idea when it comes to me, and nothing else.
  • Content Calendar – I found that if I can seed the idea for the post days ahead of time, it vastly removes the stress of writing the post. I’ve been planning for the 1 to 2 week timeframe at the moment. Basically, over the weekend, I’ll make sure I know which topic I’m going to write about each day for the upcoming week. I’ll also look out one week further for an even rougher idea of which posts I’ll be focusing on.
  • Content Curation – Content curation is an awesome way to get valuable content out to your readers. Just because you saw a popular article on Twitter, don’t assume that your readers have seen it. Chances are, they haven’t. And even if they have, there’s always room for more voices and opinions on the topic. Re-post it with your own perspective and your readers will love it. I’ve tried either linking to another piece of valuable content that I found that week with some additional commentary of my own, or lately, been doing more of the dogfooding thing and using my app Curate to construct a weekly newsletter. The newsletter gets sent to my email list subscribers via AWeber. I then post a link to the web-based version of the newsletter from my blog.
  • Weekly Menu – I actually heard this idea at the 2015 AWeber Ascend Conference (for digital marketers). The bad thing is that I can’t remember who presented it. Basically, the gist is that you line up your posts over the week as you might line up your courses while out to eat for dinner. Monday’s post is just like an appetizer, something light to whet your appetite. For me, lately I’ve been posting my videos while reading Martin Fowler’s book on refactoring. Similarly, Friday is all about an easy transition into the weekend with some content curation. The mid-week is all about the monster post. Somewhere between Tuesday and Thursday, I’ll shoot for a longer post, usually something instructional, to allow my readers to dive into something a little more meaty. These will probably be the best posts to really tweak for SEO. If you can write an in-depth instructional article, chances are, new readers will come to your site for this content. On the surrounding days, write other posts somewhere in between the long monster post, and the shorter content curation posts. I’ve also tried weeks of related content, like back when I was writing about code coverage.

Progress To Date

50 posts ago, when I was just getting started, I learned in this article titled 5 Tips to Drive More Traffic to Your Blog Today that once you have 51 posts, your blog traffic increases by 53%. 50 posts has been a milestone I’ve had in mind ever since I started, and now that it is here, I’m really excited. It’s just a milestone, not a goal. I’ll continue past it and am now looking forward to my 100th post.

Here’s a screenshot from my Google Analytics Audience Dashboard:

Start A Programming Blog

Now I know I haven’t changed the world, but I feel really good about 607 users over almost 2 months. That’s my tribe. It’s hard to find actionable information in Google Analytics, but for me, seeing the trend upward in readership really motivates me. For that alone, Google Analytics is invaluable. It helps reinforce to me that I’m actually helping people.

Other Random Tips

Don’t Start With H2

RSS feeds don’t show style. So if your RSS feed takes an excerpt from the beginning of your article, and your first line is an H2 title, if won’t appear as such in the feed and may seem disjointed from the rest of the content. Your better off writing an introductory paragraph, and then following it up with an H2 when you introduce the first section of real content.

Spam In Google Analytics

Did you know that you can get spam in Google Analytics? Ya, it’s a real thing. I first noticed it in when looking at referrers to me site. Basically spammers simulate requests to Google Analytics properties with randomly generated ids. Then, the spammer’s website shows up as a referrer to your site. You click their URL to check out their page thinking “Oh who’s this that linked to my site?” and you land on something totally bogus. There’s a ton of information online for tweaking your Google Analytics settings to prevent this rotten information from infecting your analytics, do yourself a favor and check it out.

Looking Forward

I have so many more ideas on how to make cleanswifter.com even better, that really time is the big constraint.

Time Is Not On My Side

Time is by far the constrained resource. Right now, my priority is to get the daily content out on cleanswifter.com. And I’m on a streak that I don’t want to break. In the future, there will be a day when that streak breaks. I can see the merit in less frequent posts – maybe then the posts that do go out are higher quality, or longer? Either way, posting everyday, and then doing surrounding tasks like picking a new theme, or working on screencasts, is incredibly hard to find the time to do.

Pingdom

Right now, I just trust that DreamHost is available all the time. I certainly haven’t had any problems to date with it. Pingdom is a great service that I’ve used in other projects that will essentially monitor the uptime of your website, and then alert you when it goes down. I’d like to hook this up to cleanswifter.com.

Create My Funnel

I referenced Pat Flynn earlier in the article. He has some great information on his website smartpassiveincome.com/ for monetizing your content. I’d love to investigate some of these options to help offset the costs with maintaining cleanswifter.com.

Share Your Love

I have not spread the word about cleanswifter.com through my own social channels. Honestly, I’ve been a little shy about it. I wanted to make sure it was something I stuck with. I don’t even really have this confidence yet, but I had always looked at 50 posts as a milestone where if I got that far, I figure it would become something part of me, and that I would stick with. I guess I’m there? Either way, I kind of look at 50 posts as a coming out party, and now that cleanswifer.com is here on the scene, I’ll start tweeting new posts, sharing links in the Slack rooms I’m in, and actively trying to drive social traffic to the site.

Theme Blues

I hate my WordPress theme. I need a new one. I have such a terrible eye for design that I don’t know where to begin. I’ve tried a couple others, but don’t feel they are any better. On the other hand, I look at colleagues’ WordPress sites, and they look beautiful. How do I get therE? Something to figure out for the future.

The Sign-off

Well, that’s the highlights of my learnings for how to start a start a programming blog. I’ve come to adopt the tagline for signing off posts, “Happy cleaning.” It’s kind of a quirky line, but something that I feel like adds a little bit of personalization to the posts. And with that…

Happy cleaning.

WWDC 2016 Wish List

WWDC 2016 is less than one week away. I’ve only been to the actual conference once, and that was the 2014 instance. I had such a great time, met people that I continue to stay in contact with despite not having seen them since, and learned so much. That was the WWDC where Swift was unveiled to the world. With such a huge announcement as introducing a new programming language, I think it’s a WWDC that will stand the test of time. In a lot of ways, WWDC is like the one time of year that we developers get a new delivery of gifts from Apple. Gifts that we can use to create new business ventures, deliver new delightful features to our customers, and even gifts that will make our own lives easier- both as developers within Apple’s platform, as well as end users of many apps ourselves. I have no shortage of things that I’d like to see from Apple, both from a developer perspective, as well as an end user perspective. Here’s my WWDC 2016 wish list:

I tried to keep this list in the realm of possibility, and it is ordered by a mild amount of prioritization.

  1. Xcode Swift Support. Yes, you can build Swift apps in Xcode, and I do. And yes, there have been improvements in this area. There are just some fundamental things broken with building Swift apps in Xcode. For example, I hope I never have to see that “Xcode can only refactor C and Objective-C code.” dialog again.

Screen Shot 2016-06-06 at 12.19.29 PM

Frankly, I would be embarrassed if I had to put an error message in one of my apps to the tune of, “sorry, you tried to do something legitimate that we just don’t support.” And then to think that this message has been around for going on two years!?!?! Additionally, while less frequent as a year ago, I still get SourceKit crashes in Xcode. That’s when all of a sudden syntax highlighting of your source code stops, and there is no autocompletion. It’s usually paired with an error message. And often, there’s no suggested course to correct whatever you did to crash SourceKit. It’s usually the case that you typed in some non-compilable Swift that rather than getting a nice error message, your IDE stops working. Do you think a third-party IDE would survive with shortcomings like this? I don’t.

  1. Automated Test Support. Reflecting over the past five or so years of WWDC, it’s been amazing to watch the progress Apple has made in supporting automated testing of iOS apps. I remember when first joining the iOS dev community, being astounded by how little Apple made available for automated testing (compared to the Java world that I came from). Fast forward to today, and it’s a fairly comprehensive suite of tools for testing your apps. A couple gaps that I would like filled include:

    • Faster test execution – I heard that Visual Studio, the .NET IDE, actually will run your test bed anytime you save a source file in your project. That sounds AMAZING! In order for that to be possible, test execution must be fast. Right now, just to run a suite of a couple hundred XCTest unit tests, it’s about 20 seconds. That needs to be sped up.
    • Headless test runners – Right now, running tests (unit or otherwise), require a simulator or device to fire up your app, and run through the tests. This shouldn’t be needed. It would be so nice to run tests without the overhead of the iOS simulator or device.
  2. Continuous Integration Improvements – Xcode Server is a start, but so far from being something that would stand our as a continuous integration solution. I’d love to see Apple take strides to better supporting cloud-based continuous integration. This may even include some amount of supporting xcodebuild on non-OS X based systems (Linux?). Headless test runners would help here too. Right now, without the help of something like Buildasaur, I can’t even get the status of a Xcode Server integration on a pull request. That’s a huge hole in me adopting Xcode Server as the sole solution for continuous integration. Oh ya, and what about even automating some of the process of app deployment, like submission to iTunes Connect? Wouldn’t that be delicious!?

  3. WatchKit Performance. I’ll state right off the bat that I don’t actually have any WatchKit code in production apps at this point. I do have an Apple Watch that I wear everyday. I buy-in to the concept of wearables, especially for health and exercise tracking. The thing is, using the watch is so darn slow and unreliable. Whether I’m asking Siri to start a timer, or using the Strava watch app’s “Start Run” button, either the action simply won’t happen, it will take too long, or some random nasty side effect will happen (like my Strava workout will clobber the corresponding entry in HealthKit). Until WatchKit apps are speedy, and reliable, there’s no chance of success for the Apple Watch in the future. New hardware is not the answer here. It may be part of the solution, but the software stack needs a total revamp.

That’s my WWDC 2016 wish list. If I didn’t say it before, I’ll just reiterate how exciting this time of year is for me, and should be for you too. Even if you need to support older iOS versions, don’t worry, the new features that are announced are still fun to play with, and you’ll eventually get to use them in your production applications. What’s on your WWDC 2016 wish list? If you didn’t see, Apple will be live streaming sessions daily, and posting videos or all sessions throughout the week. Starting next week, I’ll be posting recaps and highlights of all the sessions I find interesting as I consume all this great content from the comfort of my couch.

Happy cleaning.

Swift Algorithm Club

I caught an article today on raywenderlich.com that pointed me to the Swift Algorithm Club. I had heard of the Swift Algorithm Club a couple times in the past, but never got the chance to take a peak. Today, I got that chance, and what I saw was really cool. Algorithms classes during my education were some of the most challenging, yet fulfilling classes that I took. Being able to dissect or create a complicated algorithm is a unique feeling. Something that I don’t think I’ve flexed enough since being out of school.

Big Oh

I really like how the Swift Algorithm Club has frequent references to Big-Oh notation, eg O(n). In particular, it’s so easy to get caught up in the high level APIs that we are often using when building our iOS apps, that it’s easy to lose focus on the basics of algorithm effectiveness and efficiency. Being able to spot an optimization to move from quadratic (O(n^2)) to linear (O(n) to even constant (O(1)) efficiency can have vast performance improvements in everything from network usage, to battery usage, to simple responsiveness of your app. One drawback, is that with the ease of learning how to “code iPhone apps” from the vast amount of tutorials out there, often these course cover nothing about algorithmic efficiency. So if all this is new to you, go do some Googling. Here’s a recorded course from MIT.

Go Contribute

I also appreciate how the article also puts an offer out recruiting contributors. I think for newcomers to the field, finding a project to be able to contribute to, or even just know how to contribute, can be daunting. It was nice that the article made some pointers on how to get started.

Wrap Up

Open source, and algorithms, how can you get any better? The Swift Algorithm Club is awesome. Take a look, and I’d love to know, do you consider Big-Oh efficiency when building your apps?

Happy cleaning.

Swift OOP Patterns and Principles

I’m always fascinated how to best apply the intersection of object oriented programming (OOP) and functional programming that is made available in Swift. Having come from a Java background, I’m much more inclined to flex my object oriented skills when a problem arises. I came across two great GitHub repos today from the same author, Oktawian Chojnacki. These repos are actually more of a reference than an open source code base. Oktawian created one repo that shows Swift OOP Patterns, and another for Swift OOP Principles. I actually had my own failed attempt at documenting Swift OOP Patterns here. I’m just including that for laughs as I abandoned the project, but it’s good to know that the idea was relevant and it’s exciting to come across someone else who was able to successfully execute it. I’ll definitely be starring and bookmarking these projects from Oktawian for future reference. And what’s even cooler about these pages and playgrounds is that Oktawian actually links out to more formal definition and further reading about each principle and pattern. It’s great having all this documentation consolidated within one easy to reference resource.

The Swift Patterns and Principles

I know I need to develop those functional programming muscles, but it’s too exciting not to pass along cool resources for Swift OOP patterns and principles when I find them. How are you making out with your balance of OOP and functional paradigms in your Swift? Do you have any similar resources for getting up to speed or improving your functional programming toolset? If so, you absolutely must send them to me, because I’m looking for anything and everything available on that topic.

6 days until WWDC 2016… The countdown continues.

Until next time, happy cleaning.

VIDEO: Bad Smells in Code

Chapter 3 of “Refactoring, Improving the Design of Existing Code” by Martin Fowler, titled “Bad Smells in Code” puts definition on when you know to refactor your code.

Here’s my perspective on the chapter:

Video Transcription:

Hey what’s up everybody, I’m Andy, the Clean Swifter. Welcome to the third video episode from my blog cleanswifter.com, where I share tips, tricks, articles, and commentary on how to write cleaner Swift code. In this video, I’ll be providing some commentary on chapter three of Martin Fowler’s book, “Refactoring, Improving the design of existing code.” The third chapter is titled “Bad smells in code.” You can buy the book through my Amazon affiliate link in the description for this video. In this chapter, Fowler covers a list of specific things, called smells, that should catch your eye and tell you that it’s time to perform a refactoring. I think “Smell” is such an effective word. Often, you won’t know in black and white terms that it’s time to refactor. Instead, your intuition that something isn’t quite right will start to poke at you. Leveraging some semi-formal definition for these “smells” will help you be able to identify them in your code. Throughout the chapter, Fowler actually goes as far to actually suggest specific refactorings in response to various smells. Since we haven’t actually read about what those refactorings are, I’m not going to mention them in any detail yet myself. I was also happy to find that in the back of the book, literally inside on the back cover, is a table reference that lists these specific refactorings that can be performed to correct a bad smell. Here’s a quick tour through some of the code smells that jumped out at me.

The first smell, duplicated code. I bet you’ve seen this one yourself, especially if you’re a liberal copy and paster. It’s name is straight forward. Seeing the same pieces of code sprinkled in more than one place is a clear indication that a refactoring is possible and should happen. One common example might be styling a UILabel. Say some group of UILabels on a page all need a certain look. It’s very easy to copy and paste the common lines of code that set the font, color, and abbreviation style. Unfortunately, when you need to change one attribute of the style, you need to do it in many places, and are likely to miss at least one, thus leaving some labels without the change. Duplicate code is easy to spot. If you see it, you need to address it.

The second smell I wanted to call out is actually three in one: Long methods, long parameter lists, and long classes. Fowler actually lists these are three separate smells, but I’m going to summarize them as one. While there are some slight nuances in how they can be treated, they ultimately represent a piece of code that is trying to do too much. The more lines of code any one “unit” is, whether it’s a method or a class, the harder to understand it will be. Later in the book, we’ll learn refactorings that will help extract common behavior, and break these long pieces of code into separate parts.

The third smells I wanted to mention are shotgun surgery and divergent change. Again, these are granular variation of a common theme: where the need to make one change, results in needing to make many other changes. Divergent change refers to this happening within a single class, where shotgun surgery refers to this happening across many classes. When this smell starts to stink, it’s usually a sign that the single responsibility principle has been violated, or that there is weak encapsulation of behavior. We’ve all gone through this, where we get a request to add a tiny feature, only to find out that there is this cascading amount of changes that are required to implement it.

Feature envy is another common smell. This happens when one class or method, heavily leverages another class, repeatedly, for a wide variety of help in completing a task. See where the name comes from? The class is envious of the features in the other class. This creates an unnecessarily strong coupling between the two classes, which should be avoided when detected. We’ll eventually look at refactorings that help prevent this.

Refused bequest is an interesting smell, one that I’ve come across a bunch with UI code. Refused bequest is when a subclass wants all of the behavior of its parent class, except a certain piece. This happens a lot when subclassing UIKit classes, especially when you start to introduce multiple levels of hierarchy in your own code. Eventually, you’ll create a subclass, where you don’t want the subclass to have all of the behavior of its parent. This is a smell, and rather than code empty methods to override the parental behavior with essentially no ops, you should look to refactor this in a better way.

The last smell Fowler identifies is simply called, comments. And it’s just that, comments in code. I can totally relate to this one. I love how Fowler says that “comments are just deodorant on code smell.” If you find yourself needing to write an extraordinary amount of comments for a piece of code, take that as a sign that there’s probably a refactoring to be done that will help add clarity to the code. That being said, don’t let this stop you from writing comments in your code, just be aware when you all of a sudden write way more than usual for a piece of code.

There were actually a couple more subtle code smells I omitted, and I encourage you to go grab a copy of the book and check them out for yourself.

Looking ahead to chapter 4, it’s title is “building tests.” Fowler puts some clarification around how to build your tests to best support your refactoring. I hope you enjoyed this video from cleanswifter.com. until next time, happy cleaning.

Weekend Reading, June 3, 2016

Weekend Reading, click here

Happy Friday there fellow clean swifters. WWDC 2016 is only one week away! What’s on your wish list? I’m trying a new format on Friday’s. Rather than a typical blog post, I’m going to post a collection of interesting links around the web that I found for you.

In the mean time, I’d love to hear from you, what topics are you interested in hearing about on cleanswifter.com? Just comment on this post and let me know.

Happy cleaning

Amazon Device Farm XCTest Tutorial

Amazon Device Farm has been on my radar for some time now. It offers the ability to remotely test your iOS apps on physical devices that are located somewhere else. Remember my post about cattle vs pets, and how your continuous integration box should not be a pet? I wanted to test out how well Amazon Device Farm XCTest actually worked, and report back here on my experience so you know how to do it as well.

Extensive List of Supported Devices

Not only does moving your automated testing to the cloud move you away from owning a “pet” build box, but it is also a cost effective way of testing your application across a large number of devices and OS versions. You won’t need to go buying old iOS devices on eBay. Amazon Device Farm supports all the way back to iOS 7. Ever accidentally upgrade your old iOS8 test device, only to realize that you can’t downgrade? With cloud based testing, you no longer need to worry about that. Amazon Device Farm supports many devices and OS versions, across iOS AND Android. You can take a look at the actual list of supported devices here.

The Goal

The goal is to evaluate and document getting a project executing Amazon Device Farm XCTest runs. I’m going to reuse my sample project from my CocoaHeads presentation, you can find it here. The project actually has three test targets setup: unit tests with XCTest, KIF tests, and FBSnapshotTestCase tests. My primary goal here get Amazon Device Farm XCTest running for unit tests. Getting the other two test targets running would be icing on the cake.

Running Amazon Device Farm XCTest Cases

TLDR

If you’ve gone through Amazon’s documentation, and are still stuck, there are two key things that I discovered that made this work for me:

  1. Properly create the .ipa file – I achieved this by Archive -> Save for Adhoc Deployment, etc.
  2. Properly create and find the .xctest folder – I had a hard time finding the .xctest folder to zip up. It’s buried in your Derived Data folder. I used the command line find command to locate it. Also, Amazon Device Farm requires you to include any class under test in the test bundle as well.

More details on those two steps later, so read on!

Overview of Amazon Device Farm

Amazon Device Farm breaks down your work into Projects and Runs. Amazon describes a Project as:

A project in Device Farm represents a logical workspace in Device Farm that contains runs, one run for each test of a single app against one or more devices. Projects enable you to organize workspaces in whatever way you choose. For example, there can be one project per app title, or there can be one project per platform. You can create as many projects as you need.

You basically have the freedom to use Projects as wide or as narrow as you want. I’m imagine a Project to be analogous to a Jenkins job. Just like a Jenkins job, a Project will consist of any number of Runs, which are basically just an execution of a given test script.

Access Your Account

To use Amazon Device Farm, you’ll need a Amazon Web Services account. Follow the instructions here for creating an account and setting it up. It’s a little more involved than just registering. You can actually create additional users within your AWS account to help segregate identities and access management, and it’s recommended that you do this to be used with Amazon Device Farm.

Once you have your account setup, sign in to the Amazon Device Farm at https://console.aws.amazon.com/devicefarm.

Create Your Project

Now that you’re logged in, you’ll need to create your first Project.

amazon device farm xctest

For this simple trial, I reused my Xcode project name for my Amazon Device Farm project name, “CocoaHeadsTestingPresentation”.

amazon device farm xctest

After you’ve created your project, you’ll see it in the list of projects:

amazon device farm xctest

Create Your Run

Select your project from the project list, and you’ll see a page that will eventually show your test runs. Since you have no test runs at this point, the page is empty. Now, you’ll create your first Run. Select Create a new run.

amazon device farm xctest

On Step 1, select the button that shows the Android and Apple icons to indicate that you are going to create a run for a native app.

Prepare And Upload Your Build

Now you need to prepare your application for execution within the Amazon Device Farm XCTest Run. This was a little tricky, and under documented in Amazon’s documentation, so I think this part will really help you. Jump over to Xcode, and Archive a build. Archiving a build will inherently enforce you to make sure you are building for device, as this is also a requirement of running Amazon Device Farm XCTest cases, since they actually run on devices. Once your build has finished archiving, select the build and **Export…* it from Xcode:

amazon device farm xctest

Select Save for Ad Hoc Deployment:

amazon device farm xctest

Ensure that the same identify as your build settings is used for code signing:

amazon device farm xctest

And then ensure that you Export one app for all compatible devices:

amazon device farm xctest

After selecting Next, follow through another couple prompts selecting the default options, and specify a location for your .ipa file and Xcode will code sign your application and create an .ipa file that will be uploaded to Amazon Device Farm. Go back into your browser that was left off on Step 1 of Create a new run in your first Amazon Device Farm project. Click Upload and navigate to your new .ipa file, and upload it.

You’ll know it was successful when Amazon Device Farm shows you information about the .ipa file:

amazon device farm xctest

Click Next step.

Specify and upload your XCTests

On Step 2, select XCTest as the test type, and then you’ll need to upload your XCTests. This was the hardest part of the process to get right, and also the most under-documented in Amazon’s documentation. Here’s a couple things to tweak and double check in Xcode to make sure you are setup:

  • Unit tests will compile with each build – This should be the default setting, but it’s worth double checking. Open the Build action settings for the scheme in the Scheme Editor. Verify that in the Run column, your test targets are checked. This means that when you type Command-B or even run your app, your tests will be compiled too. amazon device farm xctest
  • SUT Classes are included with the test target – In order for your classes under test (aka SUT) to be available within the test bundle, you need to ensure they are included with test target membership. In my project, WelcomeViewController.swift was a class under test, so I needed to actually add it to the test target membership since this isn’t technically required in a Swift world with the @testable annotation for importing modules. amazon device farm xctest
  • Build tests for devices – Your XCTest bundle must be built for device, not simulator. Select a device, rather than a simulator. amazon device farm xctest

Now that you are all setup, build your tests with Command-B. Now, you need to find the .xctest folder, compress it, and then upload it. I used a find command from Terminal to find it:

CocoaHeadsTestingPresentation|⇒ find . -type d -name '*.xctest'
./Carthage/Checkouts/ios-snapshot-test-case/DerivedData/FBSnapshotTestCase/Build/Products/Release-iphoneos/FBSnapshotTestCase iOS Tests.xctest
./Carthage/Checkouts/ios-snapshot-test-case/DerivedData/FBSnapshotTestCase/Build/Products/Release-iphonesimulator/FBSnapshotTestCase iOS Tests.xctest
./DerivedData/CocoaHeadsTestingPresentation/Build/Products/Debug-iphoneos/CocoaHeadsTestingPresentation.app/PlugIns/CocoaHeadsTestingPresentationTests.xctest
./DerivedData/CocoaHeadsTestingPresentation/Build/Products/Debug-iphoneos/CocoaHeadsTestingPresentation.app/PlugIns/SnapshotTests.xctest
./DerivedData/CocoaHeadsTestingPresentation/Build/Products/Debug-iphoneos/CocoaHeadsTestingPresentation.app/PlugIns/UserInterfaceTests.xctest
./DerivedData/CocoaHeadsTestingPresentation/Build/Products/Debug-iphonesimulator/CocoaHeadsTestingPresentation.app/PlugIns/CocoaHeadsTestingPresentationTests.xctest
./DerivedData/CocoaHeadsTestingPresentation/Build/Products/Debug-iphonesimulator/CocoaHeadsTestingPresentation.app/PlugIns/SnapshotTests.xctest
./DerivedData/CocoaHeadsTestingPresentation/Build/Products/Debug-iphonesimulator/CocoaHeadsTestingPresentation.app/PlugIns/UnitTestBundle2.xctest
./DerivedData/CocoaHeadsTestingPresentation/Build/Products/Debug-iphonesimulator/CocoaHeadsTestingPresentation.app/PlugIns/UserInterfaceTests.xctest
CocoaHeadsTestingPresentation|⇒ 

Remember, you want the bundle built for device, not simulator. That means you’ll use the one in the directory Debug-iphoneos, not Debug-iphonesimulator. The directory you need to compress to a zip file is:

./DerivedData/CocoaHeadsTestingPresentation/Build/Products/Debug-iphoneos/CocoaHeadsTestingPresentation.app/PlugIns/CocoaHeadsTestingPresentationTests.xctest

Compress it as a standard zip file (you can use Finder for this), and Upload it back in the Amazon Device Farm browser.

amazon device farm xctest

You’ll know the upload was successful when you see details about the XCTest zip file:

amazon device farm xctest

Click Next step to select your devices for the run.

Select Devices

One thing that annoyed me with setting up my first Run for an Amazon Device Farm XCTest was that when I finally got to the screen to select which devices to execute my Run on, the default list contained five devices, none of which were supported by my app. I would have rather’d some smarts on Amazon’s part to look at the lowest iOS version supported by my app, and then only show me “Top Devices” for that minimum iOS version.

Since the suggested list didn’t work for me, the first thing to do was Create a new device pool, which is what you should click to do that:

amazon device farm xctest

On the resulting screen, it’s obvious enough to select devices for a new “pool” – just make sure you select devices compatible with your app’s minimum version, because you won’t be prevented from doing that.

Once you create a pool of compatible devices, you’ll see a message about “100% Compatibility”

amazon device farm xctest

Select Next step to specify initial device state.

Specify Device State

In Step 4, you can specify other initial aspects of the device’s initial state, like other apps to load, a geographic location, or which locale to use:

amazon device farm xctest

I didn’t change any of these values from the default for my app.

Next, click Review and start run. The next page reviews your Run’s settings, and allows you to start it. Click “Confirm and start run” to start it.

Boom, that’s it! At this point, you’re basically done. If all is configured correctly, your Amazon Device Farm XCTest will be running. Congrats!

amazon device farm xctest

Observations of Amazon Device Farm XCTest

Here’s a couple observations from going through this setup for Amazon Device Farm XCTest.

Setup Is Too Manual

Next, I really need to investigate automating this. There’s no way I would frequently go through this in order to run my tests. It’s so much faster to run it from Xcode locally. There’s just too much clicking through prompts. Ideally, I want to connect this with my continuous integration server, so that’s the next thing I’ll look into.

Tests Are Slow

Just the simple act of running tests is really slow. For my sample project, that is totally bare bones, with ONE XCTest unit test, it took just over three minutes to run in Amazon Device Farm. That’s compared to like one second locally in Xcode. I’d like to try this with a larger code base and observe how long it takes. I hope the duration doesn’t lengthen with the size of the project or number of tests, but it probably will. At this point, I don’t think I’d put such long running tests in the middle of my code review workflow, but rather integrate these as nightly builds across a large number of devices.

Documentation Lacked Key Steps

The hardest part of getting this setup was getting the precise build settings right, both for the app binary ipa itself, and the .xctest bundle as well. Amazon totally glossed over this in their documentation, which really prompted me to write this article. The good news is that in Googling around, I noticed Amazon support employees actually answering questions on Stack Overflow, and also participating in Amazon’s own dedicated form for supporting Amazon Device Farm.

Wrap Up

I noticed that there is a command line reference for Amazon Device Farm. In order to integrate Amazon Device Farm XCTest with my continuous integration procedures, I know I need to test this with more complicated projects, and also automate it. I’ll do that in a future post.

Happy cleaning.

Ellen Shapiro on Code Coverage

Source: Fabio Oliveira, Twitter

I caught this great picture on Twitter of Ellen Shapiro presenting at UIKonf last week in Berlin.

Now, I’m not totally sure of the topic of the talk, but having heard first hand of Ellen’s passion on automated testing, and seeing this slide, I’m pretty sure it’s content would be something that I would endorse here at cleanswifter.com.

If you aren’t following Ellen, you should be. I’ve seen her present several times, and she is my colleague on the raywenderlich.com iOS team. Besides Twitter, here’s an appearance of her’s on the raywenderlich.com podcast that you’ll enjoy.

I’ll even leave you with a fun story from the first time that I met her. This was back at a CocoaConf in the fall of 2014 in Boston. During an impromptu lunch time session where developers could show off their own apps, Ellen stepped up to give a demo of Hum. It’s an app for musicians to help record little bits of audio so they can remember it later, for use when you’re songwriting. A major part of the app has to do with recording audio so you can listen to it later. Ellen blew people away in the demo by belting out, herself, solo and acapella, the opening line to Black Dog by Led Zeppelin. I think I speak on behalf of the whole room, that I was blown away by its awesomeness. I was a fan for life, and that’s before I came to learn about her passion for high quality iOS code.

If you ever get to meet Ellen, tell her the Clean Swifter says Hi.

Happy cleaning.

PS – Thirsting for a tutorial? I’ve got something good planned for tomorrow- how to run your first XCTest on Amazon Device Farm. Be sure to come back and check it out.

iOS Environment Configuration

Many Environments To Manage

Have you ever worked on an iOS app that needed multiple environments to support it through development? I have. For me, almost every app I have ever worked on has had some sort of web based API supporting the app. And for these apps, I’ve tried a variety of techniques to consolidate and improve how I manage the urls for these web APIs across different test infrastructures. This kind of iOS environment configuration can become tricky. For example, at one place I worked, we had the following “test environments” or different web backends intermingled throughout the release pipeline:

  • Local (url of localhost, sometimes an IP address_
  • DEV (Development testing)
  • INT (Integration testing)
  • SAT (Systems acceptance testing)
  • PERF (Performance testing)
  • CAT (Client Acceptance Testing)
  • Pilot (Alternate Production servers – including different urls for each node behind the F5 load balancer)
  • Production (including different urls for each node behind the F5 load balancer)

This amounts to more than 10 different environments that I would need to provide builds for various testers throughout the development cycle.

Summary Of Options

Needless to say, 10 environments is a lot and need to be managed somehow. I was thinking of writing up each technique I’ve tried, but then I came across a useful article on “The App Business” blog, titled “A robust multi-environment build setup.” that clearly describes a couple of the most popular ways to do this.

Automating It

iOS environment configuration

The majority of “The App Business” blog article recognizes some manual ways to manage your builds and the environments they are configured to connect to, including other iOS environment configuration. Later in the article though, “The App Business” goes a further extra mile by announcing an actual tool they created to help accomplish this, it’s called configen. configen takes a configuration file, and actually generates a Swift class to help manage selecting environments during build configurations.

Schemes Aren’t Bad

One qualm I have with the article. Using separate Xcode Schemes for different environment variables is a useful way to help separate our your iOS environment configuration. One thing I like about using separate Schemes that the article doesn’t mention, is that non-developer-types, like product managers or designers, may feel comfortable knowing where the dropdown is in Xcode to build for a separate scheme, while they may not feel comfortable having to modify code or run schemes to change environment options.

iOS environment configuration

User Controlled

One thing I would have liked configen to take farther is the ability for the end user of the app to be able to change the environment variables and other iOS environment configuration used for a given session of the app. I’ve seen this done several ways, but none that I’m happy with. The last time I did it, I actually coded my own interface for the user to select which environment to use. I wasn’t happy with how intertwined the resulting user interface code was the rest of my code base, there wasn’t good decoupling. Ideally, there’s a third party package, that can be modularly loaded, such that it is a drop-in solution.

Getting More Clean

What’s on your wish list for iOS environment configuration? What aren’t I thinking of? How have you fared? I’d love to hear.

Happy cleaning.