Writing Your First KIF Test

Earlier this week I introduced you to the concept of functional testing on iOS. Yesterday, I showed you how to install KIF, a tool for functional testing on iOS. Today, I’m going to walk you through writing your first KIF test.

If you haven’t done so, please start by downloading the demo application, and installing KIF from yesterday’s post, . This article will continue where it left off. If you want to skip that, and just start with a fully configured demo app with KIF installed, you can download that here.

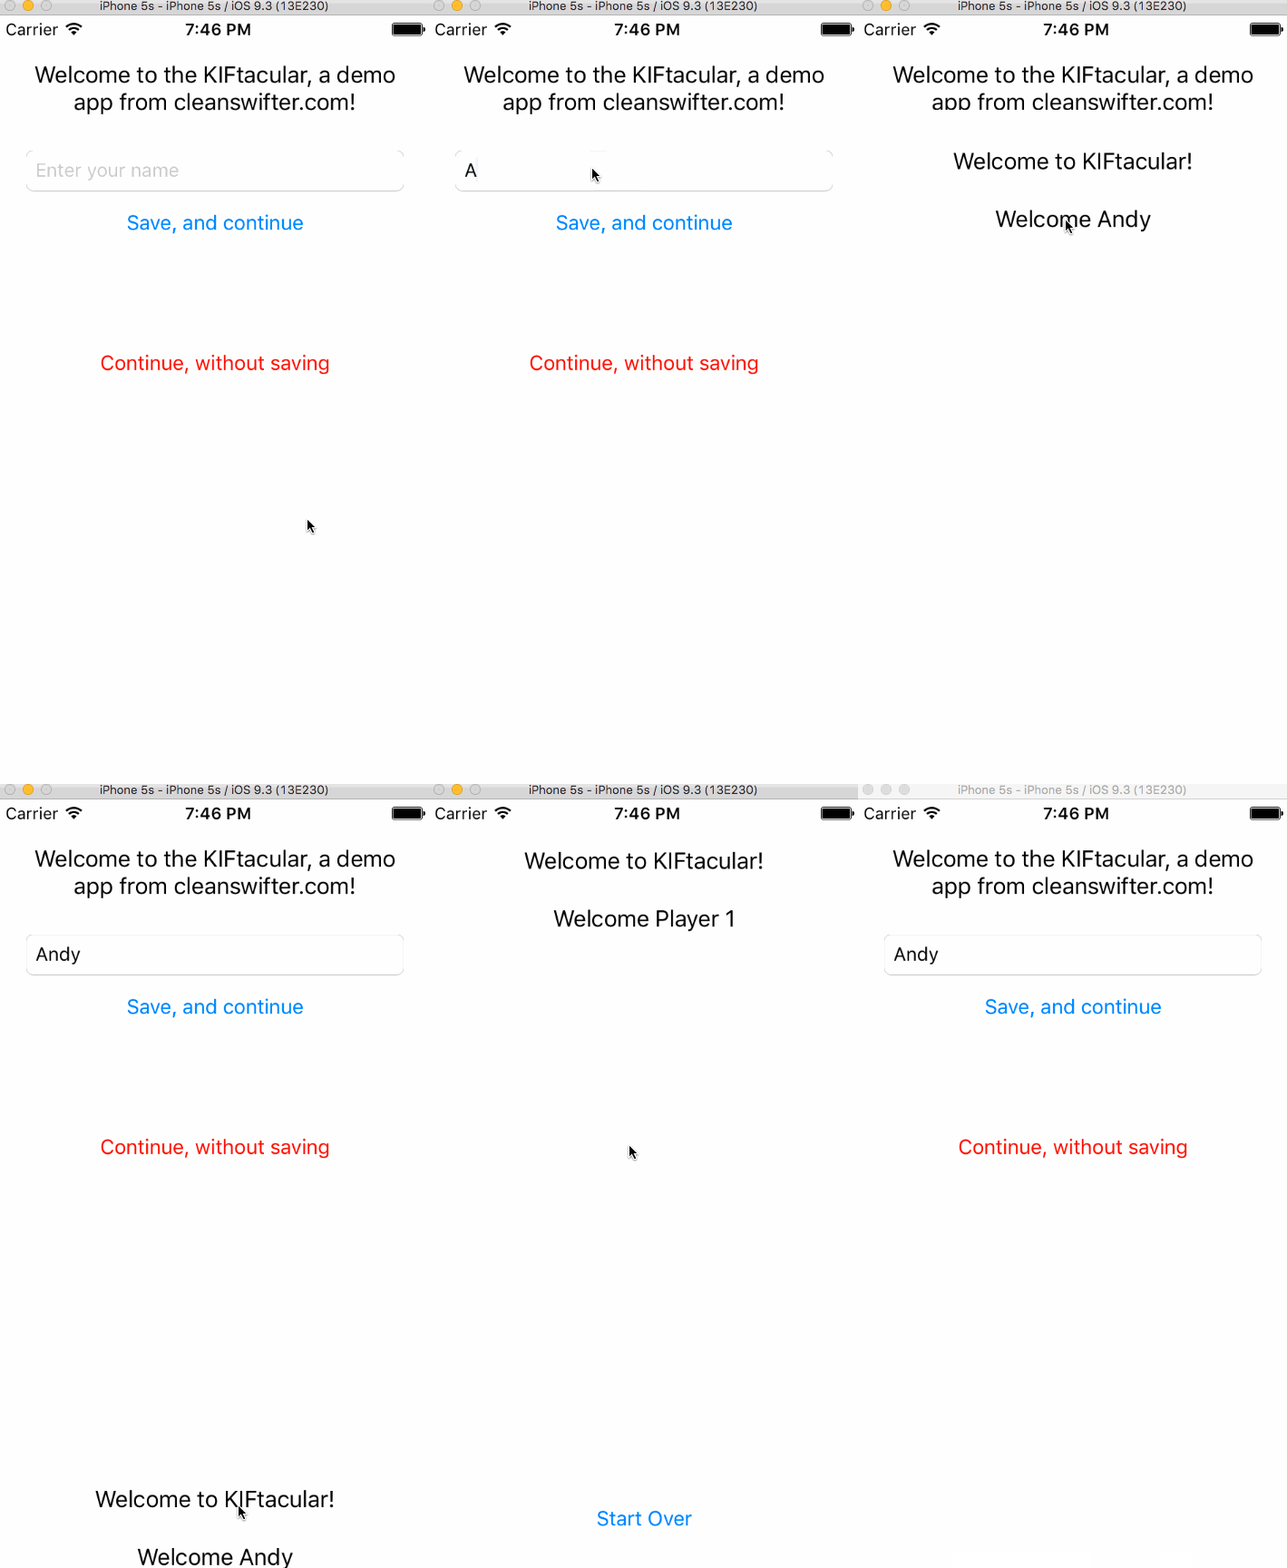
Demo Of The Demo App

From the root directory of the Demo app, KIFDemoApp, open the workspace file KIFDemoApp.xcworkspace in Xcode.

Build and run the app, and give it a try.

Writing Your First KIF Test

You’ll notice a view with a text field, and two buttons. Each button presents a new view. The difference is that one button will replay back the text that you specified in the field, and the other button just shows the next view with static text.

Step 0 – Add An Extension For KIF’s tester

Disclaimer: This should probably move to yesterday’s post on installing CocoaPods.

Before writing your first KIF test, there’s a step that must be done. The critical mechanism that the KIF API provides for enabling you to navigate through your app is called tester(). It’s implemented as a C preprocessor macro that isn’t naturally available in Swift. You’ll need to manually configure this via an extension that you create.

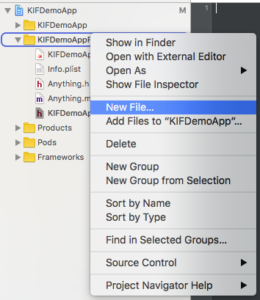
Create an empty new Swift file in the group and target KIFDemoAppFunctionalTests called KIF+Swift.swift. Replace it’s contents with:

extension XCTestCase {
    func tester(file : String = #file, _ line : Int = #line) -> KIFUITestActor {
        return KIFUITestActor(inFile: file, atLine: line, delegate: self)
    }
}

extension KIFTestActor {
    func tester(file : String = #file, _ line : Int = #line) -> KIFUITestActor {
        return KIFUITestActor(inFile: file, atLine: line, delegate: self)
    }
}

You will then use tester() in writing your first KIF test case. Now you need to create that new test file.

Step 1 – Create a Unit Test

You might be wondering, “Why am I creating a unit test case class? I want to create a functional test!” The answer is that it’s convenient to use Xcode’s template for unit tests, you’ll see how to then convert it to a functional KIF test next.

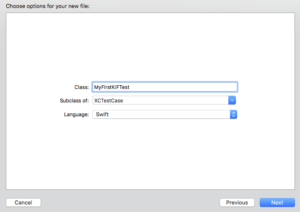
To create the unit test, back in Xcode, in the group KIFDemoAppFunctionalTests create a new Unit Test Case Class by clicking File -> New -> File… and then in the resulting prompt, iOS -> Source -> Unit Test Case Class. Yes, I recognize this is a little weird.

Name the new file, “MyFirstKIFTest” and make sure the Language is Swift.

Writing Your First KIF Test

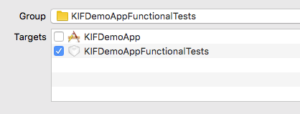
On the next screen, make sure that the new file will only be added to one target, the KIFDemoAppFunctionalTests target, and click Create.

Writing Your First KIF Test

Xcode just created a unit test for you, a good ole subclass of XCTestCase. Now we’re going to convert that to a KIFTestCase.

Step 2 – Convert The Unit Test to a KIF Test

In MyFirstKIFTest.swift, change the superclass from XCTestCase to KIFTestCase. Also, delete all code within the class.

MyFirstKIFTest.swift should now look like:

import XCTest

class MyFirstKIFTest: KIFTestCase {
}

Build the app, and verify everything still compiles. Congratulations on writing your first KIF test!

Step 3 – Write A Functional Test For a Button

For writing your first KIF test, you are going to write a test that taps the Continue without saving button in the demo app, and verifies that the subsequent view is shown.

Add this method to MyFirstKIFTest

func testContinueWithoutSaving_ShowsNextScreen_WithCorrectText() {
    tester().tapViewWithAccessibilityLabel("Continue, without saving")  // 1
    tester().waitForViewWithAccessibilityLabel("Welcome Player 1")      // 2
    tester().tapViewWithAccessibilityLabel("Start Over")                // 3
}

This method is simple, yet very powerful. In 1, the tester() is told to tap something on screen with the accessibility label “Continue, without saving.” If that thing isn’t there, the test will fail. So right off the bat, this line alone provides verification that there is something on the screen with that label, AND that it can be tapped.

In 2, the tester() is told to wait for a view to appear on the screen with a accessibility label of “Welcome Player 1”. If you played around with the demo app, you would have realized that “Player 1” is a static name for players who don’t provide a name. This is the real thing that this test is verifying- that whey the user continues without providing a name, a new screen is shown with a default name.

In 3, you need to reset the app to a “default” state. This isn’t technically required, but I suggest it as a best practice. Future tests you write will automatically continue in the app wherever the prior test left off. For good decoupling of your tests, I recommend “undoing” anything that your test did in the app, so that future tests can start assuming a “fresh” app.

Run your tests by selecting Product -> Test, or use the keyboard shortcut Command-U. Watch how the iOS Simulator launches your app, and magically navigates through the screens. This part never gets old for me, I love watching my apps get automatically verified.

It’s always best to verify that tests fail as well. That way you aren’t lulled into a false sense of security, when the test was just giving false positives to begin with. You should do this all the time, not just when writing your first KIF test. Change either of the accessibility labels in the test, and re-run. You’ll see that the test fails.

Test Suite 'Selected tests' started at 2016-04-27 20:14:17.801
Test Suite 'MyFirstKIFTest' started at 2016-04-27 20:14:17.801
Test Case '-[KIFDemoAppFunctionalTests.MyFirstKIFTest testContinueWithoutSaving_ShowsNextScreen_WithCorrectText]' started.
/Users/andyo/Documents/MyGitHubProjects/KIFDemoApp/KIFDemoAppFunctionalTests/MyFirstKIFTest.swift:14: error: -[KIFDemoAppFunctionalTests.MyFirstKIFTest testContinueWithoutSaving_ShowsNextScreen_WithCorrectText] : The step timed out after 10.00 seconds: Failed to find accessibility element with the label "Continue, without savingg"
Test Case '-[KIFDemoAppFunctionalTests.MyFirstKIFTest testContinueWithoutSaving_ShowsNextScreen_WithCorrectText]' failed (10.064 seconds).
Test Suite 'MyFirstKIFTest' failed at 2016-04-27 20:14:28.022.
     Executed 1 test, with 1 failure (1 unexpected) in 10.064 (10.221) seconds
Test Suite 'Selected tests' failed at 2016-04-27 20:14:28.023.
     Executed 1 test, with 1 failure (1 unexpected) in 10.064 (10.222) seconds

In this output, also notice the message “The step timed out after 10.00 seconds.” That’s an important nuance. By default, KIF allows a 10 second grace period for a given “thing” to be found by the API. This allows for slow user interface transitions to complete without falsely failing a test.

Let me also pause to clarify and reinforce that KIF’s magic is totally driven off of accessibility labels and identifiers (and luckily this is in common with other functional tests in case you ever want to switch test tools later, as well as best practice for enabling people with impaired vision to use your app). As you create your app, and write your KIF tests, it’s much easier if you specify the accessibility information along the way.

Step 4 – Write A Functional Test For a Text Field

Now that your whistle is wet, let me further satiate your desire to write functional tests. This time, you’re going to raise the stakes by inputting text, and based on this input, verify an expected output on the second view.

Add this second test method to MyFirstKIFTest:

func testSaveAndContinueWithAName_ShowsNameOnNextScreen_WithMatchingText() {
    let name = "Clean Swifter"                                                   // 1
    tester().enterText(name, intoViewWithAccessibilityLabel: "Name field")       // 2
    tester().tapViewWithAccessibilityLabel("Save, and continue")                 // 3
    tester().waitForViewWithAccessibilityLabel("Welcome \(name)")                // 4
}
  1. Create a constant string representing the name that will be entered and verified.
  2. Enter the name into the text field.
  3. Tap the Save, and continue button
  4. Wait for the next view, reusing the name constant to verify the output string.

Run your tests. What happens?

The tests won’t pass.

Failed to find accessibility element with the label "Name field"

You never specified an accessibility label on the text field. Open Main.storyboard and set the Accessibility label on the text field. This screenshot should help you figure out how to find and do that:

Writing Your First KIF Test

Run your tests, again. All should be good!

Wrap Up

I hope you enjoyed writing your first KIF test. Well, it was a bonus because you really wrote two! With these basics, it really opens up a world of opportunity for functional iOS testing. For further reference, take a review of the methods available on KIFUITestActor. Those methods provide the comprehensive list for navigating through your app. There’s a lot of available, try it out, and let me know what creativity you come up with after writing your first KIF test! You can find the demo app with the KIF tests added in my GitHub repository.

Happy cleaning.

Installing KIF with CocoaPods for Swift Apps

If I haven’t driven it home yet this week, I love KIF for writing functional iOS tests. I want to cultivate that love in you as well, so here’s a walkthrough on installing KIF with CocoaPods for Swift Apps. Installation of KIF isn’t totally straightforward for Swift apps, I walk you through some of the finer points of installation with CocoaPods basics for getting up and running with KIF.

To help you get started with KIF, I created a demo project with the basic application code for which you’ll be able to write the functional tests. You can find it on GitHub at: https://github.com/obuseme/KIFDemoApp or download in a zip file here. We’ll use this project for the rest of the week as I go deeper and deeper into the capabilities of KIF with the next couple posts.

Installation

I recommend installing KIF with CocoaPods for Swift apps. Ensure you have CocoaPods 1.0 installed, I specifically used 1.0.0.beta.8 when writing this up. First start by creating a new target that will be dedicated for your functional tests. Open KIFDemoApp.xcodeproj in Xcode. Then, in Xcode, select File -> New -> Target…. Select iOS -> Test -> iOS Unit Testing Bundle. Name it “KIFDemoAppFunctionalTests”.

Next, create a new text file in the root of the demo project called Podfile. Add this text to it:

source 'https://github.com/CocoaPods/Specs.git'
platform :ios, '9.0'

project 'KIFDemoApp'

target :KIFDemoAppFunctionalTests do
        pod 'KIF'
end

This podfile sets up KIF to ONLY be included in the dedicated target, KIFDemoAppFunctionalTests. This is incredibly important because KIF uses private APIs, and if you accidentally include KIF in your main app target that you ship to Apple for review for the App Store, you’ll be rejected.

Then, from the command line, in the root of the project run:

pod install

and you’ll see this output:

KIFDemoApp|master⚡ ⇒ pod install
Analyzing dependencies
Downloading dependencies
Installing KIF (3.4.2)
Generating Pods project
Integrating client project

[!] Please close any current Xcode sessions and use `KIFDemoApp.xcworkspace` for this project from now on.
Sending stats
Pod installation complete! There is 1 dependency from the Podfile and 1 total pod installed.
KIFDemoApp|master⚡ ⇒ 

Follow the instructions, and close KIFDemoApp.xcodeproj and open KIFDemoApp.xcworkspace. Now KIF is installed in the workspace.

We will be writing our KIF tests in Swift. Since KIF is written in Objective-C, you must include KIF’s header file from a bridging header file in the KIFDemoAppFunctionalTests target.

To do this, right-click the group KIFDemoAppFunctionalTests and select New File.

Installing KIF with CocoaPods for Swift Apps

Then select iOS -> Source -> Cocoa Touch Class, Next. Name it anything, literally anything you want but ensure that the Language is specified as Objective-C, we’ll delete it right afterwards, click Next. On the next screen, ensure that only the KIFDemoAppFunctionalTests target is selected:

Installing KIF with CocoaPods for Swift Apps

And click Create.

Select the option in the resulting prompt to “Create Bridging Header.”

Installing KIF with CocoaPods for Swift Apps

You’ll have two Objective-C files created, as well as new file called KIFDemoAppFunctionalTests-Bridging-Header. Delete the two Objective-C files – their only purpose served to help create the bridging header.

Installing KIF with CocoaPods for Swift Apps

You can verify that everything is working now by selecting Product -> Test. Everything should compile, and an empty implementation of KIFDemoAppFunctionalTests should run (and pass).

After installing KIF with CocoaPods for Swift apps, you are all set to create your first KIF test case!

Wrap Up

I hope you found this walkthrough of installing KIF with CocoaPods for Swift apps useful. In case something didn’t work out for you, you can find the final demo project at https://github.com/obuseme/KIFDemoApp/tree/kif-installed or here. Tomorrow, we’ll go through the basics of actually writing some functional tests for the demo app. And Friday, I’m going to share a couple advanced tips and tricks to leverage when writing your KIF test cases. Be sure to check back.

Happy KIF’ing!

Three Reasons KIF is Awesome

As I introduced yesterday, KIF is a tool that enables functional testing of iOS applications. I wanted to go into a little more detail today on KIF’s capabilities by giving you three reasons KIF is awesome. Tomorrow, I’ll present an actual walkthrough of writing a KIF test case or two, so be sure to check back then.

What is KIF?

KIF stands for “keep it functional.” The name does it justice, it’s a test framework totally focused on providing a mechanism to write functional tests for your app. KIF tests hook into your app by interacting with the user interface. Similar to all automated tests of any sort, KIF enables you to write repeatable steps of verification to ensure that certain inputs determine certain outputs. Unlike a unit test where you might instantiate a model object, and then directly call a method, and verify the outcome, in KIF tests you instead write code to literally navigates through your app’s user interface and looks for things on the screen. You’ll never call viewDidLoad() explicitly from a KIF test, but you will instead simulate the tap of a button. In order to find things on the screen, KIF leverages accessibility labels and identifiers on your user interface elements.

Three Reasons KIF is Awesome

There are three main reasons why I like KIF:

  1. Tests can be written in Swift or Objective-C. For anyone that has experience with the first iteration of UI Automation test cases, THIS IS HUGE. UI Automation was Apple’s original provided tool for developers to write functional tests, and it was lame because you had to write the tests in JavaScript with a poorly documented API. Three Reasons KIF is Awesome
  2. Tests are executed as part of a normal old test target. Similarly replacing UI Automation JavaScript testing, THIS IS EVEN HUGER! Being able to execute your tests as a normal target in Xcode means first class citizenship with your build process, and thus more easily enabling repeatability and integration with continuous integration tools. With a single Command-U (the keyboard shortcut to run all tests), you can run both your unit tests and your KIF tests.
  3. KIFTestCases, the class that you subclass to write your tests, are subclasses of XCTestCase. This means that the same familiar API from writing verification in unit tests applies to KIF tests, no need to learn a new API for making assertions in your KIF tests.

Can KIF Test Swift Code?

For sure! In fact, this is where I got my first introduction to writing Swift code as part of a “real” project. The first Swift code that we started adding into our repositories on my team was in KIF tests. If you’re looking for a way to start introducing Swift code into your Objective-C project, give it a try in your tests.

Wrap Up

I’ve really enjoyed using KIF for my functional tests, and I hope I helped you by explaining why. Tomorrow, I’m excited to walk you through creating your first KIF test.

Happy cleaning.

iOS Functional Testing Overview

What is Functional Testing

iOS functional testing is the process in which an app is tested as a “black box” and in an end to end fashion. Unlike unit testing, functional tests are written with no awareness of the inner working of the code of an app. Honestly, you could even hand your project to someone, and forbid them from looking at the main source, and they would still be able to write thorough functional tests just my observing how the app behaves on a device or in a simulator. As a result, in iOS functional testing, you’ll write a lot of code that simulates gestures (taps, swipes, shakes, rotations, etc.), and perform validation based what appears on the screen in response to varied input. Of course, knowing the ins and outs of how the code for the app is written helps a lot when writing iOS functional tests. You’ll be more able to know where the edge cases are, and be able to ensure there’s coverage for each nook and cranny.

iOS functional testing

I’m someone cloudy on how iOS functional testing might differ from “acceptance” testing or “integration” testing or “UI testing”, and a lot of the time I interchangeably use the terms. In more complex systems than iOS apps, there may be more nuances to where boundaries are drawn between these processes.

How to do Functional Testing on iOS

Unlike manual tests, iOS functional testing is performed via written tests that enable this outside-in approach in an automated and repeatable way. I’m currently using and loving KIF for my iOS functional testing. As a result, I’m going to make a couple other posts this week dedicated to writing great tests with KIF.

KIF isn’t without its limitations. There’s also a bunch of other tools available for iOS functional testing, including:

Down the road, I plan to cover each of these in-depth as well as KIF.

Can you do TDD with iOS Functional Testing?

Hell yes, you can do TDD with iOS Functional Testing. In fact, I believe in it, and advocate it, though there are caveats you should be aware of. Often, it will end up redundant with unit tests. And, if you are purely following the red, green, refactor cycle, you won’t often end up with compilation errors as a result of your iOS functional tests, and instead you’ll have to run your tests more frequently. And iOS functional testing is slow, so as a result, I end up usually spending my TDD cycles with unit testing, and then after the fact, perform my iOS functional testing with KIF.

Often, as bugs are found in the app, I might start with iOS functional testing in order to ensure that I have a functional test that actually leverages the broken code. That way, I have the confidence to know that the bug will never surface again.

Don’t Rely on iOS Functional Testing Alone

As much as I love iOS functional testing, I believe it should be used side by side with unit tests. There’s simply large pieces of code that will go untested if you only rely on iOS functional testing. Additionally, because these test are slow, the more you write, the more slow they get. And finally, depending on how many other “things” like persistence layers or backend services that your app uses, your iOS functional testing will rely on these to be “working” and reliable as well – a dependency that just isn’t there with unit tests, and thus they are more reliable. I liked this article on the Google Testing blog that goes into this in more detail.

Wrapping Up

iOS functional testing sit at the top of the testing pyramid. They are a powerful way to test your app in an end to end, blackbox fashion, simulating a user testing your app. Check back throughout the week for more detailed posts on my favorite functional testing tool, KIF.

Happy cleaning.

Storyboard Code Review Tutorial

It’s extremely important to keep your storyboards and xibs in tip top shape. Just like code, one of the easiest ways to do this is through storyboard code review. I heard the question posed on the iOhYes podcast, episode #108, “What’s involved with storyboard code review?” I’m proud of the team that I work on, and I think we’ve come up with a fairly mature process of storyboard code review. Here’s what we look for:

Most Important Thing – Small Commits

The first thing I look for, is the commit small enough such that it adds one concise piece of functionality to the app in an end to end fashion? Or does the commit add multiple things, or even partial implementations? This goes beyond just storyboards, so you can apply this to all aspects of code reviewing a commit. This fundamental building block for structuring your commits to be atomic, small, and concise will facilitate an easier code review. We strive for less than 500 changed lines of code per commit not including storyboard, project files, or added dependencies (yes, we check in our CocoaPods and you should too).

By keeping your commit small, reviewers of the code will not be overwhelmed with what they are looking at. Things will not slip through the cracks. And it will be all the more obvious as to “what’s changed in this commit?”

Happy Auto Layout

Assuming you are using Auto Layout (and if you’re not, you should be), another important thing to look for during storyboard code review is whether Auto Layout is correctly defined in the storyboard. Specifically, Auto Layout should know how to position every item in the storyboard. This is not pedantic, it’s correct. Remember, bugs come from incorrect Auto Layout. You don’t want bugs do you?

Auto Layout constraints should be:

  1. Comprehensive for each UIView – nothing ambiguous
  2. Correct relative to how the UIView is placed – nothing misplaced

There’s two ways to this. First, my preferred way:

Look for either misplaced="YES" or ambiguous="YES" in the storyboard XML itself. I prefer this way because when looking at a Github pull request, it’s easy to just Command-F on the page for those two terms.

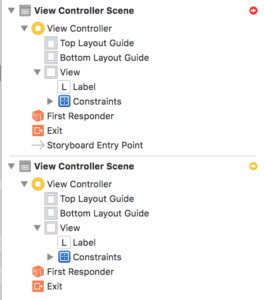
An alternate way, open the storyboard in Interface Builder and look through each scene for the red or yellow warning dot that something isn’t right with Auto Layout.

Screen Shot 2016-04-24 at 2.43.26 PM

Runtime Errors

Don’t forget that even if the storyboard itself looks okay, things can go wrong at runtime, especially if you are either programmatically tweaking constraints, or even must manually manipulating frames or views. If you’ve used Auto Layout long enough, you’ve definitely seen an error like this in the Console:

2012-07-26 01:58:18.621 Rolo[33597:11303] Unable to simultaneously satisfy constraints.
    Probably at least one of the constraints in the following list is one you don't want. Try this: (1) look at each constraint and try to figure out which you don't expect; (2) find the code that added the unwanted constraint or constraints and fix it. (Note: If you're seeing NSAutoresizingMaskLayoutConstraints that you don't understand, refer to the documentation for the UIView property translatesAutoresizingMaskIntoConstraints) 
(
    "<NSAutoresizingMaskLayoutConstraint:0x887d630 h=--& v=--& V:[UIButtonLabel:0x886ed80(19)]>",
    "<NSAutoresizingMaskLayoutConstraint:0x887d5f0 h=--& v=--& UIButtonLabel:0x886ed80.midY == + 37.5>",
    "<NSAutoresizingMaskLayoutConstraint:0x887b4b0 h=--& v=--& V:[UIButtonLabel:0x72bb9b0(19)]>",
    "<NSAutoresizingMaskLayoutConstraint:0x887b470 h=--& v=--& UIButtonLabel:0x72bb9b0.midY == - 0.5>",
    "<NSLayoutConstraint:0x72bf860 V:[UILabel:0x72bf7c0(17)]>",
    "<NSLayoutConstraint:0x72c2430 UILabel:0x72bfad0.top == UILabel:0x72bf7c0.top>",
    "<NSLayoutConstraint:0x72c2370 UILabel:0x72c0270.top == UILabel:0x72bfad0.top>",
    "<NSLayoutConstraint:0x72c22b0 V:[UILabel:0x72bf7c0]-(NSSpace(8))-[UIButton:0x886efe0]>",
    "<NSLayoutConstraint:0x72c15b0 V:[UILabel:0x72c0270]-(NSSpace(8))-[UIRoundedRectButton:0x72bbc10]>",
    "<NSLayoutConstraint:0x72c1570 UIRoundedRectButton:0x72bbc10.baseline == UIRoundedRectButton:0x7571170.baseline>",
    "<NSLayoutConstraint:0x72c21f0 UIRoundedRectButton:0x7571170.top == UIButton:0x886efe0.top>"
)

Will attempt to recover by breaking constraint 
<NSLayoutConstraint:0x72bf860 V:[UILabel:0x72bf7c0(17)]>

Break on objc_exception_throw to catch this in the debugger.
The methods in the UIConstraintBasedLayoutDebugging category on UIView listed in <UIKit/UIView.h> may also be helpful.

It’s nearly impossible to manually go through every view in an app with each storyboard code review, but that doesn’t mean you shouldn’t at least run the app and inspect any views that were added or changed with the commit. And the smaller the commit, the more focused this review can be. When going through this manual review of the app, keep an eye on the Console for that error message. It indicates something isn’t quite right with the Auto Layout, and probably needs to be addressed by the author.

Check For Valid IBActions

The last thing any of us want is our apps to crash. That’s even worse than a crappy user interface when it comes to losing a user’s faith in your app. Your app will crash if a UIControl is connected to an IBAction that no longer exists. You should look for this when doing storyboard code review. I’ve had this happen to me so many times, that having my peers look for this has saved my bacon more times than not. Specifically, this happens when:

  1. Connect an IBAction to a UIControl in Interface Builder
  2. Delete the IBAction method from the code.

Interface Builder does not disconnect the IBAction. If the end user triggers this action, the app will crash.

There are a couple ways to look for this: manually check every new or modified IBAction to ensure that the corresponding method exists, or manually test the app to verify than any new or modified control works. You can also do this verification through automated acceptance tests as well.

Open the Storyboard in Interface Builder

As part of storyboard code review, I recommend simply opening the storyboard in Interface Builder. This confirms two things:

  1. The file can be opened. Don’t dismiss this. I often have had manual merges of storyboards go wrong such that the resulting file couldn’t even be opened in Interface Builder. Code shouldn’t get merged like this.
  2. Interface Builder shouldn’t change the storyboard, just by opening it. Sometimes, I’ve observed that if the storyboard is using a custom font, and that font isn’t installed correctly on each machine, that Interface Builder will reposition all UILabels in the storyboard automatically when the file is opened. You can easily tell if this has happened because simply opening the storyboard will cause a local change in the file. This should not happen.

Look For Relevant Tests

This one is a little more subjective, and depends on your team’s agreed upon strategy for tests. On my team, we try to do our best to have redundantly high test coverage for our apps, at both the unit and acceptance test tiers of the testing pyramid. The acceptance tests are a little more loosely covered. During storyboard code review, I’ll check whether any of the changes made have corresponding tests written of the appropriate nature, and where possible make suggestions for better verification and coverage.

Wrap Up

Storyboards are code too. Just because you aren’t writing it by hand, doesn’t mean it shouldn’t be held to the same high standard as Swift or Objective-C code. A user’s opinion of the app can immediately drop if something in the user interface doesn’t look right. That starts in Interface Builder, hold yourself and your team to a higher standard. I’d love to hear how these suggestions for storyboard code review work for you.

Happy cleaning.

Your First iOS Unit Test

I recently had the question posed to me, “how do I get started with unit testing on iOS?” I have a suggestion for your first iOS unit test, look for a piece of code that performs an operation on a String. Write your first iOS unit test for that method. Strings and their related manipulations are easy to unit test. They don’t have deep integration with other frameworks like UIKit or CoreData, and the behavior is usually easily understandable just by reading the code, thus making it easy to reverse engineer what “should” happen, in order to translate it into a unit test. Let’s work through an example.

A “Unit” Defined

The first thing to understand about “unit testing” is what a “unit” even is.

Your First iOS Unit Test

No, not a storage “unit.”

It’s a vague term for sure. I’d describe it as, “the smallest piece of code that actually does something useful.” It’s kind of like art, you know it when you see it. I’ve written dedicated unit tests for single lines of code before. I’ve written unit tests for entire methods before. Bigger than that, and you start to take on too much scope for the test. You want the test to be straightforward. You want the test to be easily troubleshootable when it fails. And you want to minimize the reasons it could fail, to only a few reasons. This keeps your tests well factored, and easily maintainable.

My suggestion for your first test is to look for a standalone method, aka a “unit” that performs an operation on a string. Here’s an example for your first iOS unit test:

The Code To Test

I wanted to come up with a straight forward example to help you visualize a piece of code that is easily verified with a unit test. Consider the following struct that represents a person with a name:

struct Person {

  let firstName:String
  let lastName:String
  let suffix:String?

  init(firstName: String, lastName: String) {
    self.firstName = firstName
    self.lastName = lastName
    self.suffix = nil
  }

  init(firstName: String, lastName: String, suffix: String) {
    self.firstName = firstName
    self.lastName = lastName
    self.suffix = suffix
  }

  func formattedName() -> String {
    if let suffix = suffix {
      return "\(firstName) \(lastName), \(suffix)"
    } else {
      return "\(firstName) \(lastName)"
    }
  }
}

The struct sets up a Person as a thing that is represented by three Strings, a firstName, a lastName, and an optional suffix.

formattedName jumps out as a prime candidate for a unit test. A standalone method that does some isolated logic based on some inputs, and returns a a new value based on those inputs.

Add An XCTestCase Your Project

Now that you know what you want to test, in order to test it, you need to leverage the XCTest framework to test it. Xcode makes this easy.

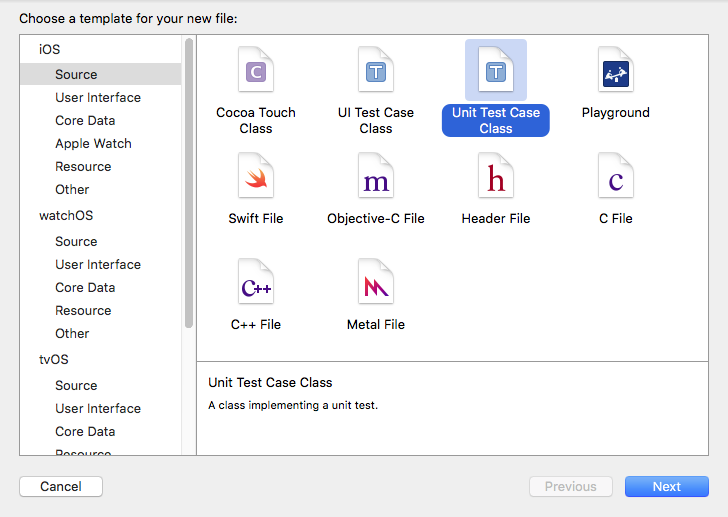
From your project, select File -> New -> File… and pick Unit Test Case Class.

Your First iOS Unit Test

Give it an appropriate name, usually ending in the convention of: Tests, so in my case, PersonTests.

That’s it, a new file will be created containing a class that is a subclass of XCTestCase. Add your tests here. Anything function whose name begins with “test” will be executed when you run unit tests.

Writing The Unit Tests

Reviewing formattedName() in Person there are two flows through the code, when the Person has a suffix and when they don’t. Two flows through the “unit” means two tests – keep your tests small. Test one thing at a time.

Consider this test to verify that a Person‘s formattedName() is correct when they don’t have a suffix:

func testFormattedName_ProperlyFormats_WhenNoSuffix() {
  let theCleanSwifter = Person(firstName: "Andy", lastName: "Obusek")
  let expectedFormattedName = "Andy Obusek"
  XCTAssertEqual(expectedFormattedName, theCleanSwifter.formattedName())
}

First, a Person is setup without a suffix, then the expected output is defined, and finally XCTest is used to verify that the output matches the expectation.

Here’s a test for the opposite condition, when a Person does have a suffix:

func testFormattedName_ProperlyFormats_WhenSuffixPresent() {
  let theCleanSwifter = Person(firstName: "Andy", lastName: "Obusek", suffix: "Jr.")
  let expectedFormattedName = "Andy Obusek, Jr."
  XCTAssertEqual(expectedFormattedName, theCleanSwifter.formattedName())
}

This test is very similar to the prior test. The only differences are that a suffix is provided for the Person and the expectedFormattedName is different.

Running The Tests

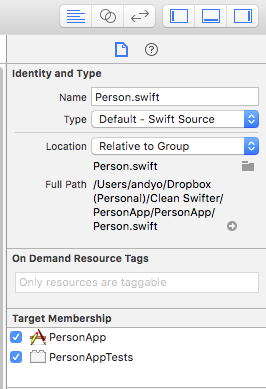
IMPORTANT: For your tests to compile, any files that you reference in the main target (eg. the code under test) need to be included in the test target. You specify this in the File Inspector:

Your First iOS Unit Test

To run the tests, use the keyboard shortcut Command-U (or if you want to be slow, select the menu item Product -> Test. The iOS Simulator will launch, the tests will run, and you’ll see the results in the Console. They look like this:

22:11:52.771 PersonApp[12486:9452629] _XCT_testBundleReadyWithProtocolVersion:minimumVersion: reply received
22:11:52.777 PersonApp[12486:9452629] _IDE_startExecutingTestPlanWithProtocolVersion:16
Test Suite 'Selected tests' started at 2016-04-19 22:11:52.785
Test Suite 'PersonTests' started at 2016-04-19 22:11:52.787
Test Case '-[PersonAppTests.PersonTests testFormattedName_ProperlyFormats_WhenNoSuffix]' started.
Test Case '-[PersonAppTests.PersonTests testFormattedName_ProperlyFormats_WhenNoSuffix]' passed (0.021 seconds).
Test Case '-[PersonAppTests.PersonTests testFormattedName_ProperlyFormats_WhenSuffixPresent]' started.
Test Case '-[PersonAppTests.PersonTests testFormattedName_ProperlyFormats_WhenSuffixPresent]' passed (0.000 seconds).


Test session log:
    /Users/andyo/Dropbox (Personal)/Clean Swifter/PersonApp/DerivedData/PersonApp/Logs/Test/78B021DC-E467-4F0E-8D95-EE44156AB2DE/Session-2016-04-19_22:11:43-ZVrKpY.log

Test Suite 'PersonTests' passed at 2016-04-19 22:11:52.810.
     Executed 2 tests, with 0 failures (0 unexpected) in 0.021 (0.023) seconds
Test Suite 'Selected tests' passed at 2016-04-19 22:11:52.811.
     Executed 2 tests, with 0 failures (0 unexpected) in 0.021 (0.025) seconds

Congratulations, You Did It!

BOOM! That’s it, you just wrote your first iOS unit test! Well, two of them. How does it feel? Trivial? Powerful? I can relate to both of those feelings. Starting out, you might be thinking, “That’s so simple, how does it even provide value?” Well, ya, if you write the test and never execute it again, chances are you’ll never get any value out of it. The power of tests comes with repeated execution of those tests. Anytime you make a change to your project, run the tests! (and add new tests too!) I guarantee you that at some point, your tests will eventually catch a bug that you didn’t otherwise notice. Then you’ll be sold on automated testing. You’ll never get there if you don’t start somewhere.

Thanks for reading, happy cleaning.

PS – Continuous integration tools like Xcode Server or Jenkins further magnify the power of your first iOS unit test by enabling automatic execution of builds and tests in response to events like source code repository commits. I’ll tackle this topic in a future post.

TDD in Xcode – Critical Keyboard Shortcuts

Iterations though the test driven development workflow must happen fast. In fact, fast is better than perfect. TDD in Xcode isn’t painful. In fact, there are a couple tips and tricks I’ve adopted when going through my red-green-refactor workflow in Xcode that makes it easy. I wanted to share them with you.

Assistant Editor FTW

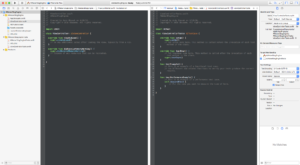
When entering the TDD zone, the first thing you want to do is get both the “production” file and the corresponding test file open. Use the Assistant Editor for this. The bigger the monitor the better. Open both of these files at the same time, in windows next to each other.

It should look like this:

TDD in Xcode

I don’t really have a concrete preference as to which file, the test or the production class, should go on the left or the right. Just remember that if you set breakpoints, the debugger will bring the file with the breakpoint to focus in the lefthand pane.

It’s kind of cumbersome to click around in Xcode to get the Assistant Editor to do what you want, and in fact I’m not even sure that I know how! I’ve become so accustomed to using keyboard shortcuts to bend Xcode to my will!!! Here’s a shortcut that I couldn’t live without, it will open any file of your choosing in the Assistant Editor, side by side with whatever file is currently open.

  1. Command-Shift-o
  2. Option-Shift-Enter
  3. Right Arrow, Enter

Okay, so it’s really a sequence of commands. Stop complaining, it’s not that hard to learn, and TRUST ME, once you commit these to finger memory, you’ll find use for them beyond just your TDD flow.

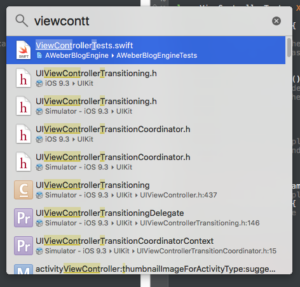
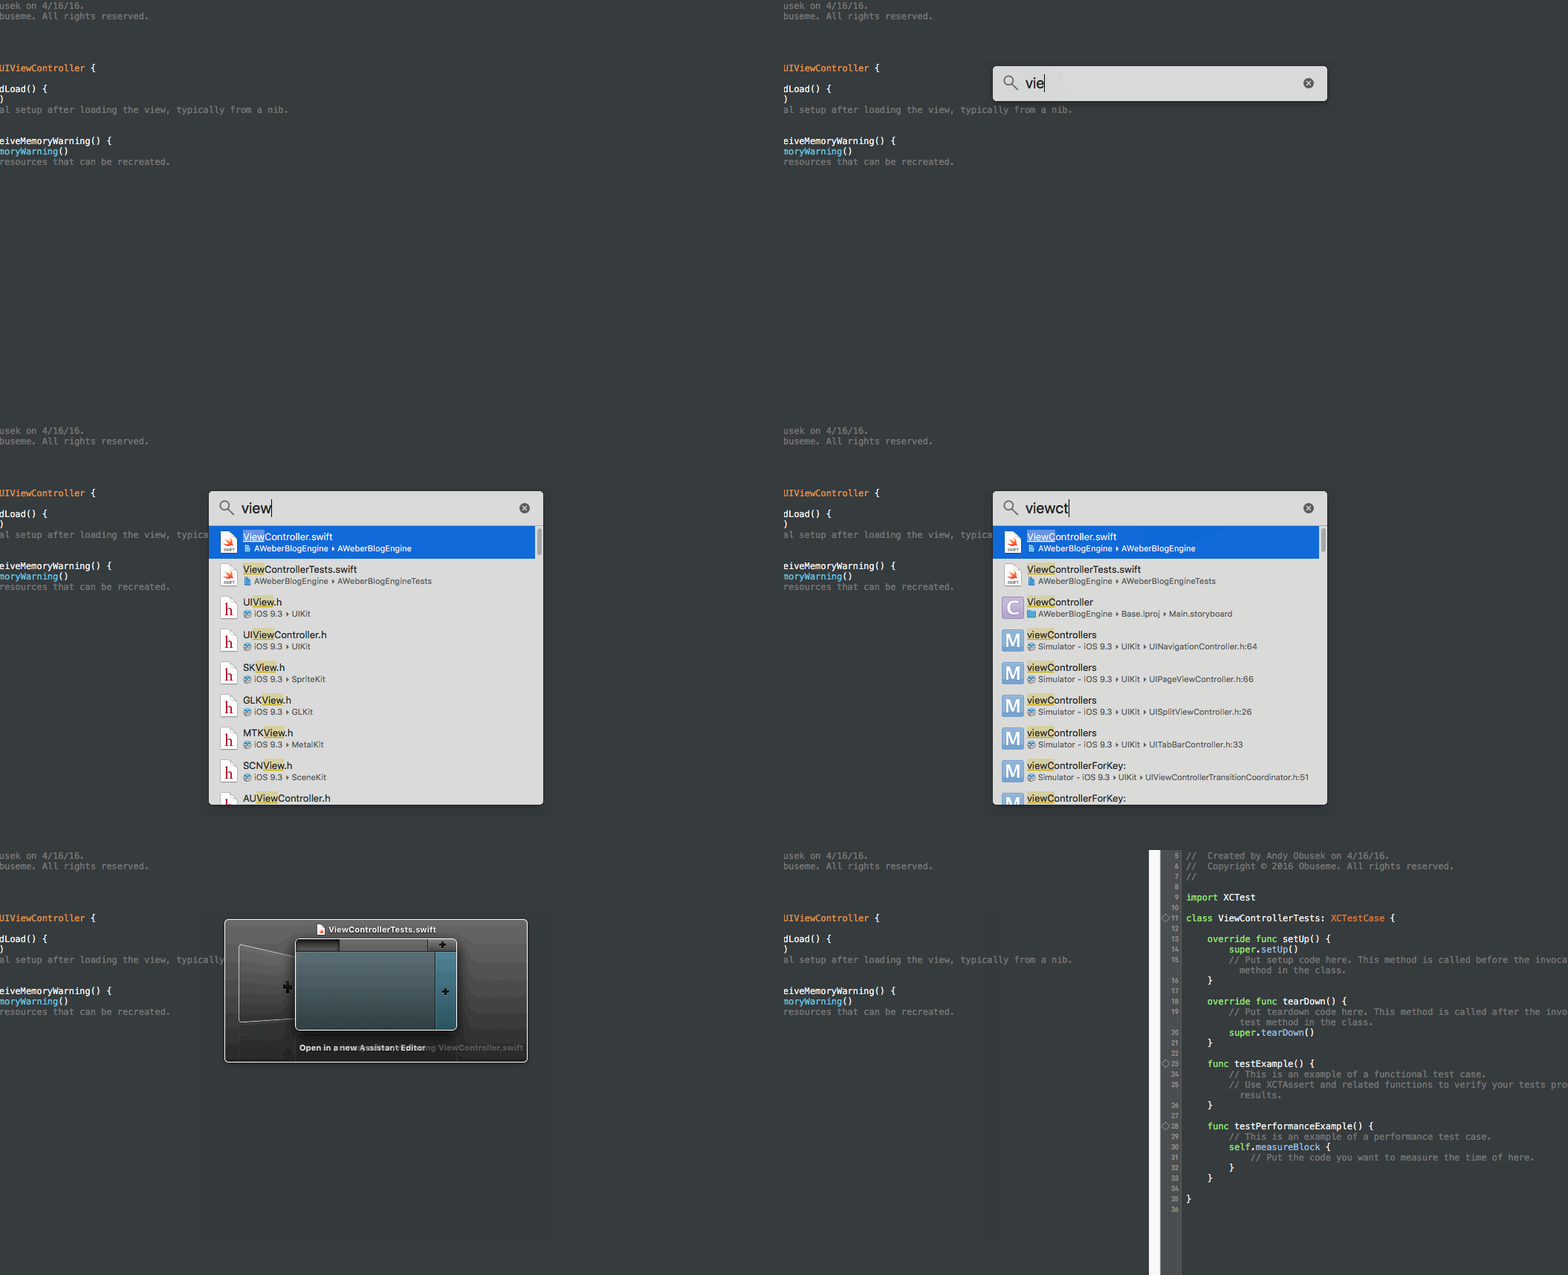
The first command brings up the “Open Quickly” dialog where you can then type a filename (or a method or variable) to open. It looks like this:

TDD in Xcode

The second command selects the file to open, while at the same time allowing you to specify where it should be opened in Xcode. It looks like this:

TDD in Xcode

The third command is just the key combination to specify that the file should be opened side by side with the current window.

Here’s a clip showing the whole sequence together:

TDD in Xcode

Running Tests

There are two specific other keyboard shortcuts that are absolutely essential to when I’m working with TDD in Xcode:

  1. Command-Option-Control-U
  2. Command-Option-Control-G

There’s not even a succinct name for the first command, and maybe that speaks to it’s absolutely magical nature. First off, the command only works when the cursor is within focus of a test class. When you execute that command from a test case, it will run whatever tests that are in the same scope as the cursor. For example:

If the cursor is within a single test method, only that test method will be run. If the cursor is within a single test class, all tests in that class will be run, but only that class.

Speed it the key to successful TDD in Xcode. The less tests you execute at once, the faster execution will be (and the more you sacrifice in what’s actually validated). I absolutely love this keyboard shortcut, it totally enables me to make small changes to the test and the class under test throughout my TDD workflow, and quickly run the associated tests.

The second keyboard shortcut is a nice complement. It reruns the last test that was run. So if you cursor is bouncing around and it’s not focused in the appropriate context (like the cursor is within the class under test) to execute the first command, this is a nice alternative to rerun whatever the last test run was.

Command-U

Don’t forget to periodically run the entire test suite. This shortcut runs all tests associated with the Test configuration in the current Scheme. In the early stages of projects, this may be fast enough for you, and you may not even need to use the more specific test running shortcuts. Enough TDD though, and you’ll get to a point where executing all tests becomes frustratingly slow for getting that immediate feedback you need for successful TDD.

The Mouse, Available But Slow

TDD in Xcode

You can always use the mouse for executing tests as well, but don’t. I just want to point it out for thoroughness sake, as well as make the point that any point you need to take your fingers off your keyboard, you are slowing down. Resist the urge to move your hands over to the mouse. Learn the keyboard shortcuts! It will pay so many dividends in your quest towards TDD in Xcode enlightenment.

Anything Else?

What do you use in your TDD workflow that enables successful, high quality code?

Happy cleaning.

TDD in Xcode – Can’t Refactor Swift Code

Red. Green. Refactor. That’s how I’ve memorized the steps for test driven development. Uncle Bob breaks them into a little more detail if you’re interested in something a little more long form. TDD in Xcode is pretty seamless, until you get to the refactor step. Xcode can’t automatically can’t refactor Swift code.

Refactoring Is Broken For Swift Code

Xcode does not currently support any refactoring of Swift code. If you attempt to use Xcode’s builtin refactoring tools, you see this:

Can't Refactor Swift Code

. From my earliest days of writing Swift, this has gotten under my skin. This is friction to my flow. I want my IDE to make it feel like I’m coasting downhill, rather than going up an incline.

Can't Refactor Swift Code

Additionally, I also take this as a sign at Swift’s maturity. I’ve since come to see the light, and no longer question Swift’s long term viability, but either way an error message like this should be embarrassing for Apple. And then the fact that it hasn’t changed in almost 2 years…

For more context, if you right click in Swift code to bring up the context menu, any of the options in the Refactor menu show that error message.

Can't Refactor Swift Code

Consider An Alternative – AppCode

This weekend I downloaded App Code by JetBrains. I’ve never tried it. Recently it specifically caught my eye that two people I respect, Orta Therox and Jon Reid, evangelize it and use it. JetBrain’s IDEs are renown for the abilities to support test driven development and refactoring. I’m looking forward to giving it a go. I’m in the 30-day trial right now, and I’m committed to learning all it has to offer to make my own impression. So far, I’ve been able to open a non-trivial project and run it in the iOS simulator, no issues. Next, I’m going to do some research about how to best use it, what it offers, and immerse myself in it. I’ll report back here along the way with my findings. I’m just hoping that while Xcode can’t refactor Swift code, I have better luck with AppCode.

Happy cleaning.

Write Small Mocks

In my final piece of commentary regarding Veronica Ray’s talk on “Real World Mocking in Swift” I wanted to chime in with agreement on her claim that you should write small mocks. Create mocks that “should be relatively short and don’t contain tons of info that you don’t need.”

Why You Should Write Small Mocks

Writing mocks, or any kind of test double, can become tedious. There’s certainly been times when writing my unit tests and manual mocks in Swift that I’ve started to feel dragged down by how much required code I had to write just to repeatedly create the mocks, for test after test… Of course you can factor your code nicely to reduce redundant code, but you’ll find that the need for subtle differences in your mocks can lead to a lot of code!

Or just copy and paste mocks from test to test, it’s only tests right, JUST KIDDING!

write small mocks

Another reason why you should keep your mocks as lean as possible, is that they often mirror your production code. One of the main benefits of high test coverage is that it enables confident refactoring. If you are writing extensive and complicated mocks that do a ton of things, chances are, you are tightly coupling your mocks with your production code in a way that inhibits quick refactoring.

A Real World Example – Mocking UIViewControllerTransitionCoordinator

I was working on some code where I needed to override willTransitionToTraitCollection in a UIViewController. I was basically adding a single line of code in the method to reposition a view’s frame when Auto Layout had finished its calculations after a trait collection transition. Simple enough. Here’s the code

override func willTransitionToTraitCollection(newCollection: UITraitCollection, withTransitionCoordinator coordinator: UIViewControllerTransitionCoordinator) {

  coordinator.animateAlongsideTransition(nil) { (context) in     
    self.playerLayer!.frame = CGRect(x: self.videoView.bounds.origin.x, y: self.videoView.bounds.origin.y, width: self.videoView.bounds.size.width, height: self.videoView.bounds.size.height) 
  }

}

I wanted to write a unit test to ensure that coordinator was told to animateAlongsideTransition. The only way I could think of to do this was to mock out coordinator which is a UIViewControllerTransitionCoordinator and set an expectation that animateAlongsideTransition would be called.

I set out to create a mock UIViewControllerTransitionCoordinator. It’s protocol with three methods. One of those three will be the “expected” method, and the other two will be no-ops. That’s well within my loose guidelines of a “small mock.” I started out with this:

class MockUIViewControllerTransitionCoordinator: UIViewControllerTransitionCoordinator {

  var animatedCalled = false

  @objc func animateAlongsideTransition(animation: ((UIViewControllerTransitionCoordinatorContext) -> Void)?, completion: ((UIViewControllerTransitionCoordinatorContext) -> Void)?) -> Bool {

    animatedCalled = true
  }

  @objc func animateAlongsideTransitionInView(view: UIView?, animation: ((UIViewControllerTransitionCoordinatorContext) -> Void)?, completion: ((UIViewControllerTransitionCoordinatorContext) -> Void)?) -> Bool {

    // NO OP - don't need this method, but I need to return something
    return false
  }

  @objc func notifyWhenInteractionEndsUsingBlock(handler: (UIViewControllerTransitionCoordinatorContext) -> Void) {
    // NO OP - don't need this method
  }
}

I thought this would compile, until I learned that UIViewControllerTransitionCoordinator extends UIViewControllerTransitionCoordinatorContext which conforms to NSObjectProtocol… Uh oh. NSObjectProtocol requires 14 methods to be implemented, 14 methods!!! I would have to create implementations of 14 methods just to get my mock to work, and that’s on top of the 3 methods I already had to override for the basic UIViewControllerTransitionCoordinator behavior.

I don’t really have any hard and fast rules as to how many empty methods are too many when mocking something out, but creating at least 16 empty methods just for a mock seems overkill to me, just to verify a single line of code.

In the end, I decided against mocking out UIViewControllerTransitionCoordinator and decided against writing the test. Ya, I’m not going to hit 100% coverage with this project. I’m also not going to have this really wacky, mostly empty mock sitting in my test. It’s a tradeoff I need to live with.

Happy cleaning!

Computed Property Stubs: Easy to Create in Swift

Using mock objects is an easy way to increase your test coverage in any code base, especially with a technique I use that I coined, “computed property stubs”. For years, in the Objective-C that powered my iOS applications, I used the hell out of OCMock. I even wrote a couple articles on it. As much as I used OCMock, I definitely had a love hate relationship with it. In one way, it totally enables a test driven development workflow in a UIKit driven codebase. On the other hand, sometimes you end up writing super nitpicky tests that end up verifying each line of code, rather than overall behavior in an application. At the end of the day though, I think I do sleep better knowing that I had the test coverage (it’s kind of like eating your vegetables).

It was disappointing to learn that OCMock would not work with Swift, nor is it even possible to create a mock framework in the nature of OCMock in Swift. Read this article for more information about why OCMock won’t work with Swift. Fortunately, there’s a couple different ways that you can actually write your own mock objects in Swift. Notice, I’m proposing that you can write your own mock objects, on a case by case basis, NOT write an entire dynamic mocking framework like OCMock.

There’s two primary uses for a mock object:

  1. Stubbing a value – creating a “fake” object that behaves in a specific and predictable way that enables testing of other code.
  2. Verifying that an expected method is called with the correct parameters.

Eli Perkins wrote a great article where he covered some techniques on how to use protocols in Swift to do the later – verify that an expected method is called with the correct parameters.

In this article, I’ll show you how to do #1, create computed property stubs to return values using Swift.

Why Stub?

You might first be wondering, why stub anything in the first place? Well, let me show you through example. Consider the following super simple UIViewController:

class ViewController: UIViewController {
  @IBOutlet weak var aLabel: UILabel!
  @IBOutlet weak var aTextField: UITextField!

  @IBAction func changeLabelFromTextField(sender: AnyObject) {
    aLabel.text = "Hi " + aTextField.text!
  }
}

How would you write a unit test for changeLabelFromTextField? In my mind, I’d write a test that initializes a value in aTextField, then calls changeLabelFromTextField and then verifies that the resulting text in aLabel is correct. On the surface, that’s a great test that achieves 100% coverage on this piece of code.

Something like this:

func testChangeLabelFromTextField_ActuallySetsLabel() {
  let toTest = ViewController()
  toTest.aTextField = UITextField()
  toTest.aLabel = UILabel()

  toTest.aTextField.text = "Andy"
  toTest.aLabel.text = ""

  toTest.changeLabelFromTextField(UIButton())

  XCTAssertEqual("Hi Andy", toTest.aLabel)
}

There’s one problem, those pesky weak properties in ViewController.

Since ViewController only has weak ownership of those IBOutlets, that means you are going to have a problem when you try to set an actual instance of an object on the property – it will immediately be “released” and the property will go back to being nil.

If you don’t believe me, here’s a Playground for proof:

computed property stubs

OCMock made this easy

Back in the good ole days of using OCMock, it would have been easy to create a mock and stub those properties out.

ViewController *toTest = [[ViewController alloc] init];
id mockVC = [OCMockObject partialMockForObject:toTest];
[[[mockVC stub] andReturn:[[UILabel alloc] init]] aLabel];

Computed Property Stubs Are Also Easy

In order to stub these properties out in Swift, it isn’t that hard either. You just have to manually create your mock and specify what is to be stubbed, in a technique I call, “computed property stubs”, like this:

class MockViewController: ViewController {
  let stubbedLabel: UILabel! = UILabel()
  let stubbedTextField: UITextField! = UITextField()

  override var aLabel: UILabel! {
    get {
      return stubbedLabel
    }
    set {
      // Nothing to do here
    }
  }

  override var aTextField: UITextField! {
    get {
      return stubbedTextField
    }
    set {
      // Nothing to do here
    }
  }
}

Basically, you just create a subclass of the class that you want to mock, and then override the weak properties with a custom getter that allows you to return an actual hard instance of an object. It’s even okay to create one of these mocks for an object under test, just don’t get your wires crossed and accidentally mock or stub behavior that you actually want to verify (test driven development, and fail first FTW here).

Now, make sure that in the test, you instantiate the mock and use that, rather than the base class.

Again, for proof, here’s a playground where you can see that by using the mock, you can actually get the object-under-test’s weak properties to behave:

computed property stubs

Not the only way to test this

One could argue that testing behavior and values of UIKit driven properties like labels and text fields is something better left to black box based testing tools like Xcode UI Tests or KIF. I would agree with you. And I would add on that redundant coverage is even better! Which is why I usually end up writing both my unit tests to verify this behavior, and then complement that with a more UI oriented test to verify it from an end user perspective. Plus, there’s plenty of other times where you might be using weak properties that aren’t part of a user interface.

You can find the Swift playground that I referenced in this article in my GitHub at: https://github.com/obuseme/PlaygroundWithSwiftMocks

Thank You

A big thanks to Jon Reid for inspiring me to come up with this approach. I credit his talk on Test Driven Development for iOS at MCE 2014 for giving me the push to try mocking on my own without a framework.

Happy Cleaning!